-
Nine Awesome Moving Tips
As you may remember, we recently moved to a new home and we are so happy to finally be done with all of the boxes and extra clutter that comes along with that. Moving can be such a time consuming (and sometimes frustrating) process. When we found out the date for our upcoming move, we started the process of decluttering and packing. Everyone does that, right? But, I wanted to share with you some not so obvious moving tips to help make the transition a little smoother. Some of these we used and some we will be keeping in mind for next time.

1. Make a floor plan.
This may sound silly, but by creating a floor plan of your new place, it will be much easier to direct movers or friends/family who are helping you. Not everyone will know what rooms you are using for what purposes. You don’t want the family room boxes and furniture in the living room and little Billy’s bedroom mixed up with Susie’s because that would be a huge pain in the booty. Draw it by hand, whip one up in your favorite graphics program or use floorplanner.com.
2. Label and color code boxes.
Most likely, when you are getting ready to move, you are writing something on the outsides of the boxes to help you out. If you aren’t, you are doing yourself a disservice. Each box should be labeled with the room that it will be going to, as well as what items are inside. Each room can also be assigned a color (kitchen = yellow, master bedroom = blue) and all of the boxes for that room would be marked with the coordinating color tape or paint.3. Bag clothes.
This one saved us a lot of time. Instead of boxing up our clothes, we grabbed some clean trash bags and placed them over the tops of the clothes right over top the hangers.
4. It’s what’s inside that counts.
Really think about what is going to go in each box and try to keep like items together. A large box wouldn’t really be a great choice for heavy items such as books, because it would be harder to move around. And you definitely don’t want to stuff your toothbrushes in with the toilet brush.5. Pack a necessities bag.
Chances are that when you get to your new place, you won’t get everything unpacked in one day. It is important to have the things you will need, like a change of clothes, toiletries and a towel for showering. Don’t kid yourself. You know you are going to be pretty ripe smelling after working so hard.
6. Use available space.
I refuse to pack the contents of our dresser drawers into boxes, just to put them right back in once we get to our destination. Let your drawers be the boxes and save yourself time and money. Also, don’t forget to fill up other empty spaces, such as a slow cooker (load your spices into it) and trash can (cleaned and sanitized so it is ready to go at the new place.)
8. Stop utilities and change address with USPS, banks, insurance, credit cards, etc.
This one is probably pretty obvious, but at the last minute when you are running around trying to get everything finished up, it is something that is easy to over look.9. Send moving announcements.
After everything is said and done, don’t forget to let your family and friends know your new address too. We have yet to do this. Oops. I’m horrible at mailing things, like my Christmas thank you cards. Don’t judge me. The first step is admitting you have a problem, right?I hope that these tips help you when you get ready to make your next move. We would love to hear any ideas you may have for making the house to house change easier too!
-
Clip It. Clip It Good.
Papers! So many papers! Where do they come from? I can never keep them all organized! If you are anything like me, then you have mail, coupons and school papers consuming your kitchen counter, table and desk space.
I would go through them, sort them into neat little piles, but the minute my kids woke up or we were expecting guests I would chuck those puppies into a enormous basket to sift through at a later date. This method has been a giant waste of time!
In the past, I attempted various systems of organization. These techniques seemed to work for a short period of time, but in the end we are creatures of habit and the basket chucking would commence. This time, I had to come up with a plan that worked with my nature. So, I created chalkboard clothes pins to clip to my tidy stacks and keep them together before being tossed in a bin.
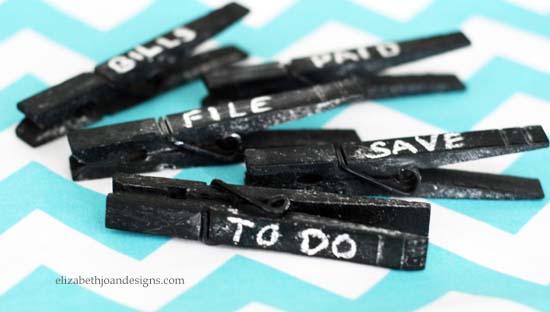
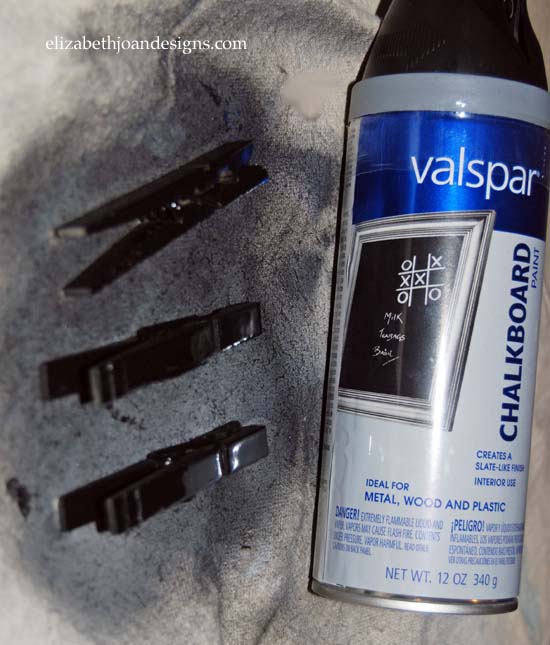
Such a simple solution only required a few wooden clothes pins, chalkboard spray paint, a drop cloths, chalk and a teensy bit of time.
I arranged the clothes pins on my drop cloth and began to spray paint. Each pin was given two coats of paint and the drying time seem to take forever!
Once dry, I primed each clothes pin with chalk to prepare it for labeling.
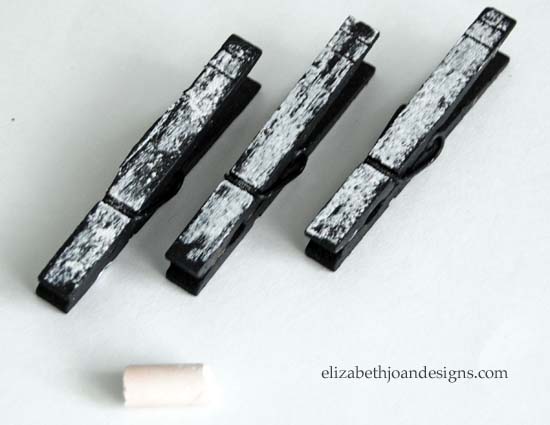
Whoohoo! I was finished. Ready to organize all or our junk!
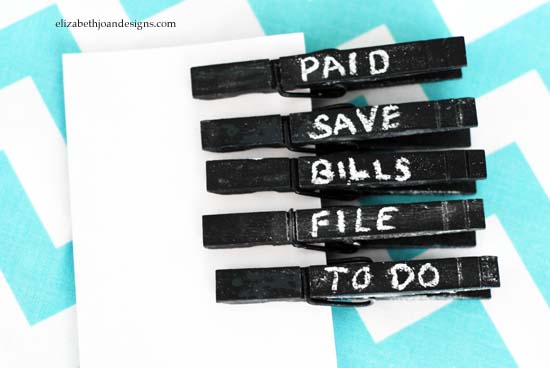
How do you keep all of your papers from devouring your kitchen, office, or entryway?
-
The Tale Of A Vanity
A few months ago, I inherited an old vanity from our grandma’s house. It had such beautiful details, although it was pretty beat up, and we were looking forward to restoring it and putting it in our daughter’s bedroom. Well, that plan changed when we moved and realized that there were already way too many furniture pieces for her room. (In addition to the stuff she already had, she also received my mom’s old dresser and a chair.)


So, the poor vanity was stuffed away in a corner. That is, until we started painting around here. Which meant that it was temporarily moved up to our bedroom with the hopes that I would actually be able to use it, myself, for makeup and hair and what not. (Nobody puts Vanity in the corner.) But after a few moments in front of it, admiring my awesomeness, I realized that I wouldn’t really be able to see very well through the aged parts (the stripes in the photo above) to do much makeup.
After pondering for a few days, I decided that it would be great to use it as a desk/nightstand and replace my current, tiny Ikea nightstand. Unfortunately, we don’t have a spare closet to create an office in, so this was the next best bet to give me a place to work.
Since we planned on refinishing it anyway, I started working my magic on this awesome piece. I decided to use it without the top part attached, for the time being, until we can replace the mirror. After some sanding and a few coats of Behr’s Paint/Primer in the color Polar Bear, it was looking pretty spiffy. I removed each of the handles and the escutcheon (that’s the little key hole thingy) and glazed them with Rustoleum Universal Oil Rubbed Bronze. Then I assembled the pieces back on and voila!

Lookin’ good!

I love the way it turned out and I’m especially in love with both of the paints I used. Don’t be surprised if you see Oil Rubbed Bronze on everything in this house.

Oh, yeah. I also added some wrapping paper to the inside of the drawer as a lining.

So, what do you think? I still need to figure out some sort of seating that’s a little more comfortable for long periods of time (thinking of the Henriksdal from Ikea with this cover.) Also, there will be some organizational items brought in to help keep supplies corralled, but that will be another post. Check back soon!

-
Closet To Office: Part 2
We have been turning our closet into an office. You can catch up here.
Finding room for everything has been a challenge. This closet is so teeny and with all of our office supplies in it, it was an insane mess. I really needed to find a way to utilize my space better.
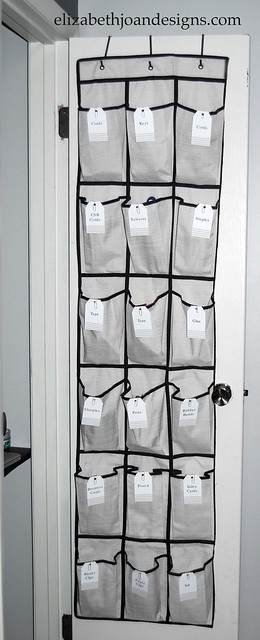
My brilliant idea: an over the door shoe organizer. There are so many pockets to stash an array of office necessities. I picked up one of these bad boys at Target.
There was one itty bitty problem with it, though. The pocket organizer was too wide to fit against our miniature door.

In fact, when I would close the door, I couldn’t actually close the closet door. This was completely unacceptable!

First thing I did was round up my cutting mat, rotary cutter, and straight edge ruler.
Next, I turned that twenty four pocket organizer into an eighteen pocket organizer by cutting off one column of pockets.
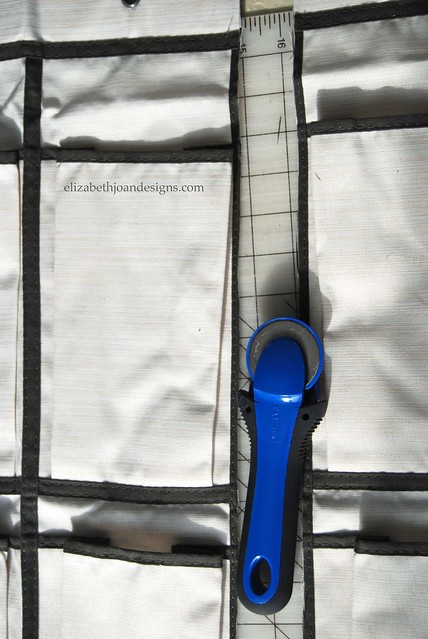
Ah, that was a much better fit! But there was still one little problem. When I would close the door, the organizer would bounce around. To remedy this situation, I needed to secure it to the door.


After that, I printed out label tags and secured them with paper clips to help locate my supplies with minimal effort.

I love the cute chevron pattern on these tags!

Doesn’t it look great?

This has been such a simple way to maximize our space!
Check back soon for more of our closet to office makeover!