-
Keep It Clean: Weekly Cleaning List
I’ve heard that it is now officially Spring, but here in the Midwest, we are still dealing with freezing temperatures and snow. What the what? You heard that right. I am so ready for some warmer weather that will let us play outside, go for bike rides and enjoy the fresh air without out our lungs freezing in the process.
Did you know that spring cleaning can help you deal with cabin fever?
It’s true. I read it on the Internet. Anyway, I figured that since Emily whipped up a great Spring Cleaning Checklist, that it was only appropriate to share a general daily/weekly cleaning list to go with it and help you keep your home spick and span all year long. Check off items as you complete them and fill in other tasks to customize the list to your own personal needs. In addition, our annual calendar will help you keep the rest of your life organized.
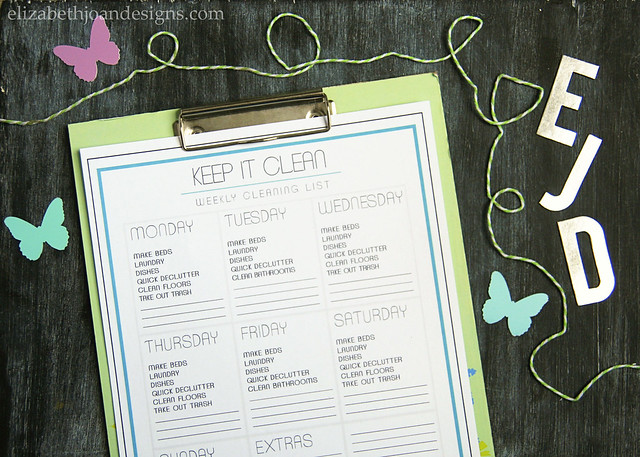
Download this printable from THE GALLERY.
-
Eye Shadow Easter Eggs
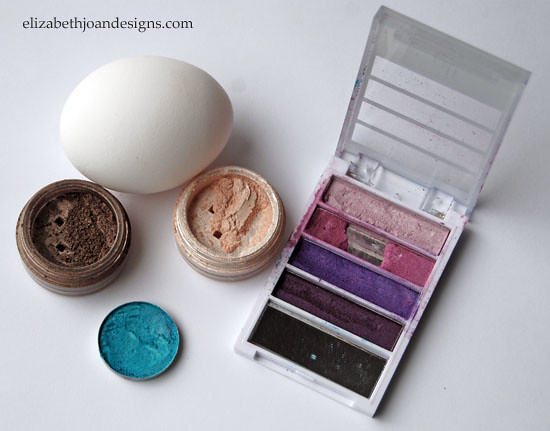
I have been racking my brain for over a week trying to come up with a fun, different way to color Easter eggs. Somewhere around using wet noodles and a mesh onion bag, I came up with the idea of smearing eyeshadow on the eggs. By the way, wrapping the eggs in wet noodles made an interesting design, but this approach was a giant pain in the tush. Alright, now back to the makeup.

This process is pretty straight forward and a bit messy.
First, I raided my makeup bag for different shades of eye lid coloring. I wanted to make sure I had a few brighter colors to keep my eggs looking Easter-y.
I learned that if I slightly dampen my finger on a wet paper towel then spread the eyeshadow onto the egg, I achieved a bolder, more even look. And when I used a brush or an applicator, I got a dusty uneven outcome that I also really liked.
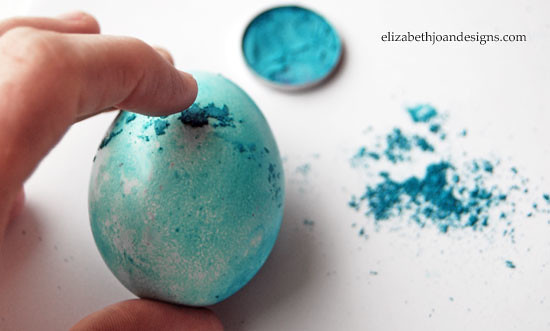
This process was all about experimenting to see what looked good.

I love how these turned out. They are so pretty and shiny! I would recommend that these eggs be more for decoration and less for eating and hunting.

Now it’s your turn to try. And remember, the cosmetic aisle at the store is your only limit!
-
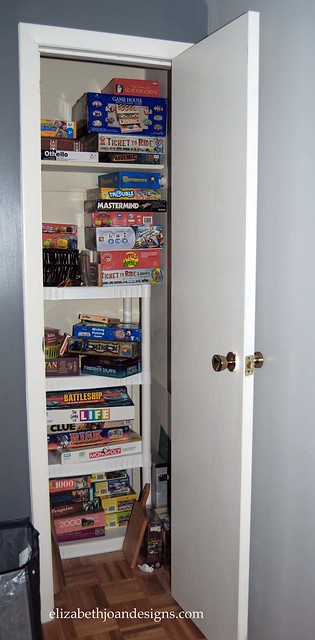
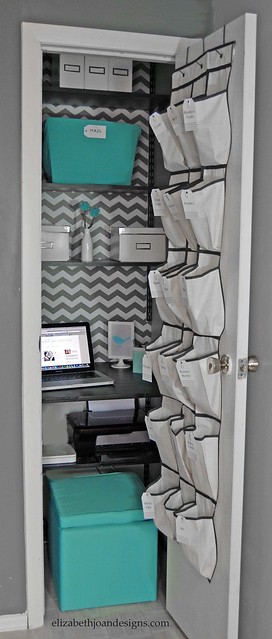
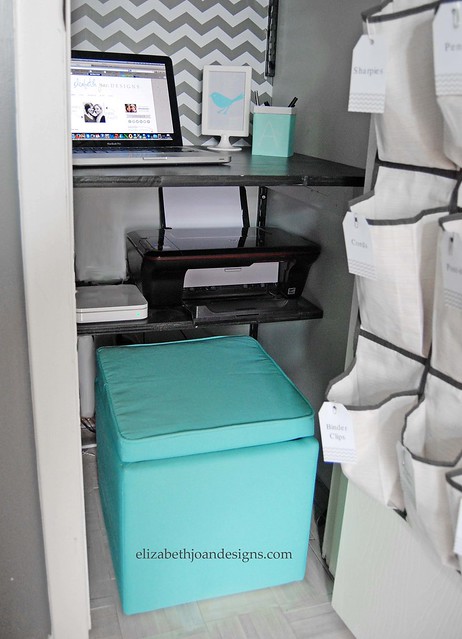
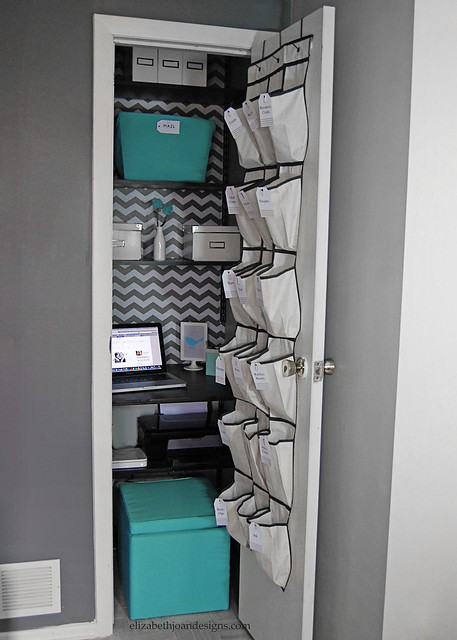
Closet to Office: Part 3 The Reveal
The time has come to show off the final look of my Closet/ Office! Our once boring, old, game closet has been transformed into a beautiful functioning office space. If you would like to catch up on what has happened up to this point, take a peek here and here.
This post contains affiliate links for your convenience. The final process has involved some bruises, sweat, and tears, but it was all worth it.
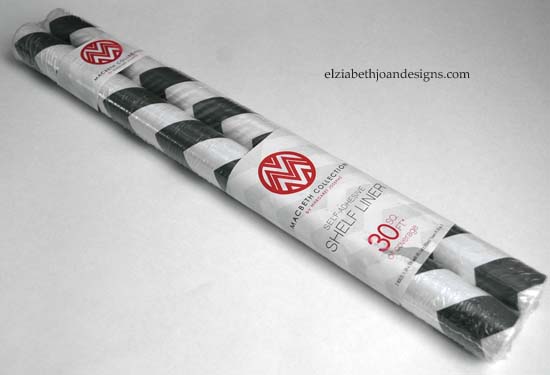
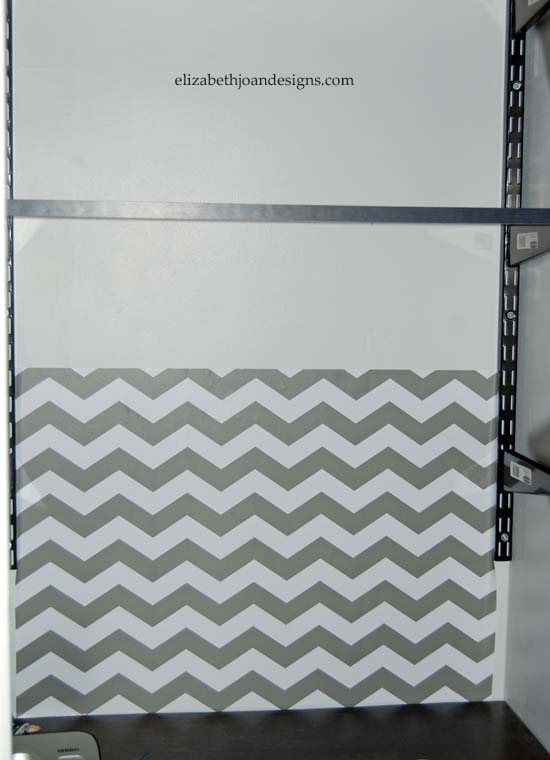
To make this tiny space a little more interesting, I decided to apply some fun chevron contact paper
to the wall behind the shelves.
This sounded easy enough, but proved to be the hardest part. Because the space I was working in was so small, I couldn’t fit my step stool all the way though the doorway. So to reach the highest points with the paper, I had to really lean against the step stool safety bar. This is where the bruising came in. Right across my shins. Ouch!
At that point, I decided to ask for help from my super tall husband.(He is not freakishly tall, just 6’2″. He helped for quite awhile and was a trooper about it. In the end, he just showed me I wasn’t crazy for thinking this was difficult.
After he surrendered, I was feeling a bit refreshed from the brake I just had. I persevered and finally finished it up, and replaced the shelves back in the closet. The happy tears started to flow uncontrollably from my oh-so-tired eyes. Yay! Mission completed!
In this closet/office there are a couple details I am excited to share with you.
I chose this storage ottoman for the desk because it was modest, functional, and could squeeze into the itty bitty spot under the shelves. This gem was found on clearance at Target for $8.00.

My husband pulled out our handy dandy drill to create a perfect hole to put cords through.
This has made the desk area a very nice charging station.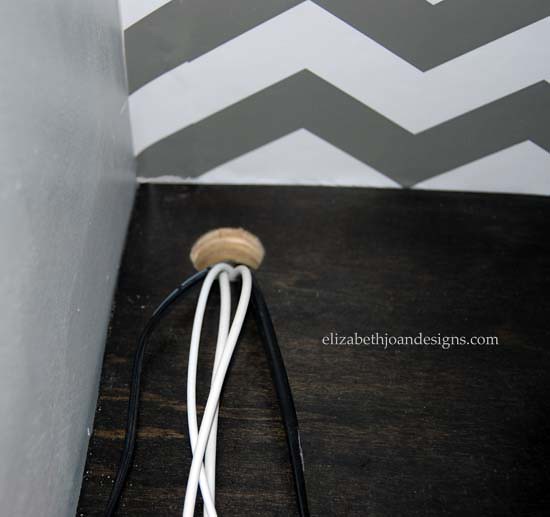
Underneath the desk, I placed a smaller shelf that houses our printer. It has been so convenient to have everything together in a closet, out of the boys’ reach.
The cost of this project was pretty minimal. I reused so may things we already had.The contact paper, the over the door organizer and cube seat, were pretty much the only things I purchased, bringing the grand total to around $35. Woohoo!

So, what do you think? I love it, other than the contact paper issues, it was pretty easy to do.
Has anyone else updated a closet recently?
____________________________________________________________________________ If you like this post, you may also like:
Half Bathroom Remodel
-
We Dig It March 2014
Each month we will be sharing some of our favorite finds from around the web. Enjoy!
1. We are loving these Whimsical Paper Feathers from Posed Perfection.
2. This amazing Spring Dining Room, by Vintage Finds, is making us long for warmer weather.

3. The Handmade Home created some awesome Toy Storage Cubbies, complete with instructions on how to DIY them.

4. If you love chevron, like us, you will adore this Simple & Streamlined Mantle/Fireplace from Hugs & Punches.

5. This West Elm Inspired Tripod Floor Lamp, by TinySidekick, is the most excellent knock off we’ve seen in awhile.

6. Freckles Chick has created an incredible Playroom for her daughter, which is super fun and functional.

