-
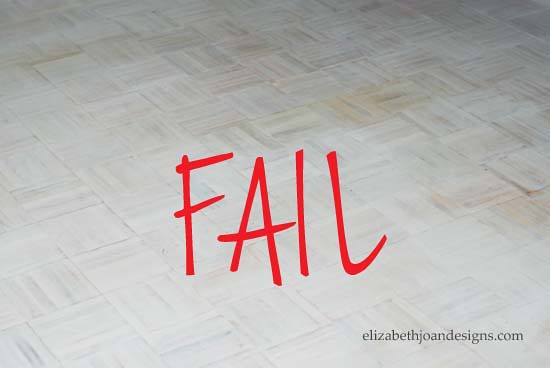
Project Fail: Whitewash Parquet Floor
Whitewashed parquet floors; sounds like it could work, right? Wrong!
In a perfect world every DIY project I did would turn out just the way I wanted it to. In case, you may not have heard, this isn’t a perfect world. Sometimes what sounds like a good idea turns out to be just plain awful. I would say I most definitely learned that lesson with this project. I realized that I really do love the look of whitewashing, just not on parquet flooring.
When this horrible idea occurred to me, our playroom floors looked a little something like this. Yuck!

I was so excited to start working. I couldn’t wait to transform them into something beautiful. In all fairness, I should tell you, my husband was a bit skeptical from the very beginning and tried to talk me out of doing this. But once I get something in my mind, I am determined to make it happen.
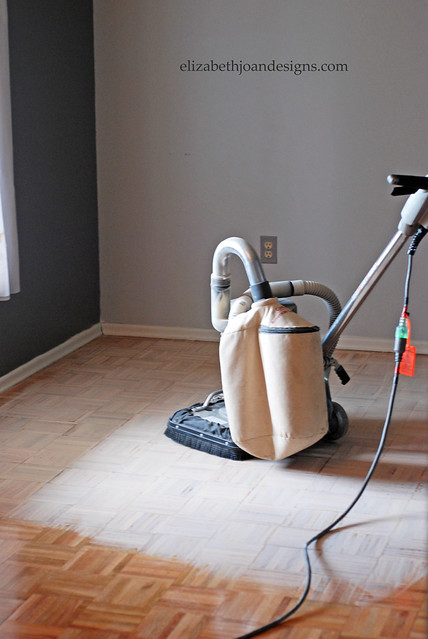
First, I rented a floor sander from Lowes to remove the current finish.
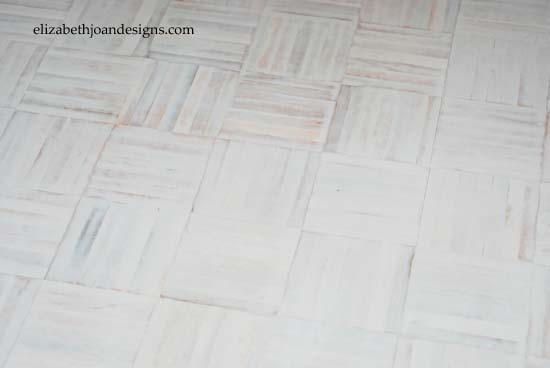
Once the floor was sanded, I wiped off all the dust and started the white washing process. I thought it was looking pretty good at that point. Next, I applied several coats of water based poly to it.
Finally, after days of working, it was complete. It wasn’t the worst looking floor in the world. (Although, I haven’t seen anything worse than this, I do believe that out there, somewhere, is a floor that looks worse than mine.) I just didn’t like it. The coloring was inconsistent across the entire area and looked bad. Plus the poly added a yellowing touch to it, that I was not a fan of. This idea might work for someone, it just didn’t work for me.
So, for now it’s back to work. Stay tuned for a future post and see what happens with this floor.
What are your most memorable project fail?
-
We Dig It April 2014
Each month we will be sharing some of our favorite finds from around the web. Enjoy!
1. Wow! This Nursery Reveal, by Lindsey from Simply Salvage, would make any baby feel right at home.

2. Corinna Ashley, from For The Love Of, made the coolest DIY Geode Specimen Art.

3. We love this Ottoman Makeover from Sarah at Little Red Brick House.

4. What an a great idea! The Queen and Her Court turned a Yoga Mat Into a Runner just by painting it.

5. This Paint Chip Abstract Art, by DIYPASSION, is totally awesome and such a fun way to make inexpensive art.


-
The Light Swap
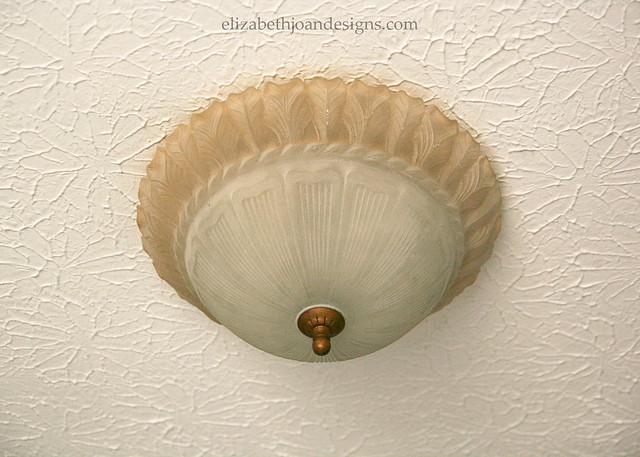
Our new house is unfortunately cursed with bad light fixtures. (And crappy ceilings, but that’s another post.) Lots of them. Specifically, the boob light. You know the ones I’m talking about. They look similar to the one below, which resides in our bedroom.
Since we have plans to replace pretty much all of the lighting here, we thought that we would start with the bedroom, since we already had most of our supplies. (Knappa Pendant Lamp and Hemma Cord Set from Ikea.) Eventually, we would like to put a ceiling fan/light combo, but it is not really high on our home improvement priority list.
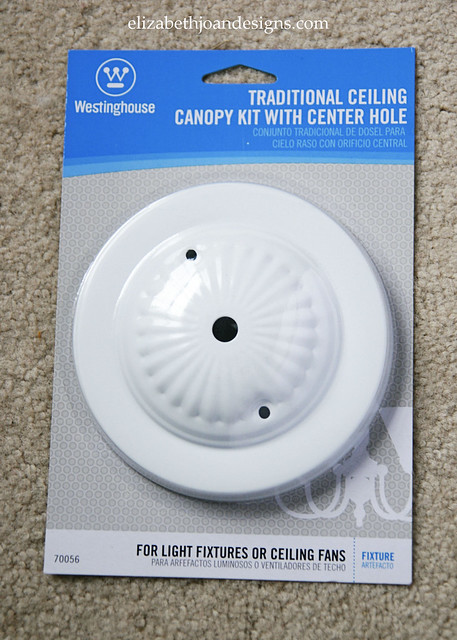
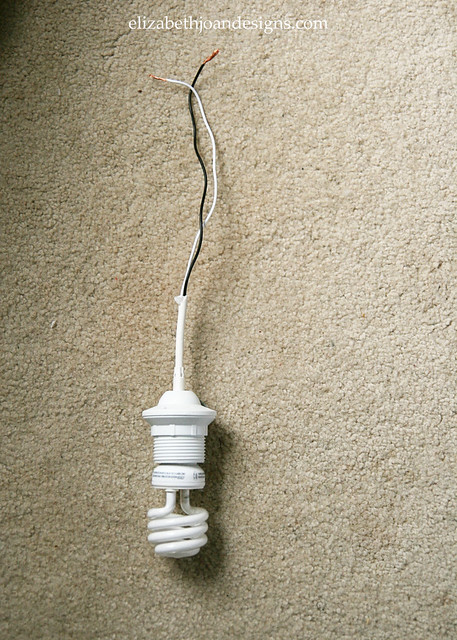
Anyway, after we gathered our supplies, which also included a stop by the hardware store to pick up canopy kit, we were ready to go. My hubby, Chris, gets most of the credit for this project, since I know nothing about electrical work and was armed with only my camera/knowledge of CPR. (Please remember to make sure the power is completely off before starting an electrical project.) He started out by cutting cord set and taking off the sheath on the end, exposing the wires. Next, he removed a small piece from the cord set, threaded it through the canopy, and put the piece back on. That kept the cord secure on the canopy.

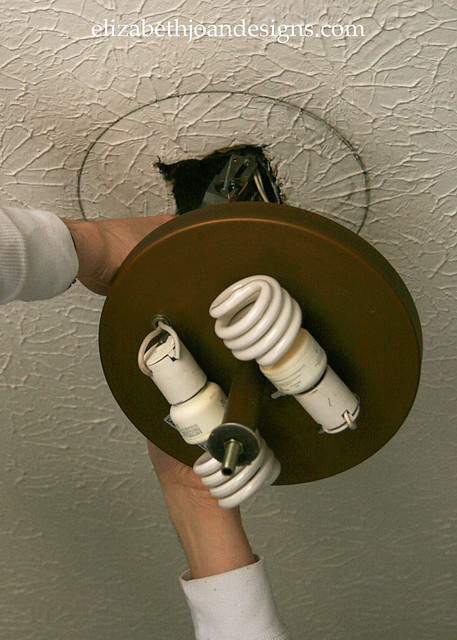
Once the new parts were ready to go up, he removed the original boob light. Buh bye! You can see that with it’s removal, it revealed a really dingy ceiling, so we whipped out the Mr. Clean Magic Eraser to try and clean it up. Once everything was clean, he connected the appropriate wires together and pushed it all back into the ceiling so that he could screw on the canopy. Finally, he put the pendant in place and we were done. Thank goodness I didn’t have to resuscitate him!

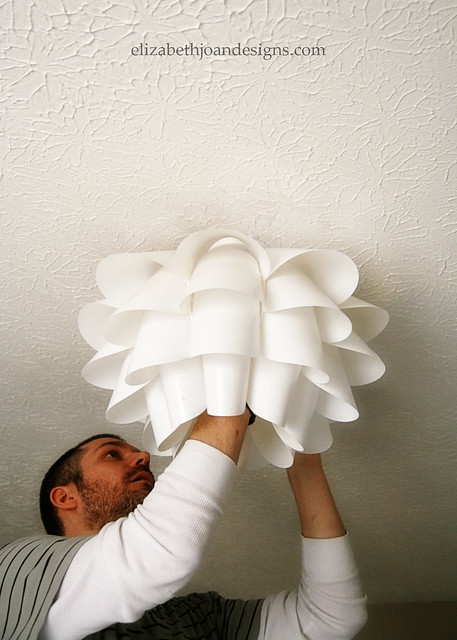
This project was quick and easy, taking only about 15-20 minutes. It is so nice to wake up in the morning and not see a boob light staring back down at me. *wink* Here is the finished product with a sneak peak of our bedroom.

Not too shabby, right? Have you taken on any lighting or electrical projects at your home?
-
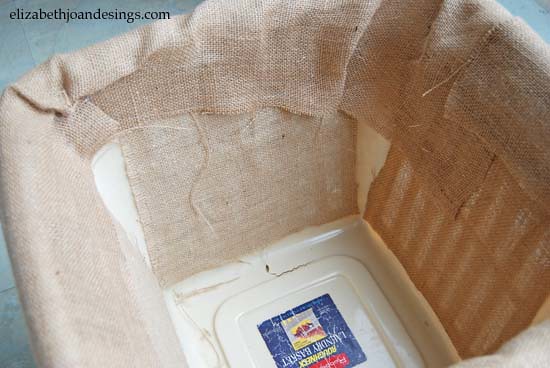
Laundry Basket Planter
When I see something left on the curb to be picked up by the trash man, my mind starts racing to create a use for this item. I begin to think I could totally use this for… and then, it becomes a “need.” I have to have it or my life will not be complete!
This broken laundry basket I saw on the side of the road was no different, except I couldn’t think of a use for it. I grabbed it off the side of the road anyways, not even caring. So, it sat in my basement for about six month when it finally hit me “I can use it to as a planter.” Here is how I turned this trash into treasure.

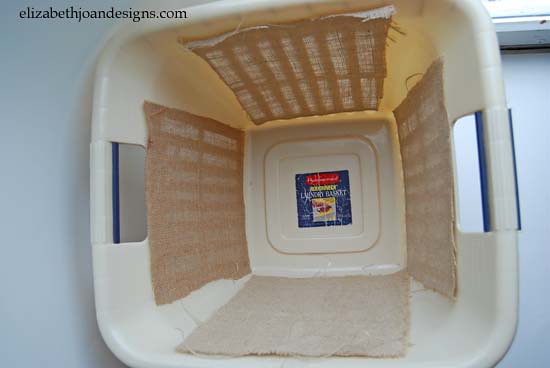
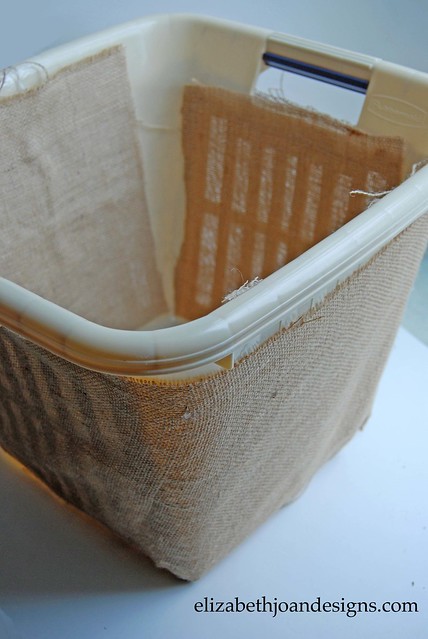
First, I taped up the crack in the side with some plain old packing tape. Next, I hot glued burlap on the inside to cover the slats of the basket. This was to help make sure my dirt stayed in.
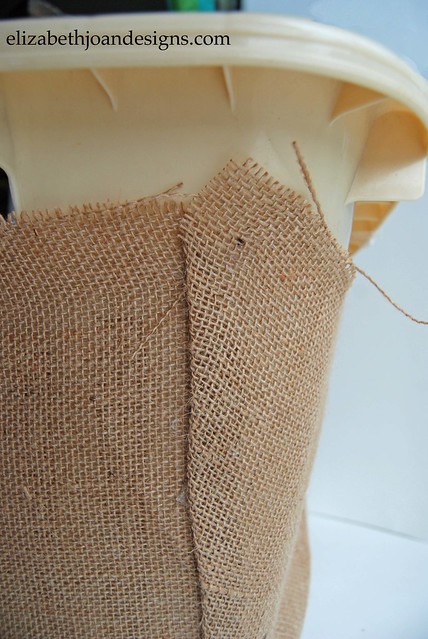
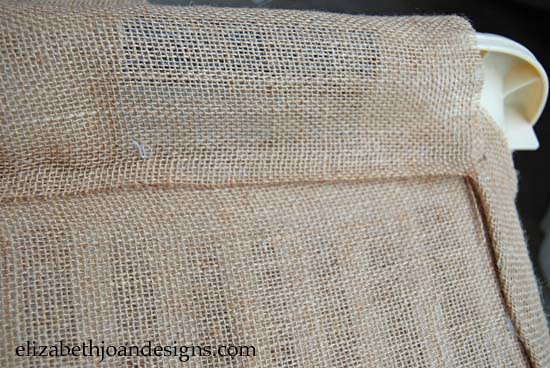
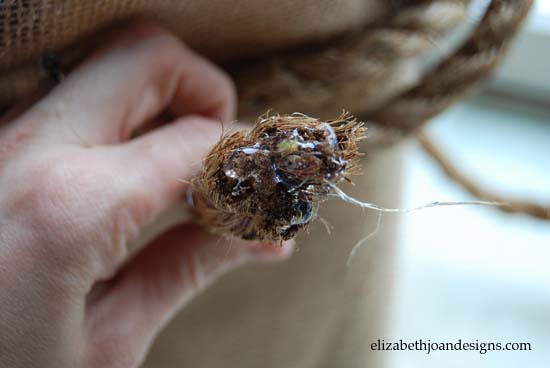
Then, I attached rope around the basket, making sure to cover the seam where the two fabric pieces came together.


Finally, I added the dirt and plant. You can’t even tell it was a broken laundry basket. Ye-haw!

Shop This Project!