-
16 Fantastic Fall and Halloween Ideas


Mason Jar Ring Pumpkin 
Fall Wreath / Blooming Homestead
Freezer Paper Stenciled Treat Bag 
Pumpkin Decorating Ideas 
DIY Pumpkins with Realistic Looking Stems / Anderson and Grant

Octonauts Costumes 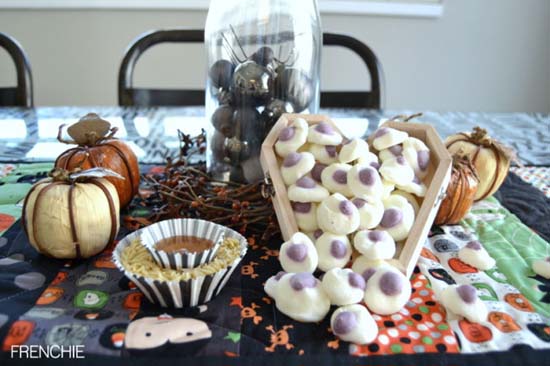
Ghoulish Greek Yogurt Eyes / Frenchie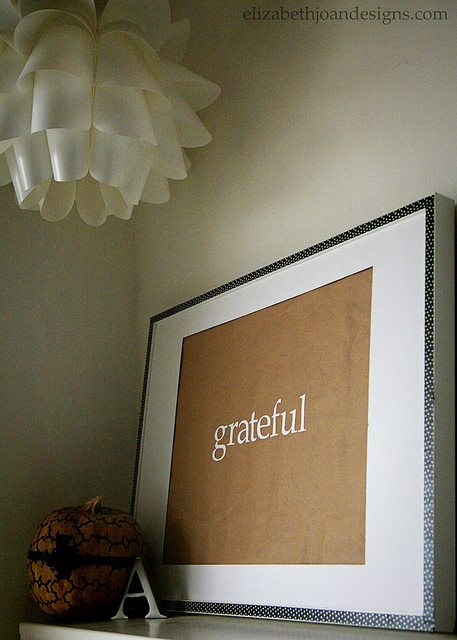
Grateful Art 
Neutral Fall Shelf Decor / Just A Girl and Her Blog

Chalk Cloth Bunting 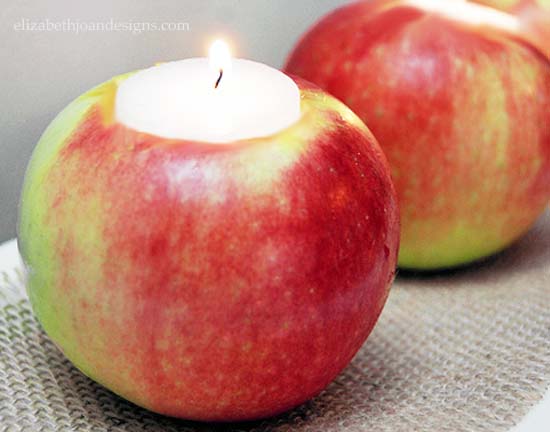
Apple Candle Holder 
Pallet Pumpkins / Little House Of Four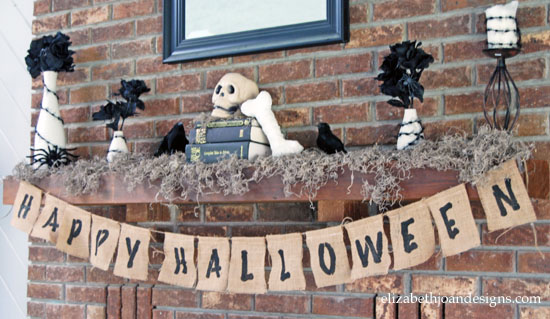
Halloween Mantle 
Fabric Pumpkin from a Milk Jug / House On The Way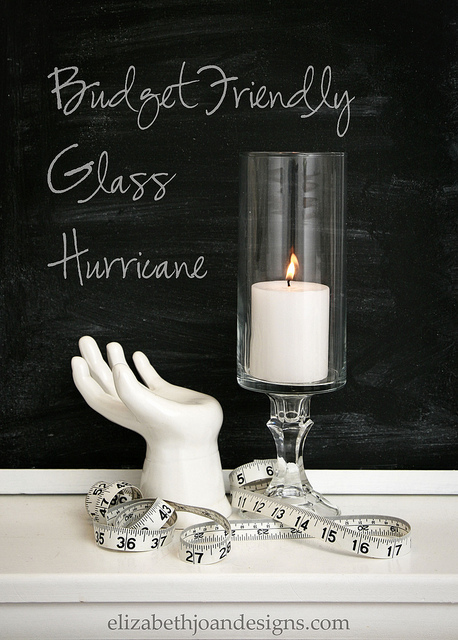
Budget Friendly Glass Hurricanes -
DIY Teacher Desk Organization Station
This shop is part of a social shopper marketing insight campaign with Pollinate Media Group®, but all my opinions are my own. #pmedia #inspirestudents http://my-disclosur.es/OBsstV”
Today I will be sharing with you an easy DIY Teacher Desk Organization Station. This adorable school supply holder is made with oodles of recyclables. How awesome is that?
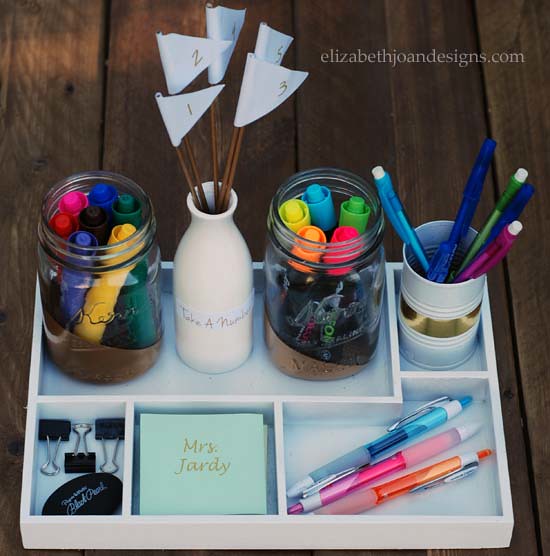
My supply list for this project was pretty basic. I used an old discarded Melissa and Doug toy tray, ribbon, glue stick, two hand-me-down Mason jars, one small empty can (previously used for tomato paste,) spray paint, several sheets of scrap paper, wooden dowels, and painters tape.
Here’s how I made it.
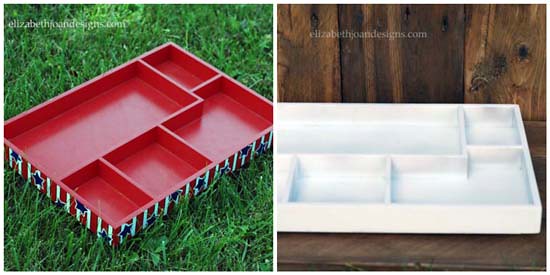
First, I lightly sanded the toy tray and spray painted it with glossy white paint to give it a much cleaner look.
Next, I jazzed up two jars with spray paint. I love the look of paint dipped Mason jars and a touch of gold is all I needed to add a bit of glam to this project. I used painters tape and scrap paper to protect the undipped portion from over spray.

Then, an old empty can of tomato paste took a turn transforming its color to white. (No, it didn’t change its own color. I just spray painted it, but I thought saying it like that was much more exciting. Tada! *Jazz Hands*) I added a piece of ribbon around the middle of the can to give it a little something extra.

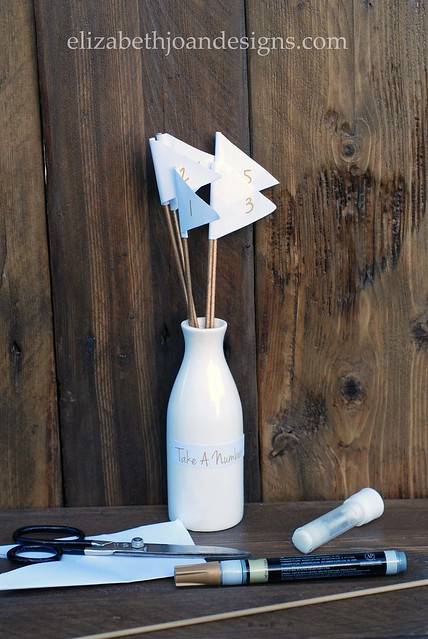
The vase I had just lying around. It was just looking for a purpose and it found one. It holds these adorable homemade “Take a Number” flags. They were assembled using wooden dowels, a glue stick, a marker, and scrap paper. Aren’t they cute?
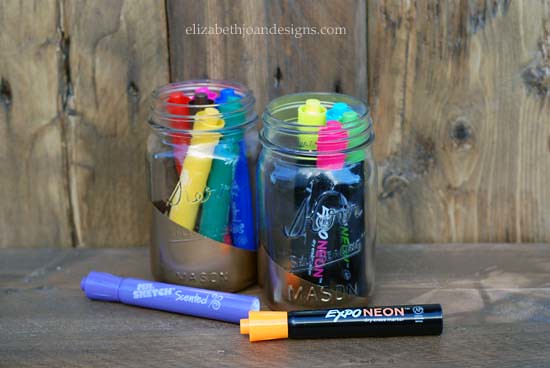
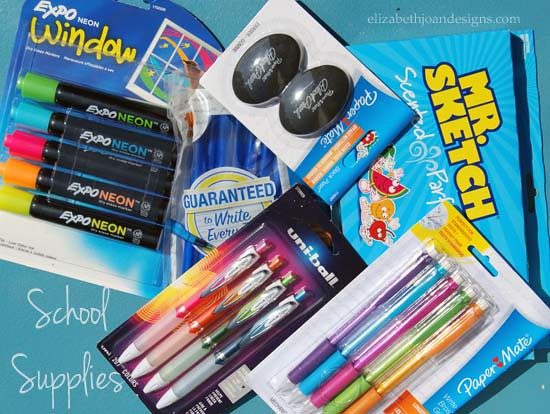
Finally, it was time to add all the essential school supplies to the tray and containers. The cost was pretty minimal. Yay! Who doesn’t love that? I had shopped at Office Max for the school supplies and found they had a great deal going on. It is Save $5 off your purchase of $20 or more on select Newell Rubbermaid Brands (PaperMate, Expo Neon Window Markers, Sharpie, Uni-Ball, & Mr. Sketch. While supplies last.) Woo hoo! If you are not part of Office Max/Office Depot’s rewards program yet, you should take advantage of it by clicking here.
I love how this desk organizational tray turned out. Everything has a place. It would make the perfect teacher gift for back to school time or any other special occasion. The teacher that receives this tray will be the envy of the faculty for sure!
-
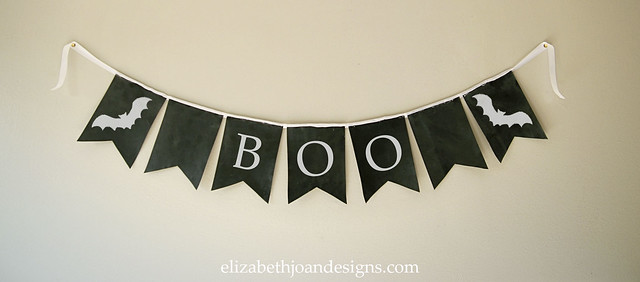
Chalk Cloth Bunting
I love a simple project and that’s what you are getting today. DIY Chalk Cloth Bunting. It’s not just adorable, but can be used for all types of celebrations. Oh, and it’s easy too. Perfect for a lazy day sitting in front of the boob tube, when your energy is drained and minimal is all you can muster.

I had some extra chalk cloth left over from this project, so I decided to use that to make the bunting. Original, right? I think that everyone in blogland has probably made a bunting or banner of some kind (even Emily did it,) and well, I just didn’t want to be left out.
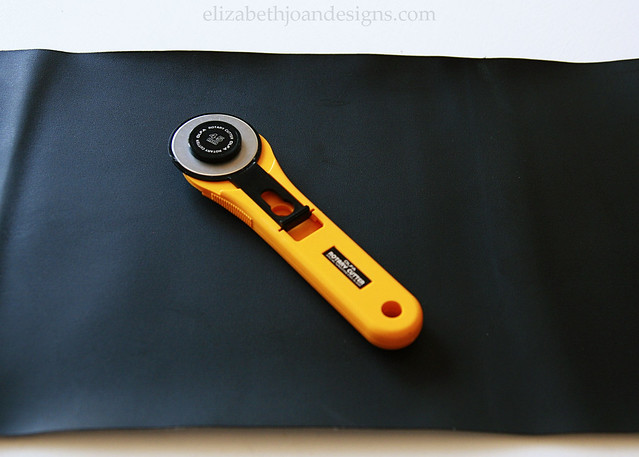
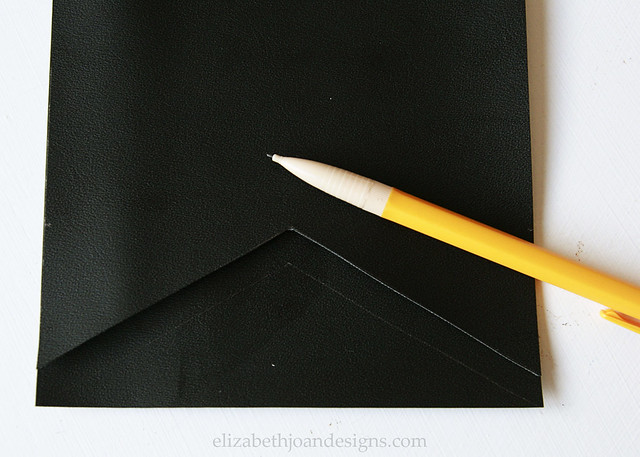
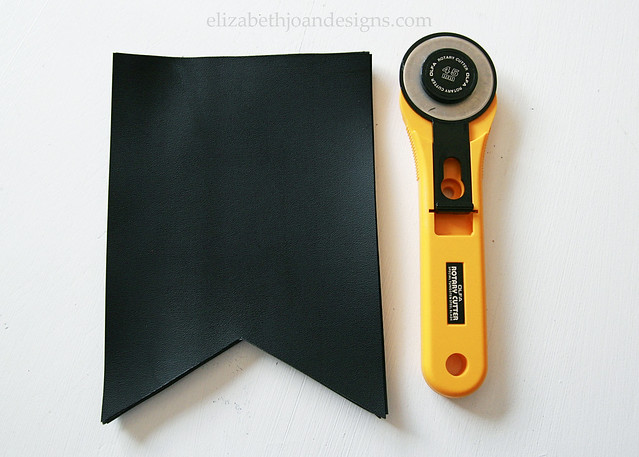
Using a rotary cutter, I cut out 7 pieces of the cloth measuring 5 inches x 7 inches each. Why 5″ x 7″? Because it just sounded good.
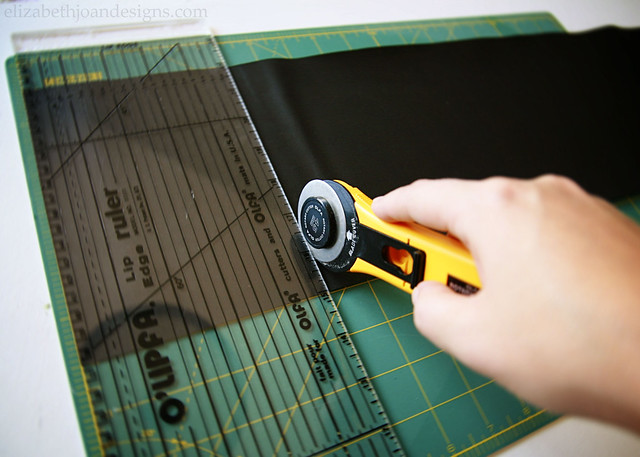
Next, I measured approximately 1.5 inches up and 2.5 inches in from each side (the center) and marked a spot with a pencil on the bottom of each piece. Starting at the corner, I cut a straight line in to the dot on an angle and did that for both sides. Then, I used that piece to trace a cutting line on the rest of the fabric pieces…
And cut out each of them.
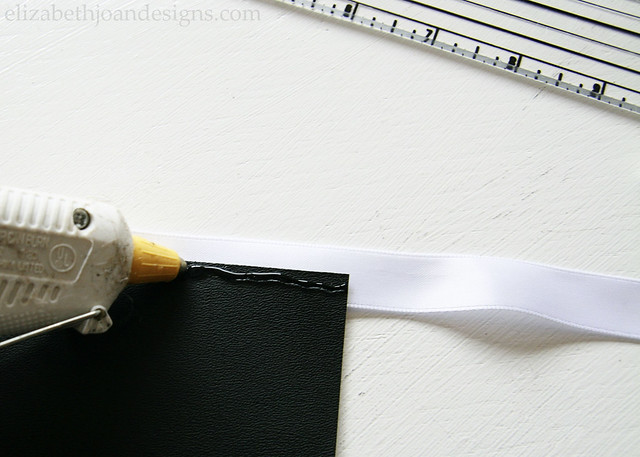
After that, it was time to attach some ribbon.
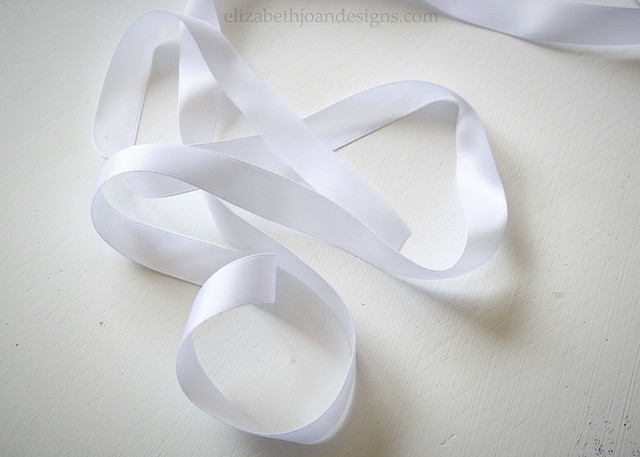
I used ribbon (you could also use bias tape) to attach the chalk cloth pieces together with some hot glue. Just fold the ribbon in half and add glue to the inside part.
The chalk cloth needs to then be primed before anything is written on it. You can find out how to do that in this post. Then just dust off the excess with a dry piece of scrap cloth or fabric.

Finally, write out a little message. The best thing about this bunting is that it is customizable and can be used for multiple occasions. Here is how we are using it this fall!
_____________________________________________________________________ You may also like:
Chalk Cloth Map 
Halloween Mantle 
Chalkboard Lettering 
Freezer Paper Stenciled Treat Bag -
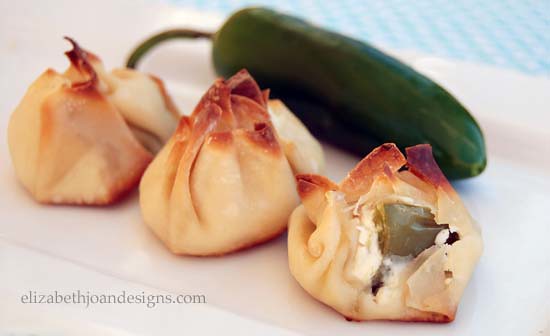
Baked Jalapeno Cream Cheese Wontons
I love Jalapeno poppers! The spicy flavor of jalapenos combined with the cooling properties of cream cheese just make my mouth water. Mmmmmm! I thought I would take that classic appetizer and give it a little twist. What I came up with was Baked Jalapeno Cream Cheese Wontons.

These little bites turned out so amazing. I just had to share how I made this delicious appetizer.

First, I sliced the jalapenos in half and removed the seeds. You can keep the seeds if you’d like, but let me warn you, your tongue will be on fire!
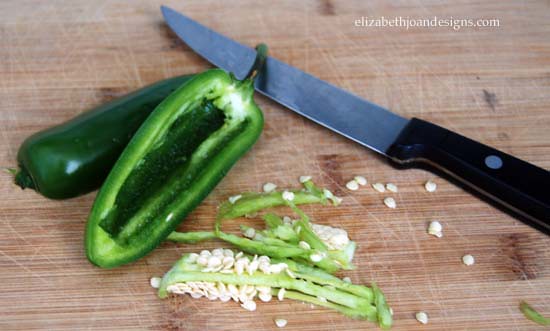
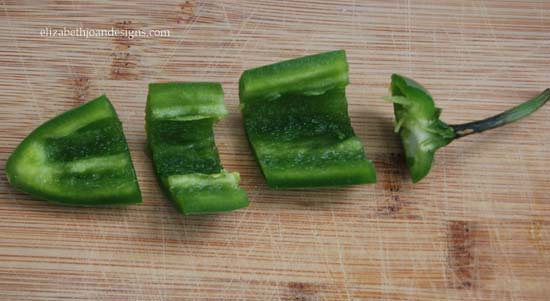
Next, the stem was taken off and discarded and the pepper halves were cut into 3 equal sections. Again, you have a choice here. You can eat the stem if you want, but it is not recommended.
Then, I placed the wonton wrappers flat on a plate and added one jalapeno piece and a tablespoon of cream cheese to each. I worked quickly so the wrappers wouldn’t dry out.
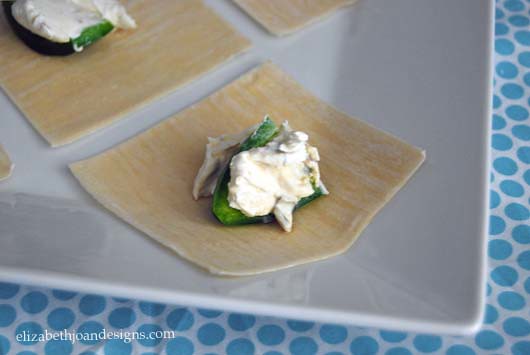
After that, I folded up the wontons. I am not sure I did this the “proper” way, but I just tried to make sure all of the stuffing stayed inside the wrapper.
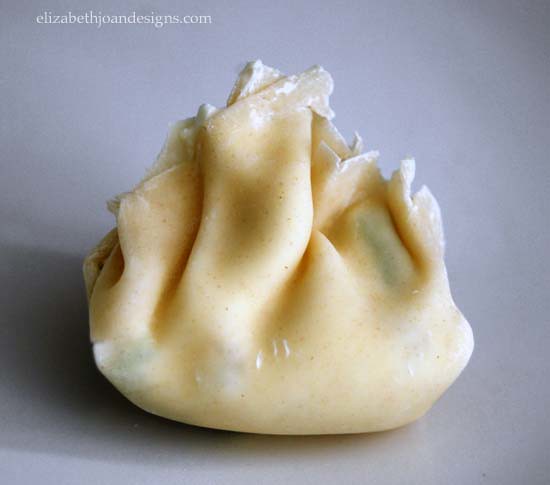
Finally, I brushed each ball of goodness lightly with olive oil, placed them in a shallow baking dish, and cooked them in the oven at 350 degrees for 8-10 minutes.

These wontons are amazing! The perfect appetizer for entertaining.
Baked Jalapeno Cream Cheese Wontons from Elizabeth Joan Designs
Yield
18 WontonsIngredients
– 18 Wonton wrappers
– 1/4 cup olive oil
– 3 Jalapenos- seeds removed and cut into 6 pieces
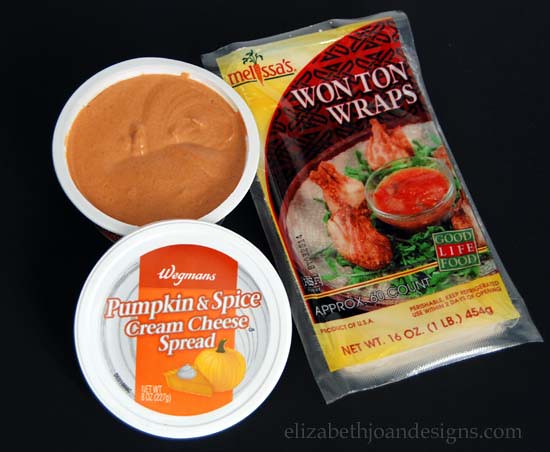
– 1 Package jalapeno cream cheese (You can use plain cream cheese if you like them less spicy.)Preparation
Preheat oven to 350 degrees. Fill each wonton wrapper with one jalapeno piece and cream cheese. Fold carefully and brush lightly with olive oil. Bake 8-10 minutes or until wonton is browned. Cool for about 3 minutes and serve warm with your favorite salsa or ranch dressing.
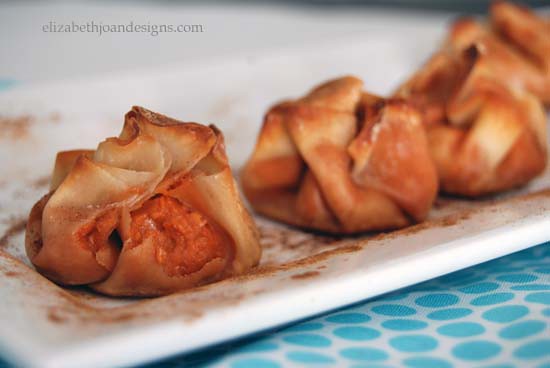
___________________________________________________ Pumpkin & Spice Cream Cheese Wontons I love the jalapeno cream cheese wontons, but my curiosity peaked at the sight of pumpkin & spice cream cheese. It was a must try with the wonton wrappers. I filled each one with cream cheese and wrapped it up. After I brushed the wontons with olive oil, I sprinkled them with cinnamon.
Wow! These tasted like fall in a ball! Yummmy!
___________________________________________________
You may also like:
S’mores Bars 
Loaded Red Potato Soup 
Yum Yum Shrimp Boil 
Grilled Bread Salad
