-
Painted Dishwasher
This project has been a long time coming and I couldn’t be happier to finally be able to scream it to the world, I PAINTED MY DISHWASHER!
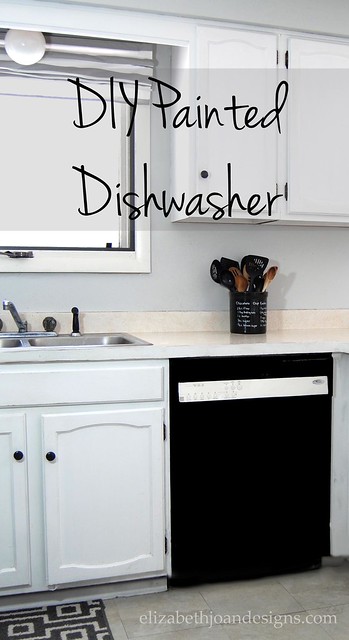
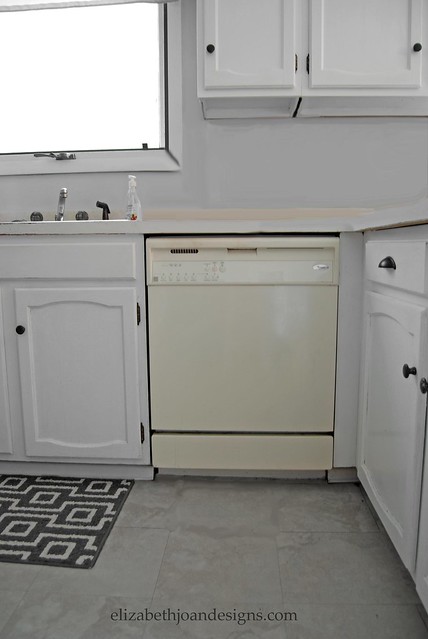
It may sound a little risky, but it was totally worth it. The ugly almond color had to go. It was the only appliance we had that was an off-white color and it stuck out like a sore thumb in our primarily black and white kitchen.
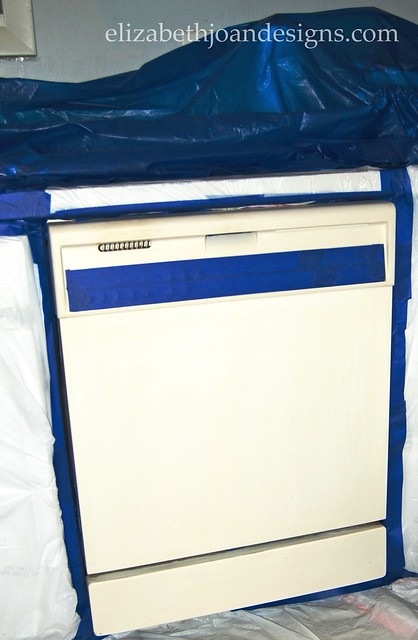
To begin this process, I covered the surrounding area with garbage bags and plastic table cloths and secured them with painters tape. I also thoroughly applied tape to the button control panel to help keep them readable after the new paint job.
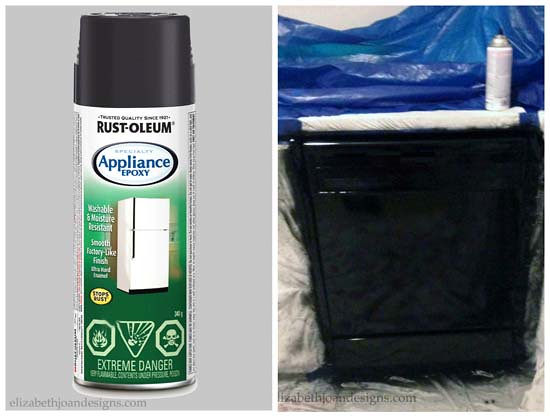
Next, I sprayed the dishwasher with a few coats of Rustoleum Black Appliance Epoxy. It was very important to follow all the instructions on the can to insure even coverage.
Finally, I removed all of the layers of plastic and tape to reveal my beautiful, new-looking dishwasher.
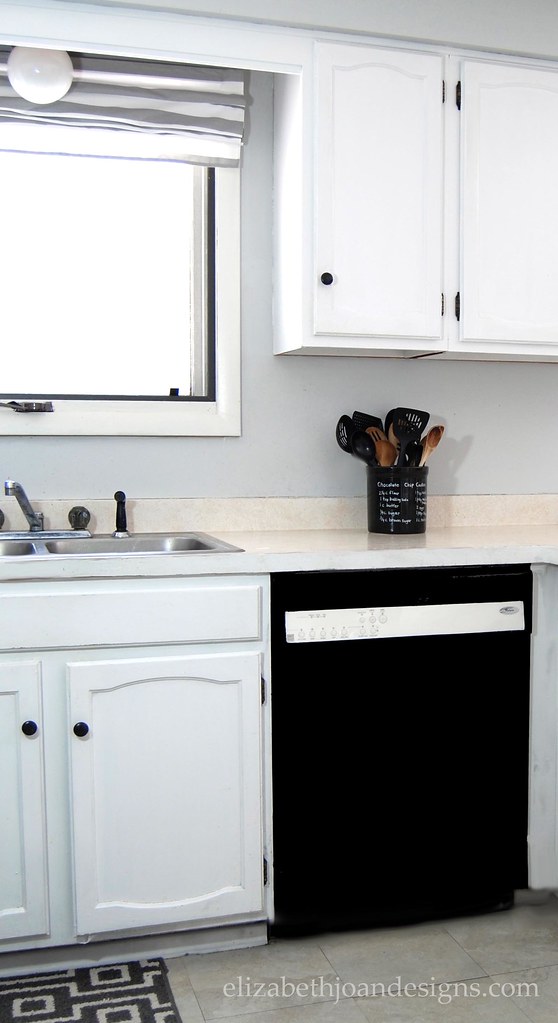
We are very pleased with how this turned out, but there is one tiny thing I am not entirely crazy about. The control panel is still that almond color. Eww. But, I am so much happier with having a black dishwasher with a small off-white stripe vs. an all almond appliance. What do you think?
This project was not the first of its kind in our kitchen. Over a year ago, I also transformed our range hood from almond to black. You can read all about that experience here.

________________________________________________________________ You may also like:

Painting Laminate Countertops 
French Lettered Milking Stool 
Personalized Utensil Crock 
Magnetic Oven Mitt -
Pinky’s Painted Desk
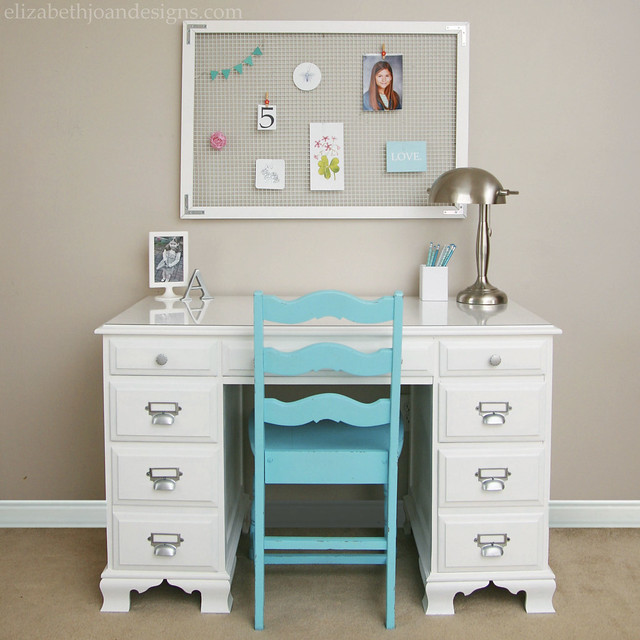
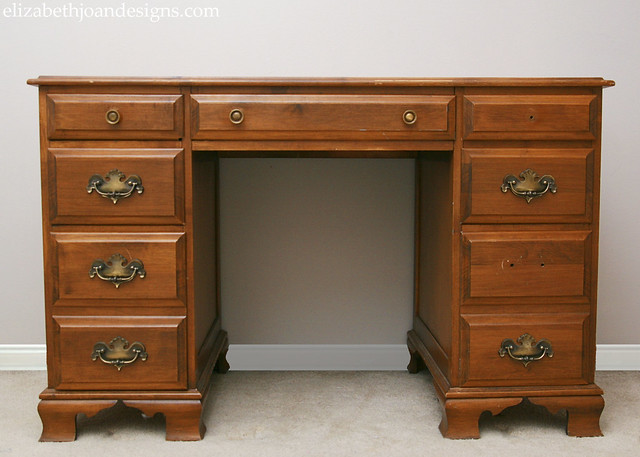
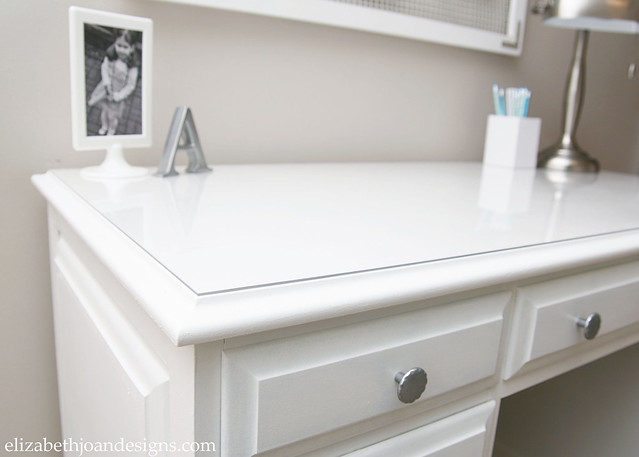
One of the items on our to-do list for 2015 is to work on our kids’ rooms. Our daughter, Pinky, is going from a little girl to a tween, so her room needs a little updating in the form of functional furniture and decor. Luckily, her space is in pretty reasonable shape and she has inherited my Mom’s childhood dresser and a painted desk (pictured below.)
This post contains affiliate links. Click here to view my full disclosure. We got the desk for the amazing price of $FREE.
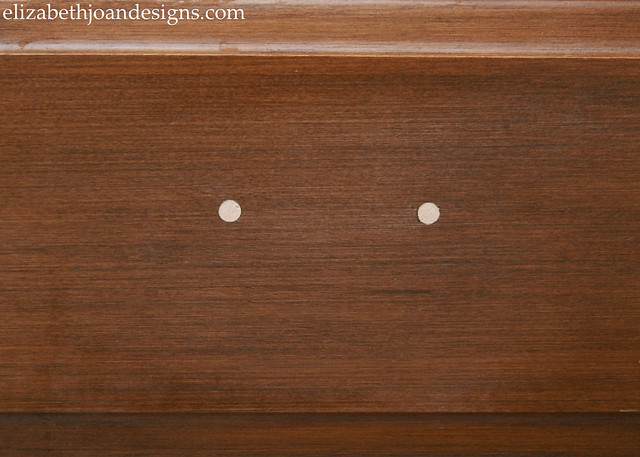
Hey, I can’t pass up a good deal and the previous owner was just going to throw it away! It was in pretty good condition, minus a few drawer pulls, but we knew we wanted to give it a little pizazz to make it work with the other furniture pieces in Pinky’s room. Plus, it has plenty of drawers, which is great for storing diaries, loom bands, and random love letters, I’m guessing.
The entire desk received several coats of primer and paint (Behr Premium Plus Ultra Interior Semigloss Enamel in Polar Bear) applied with a sponge roller. I also used a paint brush to get in a few nooks and crannies, but I like the smooth look the roller delivers, plus it makes everything more time efficient. Bonus! 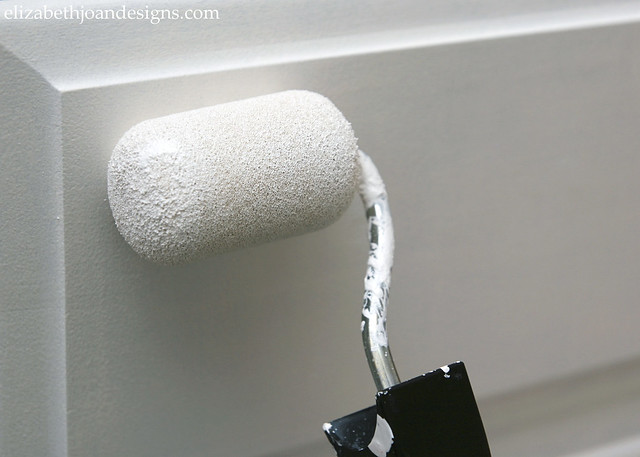


-
Watercolor Valentine’s Day Art
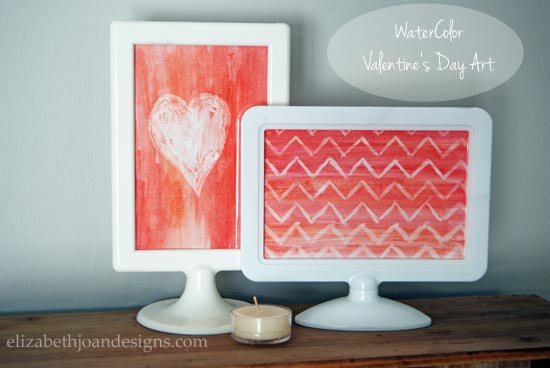
This project came to me very spare of the moment. My kids and I were spending time together painting at the table when I decided to make some of my own Watercolor Valentine’s Day Art to bring a little festivity to our home for the up coming holiday. This project really shows that you don’t need great expensive materials to create fun art to display.
Here is what I had to work with…
I used plain old boring computer paper, my child’s watercolor set, a broken white crayon and dull scissors. Nothing fancy here.
First, I drew a design on the paper with the white crayon. I knew I wanted to display my finished art in a 4×6 frame, so I drew accordingly.

Next, I brushed the desired colors over the crayon markings to reveal the hidden image and left them to dry.


Finally, the pictures were cut out to fit the frames and displayed for all to enjoy.

For what I had to work with, including my poor artistic skills, I love the finished product! Do you decorate your home for Valentine’s Day?
________________________________________________________________ You may also like:

Heart Stamps 
Heart Candle Holder 
10 Minute Wood Cutting Board 
Monogrammed Stamped Clay -
Anniversary Decor
My wonderful husband, Adam, and I celebrated our 7th anniversary this past Sunday. We typically don’t make a big deal out of this special day since it is so close to Christmas. We usually cook a fun meal together and play a board game. No gifts. But this year, I was extremely inspired by a beautiful post on Ways to Strengthen your Marriage from Dwelling in Happiness to make a little extra effort to show my hubby how much he means to me. With sticking to our “no gifts” pact, I had to get creative with some anniversary decor.

Sunday morning while Adam was out of the house for a bit, the kiddos and I went down to the basement and retrieved my box of wedding decor. Our buffet table was decorated with all of our mementos and when Adam arrived home he was pleasantly surprised.
Our wedding took place in a restaurant overlooking the Long Beach, California skyline. Our amazing engagement and wedding photos were taken by Mimi Teller Photography. And in true Emily fashion, most of the decor was DIY. Here are a few of my favorites.
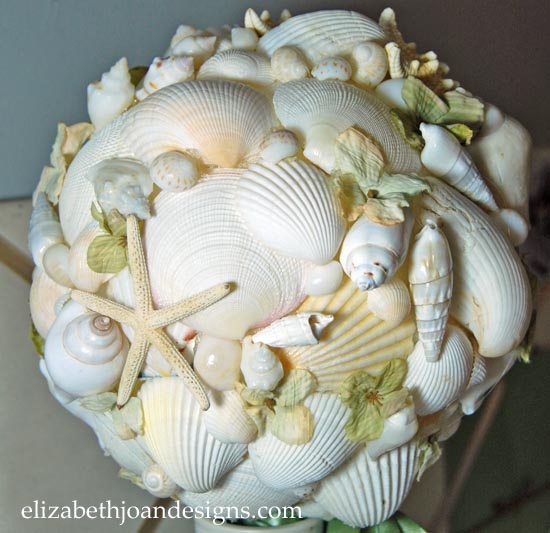
In lieu of traditional flowers for my bouquet, I opted for sea shells. This was a very budget friendly option. First, I took a medium Styrofoam ball and inserted a wooden dowel in it to create the handle. Next, shells were hot glued to the entire surface of the ball. Finally, I wrapped fabric around the handle and accented the bouquet with faux flowers.
I have a love/hate relationship with this bouquet. Adam and I learned one of our first true lessons on compromising with our wedding planning. He wanted a more traditional wedding and I wanted the complete opposite. After a lot of convincing, I won the battle of having a shell bouquet instead of flowers. Then, I made the bouquet and realized it was more like a weapon than a bouquet. At this point, I no longer wanted to lug this “club” down the aisle.
This change of mind led to another disagreement. This one turned out in Adam’s favor by him saying “You are carrying that shell bouquet down the aisle or your not walking down it.” Even though I was 100% sure he didn’t mean that, I humored him by using it. In the end, I was pretty happy carrying it.
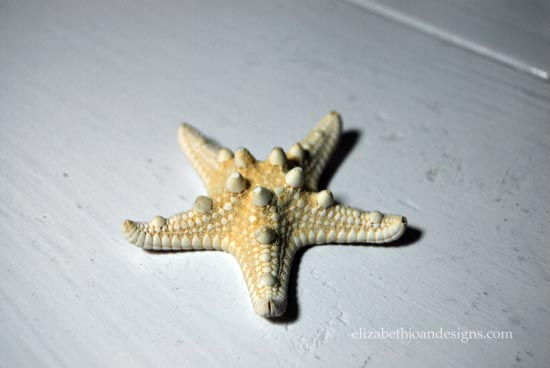
Adam wore this starfish as his boutonniere. A bar pin was attached to the back of it using hot glue. (If you couldn’t tell, we kind of had a whole sea shell theme happening with the decoration.)
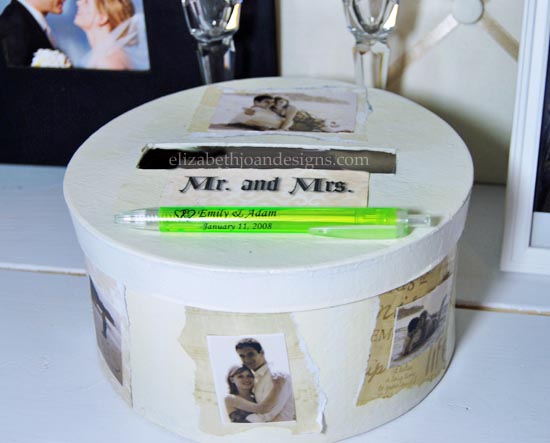
For our card holder, I spray painted this hat box off white and Mod Podged our engagement photos to it. Isn’t it cute? I love how it turned out. Now it has become the best place to store all of our wedding keepsakes.
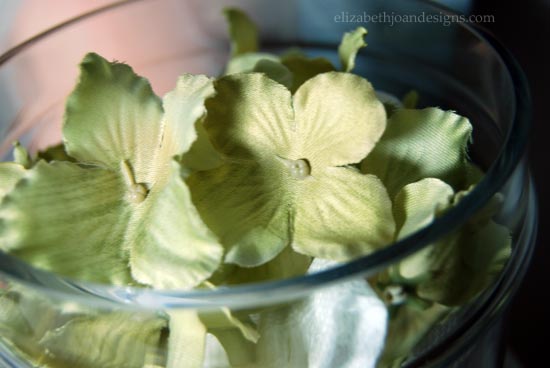
These little faux flowers were scattered down the aisle by our adorable little flower girl. (Erin’s daughter who is now 10! Wow, time really flies!)
Adam and I were season pass holders at Disneyland during our time in Southern California. So it just seemed perfect for us to end our wedding weekend at the “Happiest Place On Earth” with our family.

We really enjoyed spending our anniversary reminiscing about our wedding and time we spent living California. With having two little ones, making time for “us” is hard to come by these days, so this really was a great way to spend our anniversary together.
Next year, I may just have to make this adorable anniversary art that Erin shared.

________________________________________________________________ You may also like:

Hardware Change-A-Roo 
Closet To Office Part 3 
Wall Decal Coasters 
Lighting Swap