-
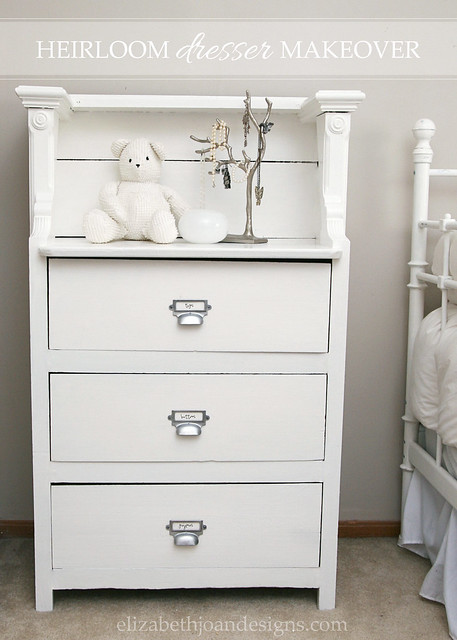
Heirloom Dresser Makeover
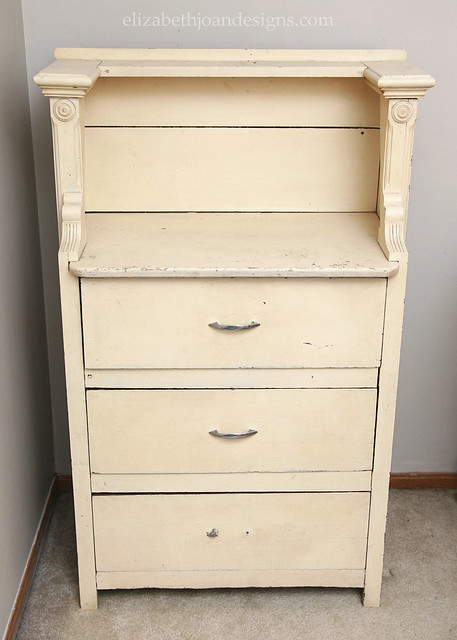
Last year, I inherited my Mom’s childhood dresser. I was so excited to get this piece and I knew that it would be perfect for our daughter Pinky’s bedroom. It certainly had it’s flaws, with the old paint being pretty chippy and one handle practically missing, but I knew I could give this heirloom dresser a makeover.
I remember when my cousins, Emily, and I would all play Barbies at our Grandma’s house as children. (Who am I kidding? We played Barbies EVERYWHERE we went!) One of my favorite places to build/decorate my Barbie house was on top of this dresser that sat in an unused upstairs bedroom. I always pretended like the little shelf on top was the bedroom and bathroom and the larger bottom space was living room/kitchen. Of course, there was an invisible elevator that would take Barbie, Ken, and Skipper up and down, so they could all travel to visit their friends who were placed in various other locations around Grandma’s house.
To update this dresser, I used the same paint and technique I used for this desk. Just some white paint and new library pulls that were left over.
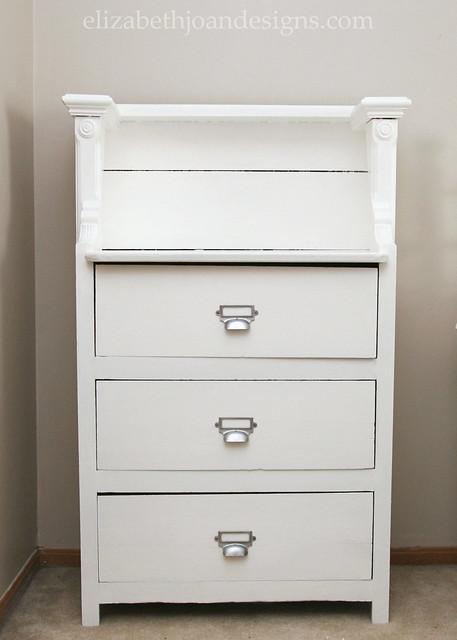
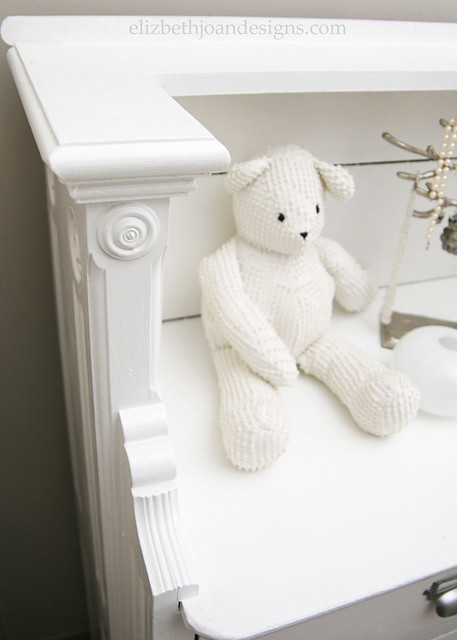
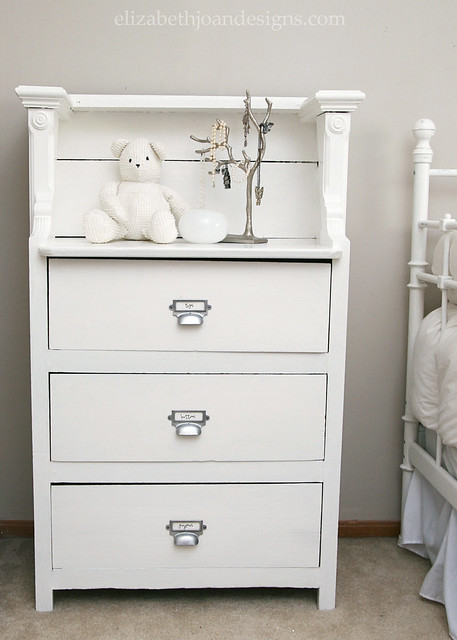
The updated versions of this dresser is by no means perfect. There are still dings and dents and cracks that I could probably fill. The drawers are not perfectly straight, but I actually like the character it adds. Speaking of character, look at the awesome details in the wood.
What do you think about the possibility of either adding a mirror or cork board to the back part of the dresser? There haven’t been any decisions made yet and Pinky hasn’t really mentioned a preference either way, so for now it is just how it was.
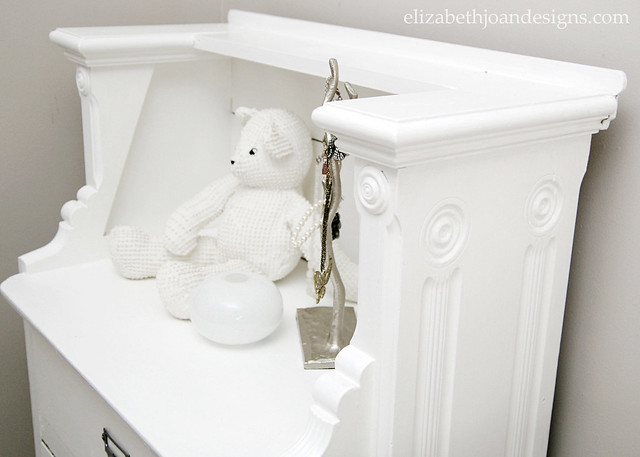
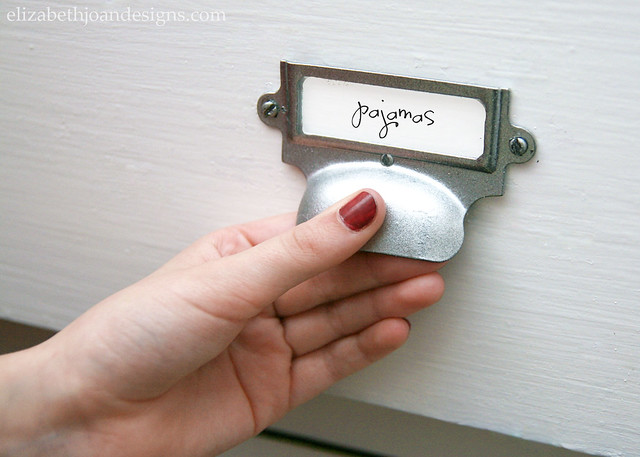
We inserted some little labels into the library drawer pulls that have the words Tops, Bottoms, and Pajamas on them, so that Pinky can keep everything organized.
This is probably one of my favorite pieces in our home right now. Besides the fact that it has sentimental meaning, I just love the crispness of the white paint, the pretty details in the wood, and all of the little imperfections. Now we just need to add some color to this room! What do you think of this heirloom dresser makeover? Let us know in the comments below, connect with us on Facebook, or chit-chat with us Instagram (Erin’s Instagram/Emily’s Instagram).
_________________________________________________
You may also like:

DIY Dining Table 
Pinky’s Painted Desk 
Entryway Remodel Part 3 
Lazy Upholstering -
Chevron Pattern to Herringbone
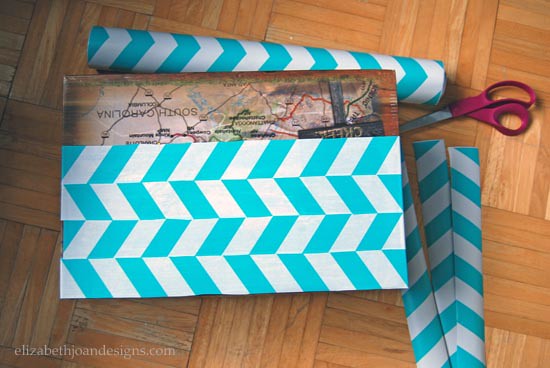
Do you remember my Garbage Picking Kit? No? You should really check it out, it’s a pretty funny post. Well, when I was working on that project, I needed something to store all of my tools in so they didn’t just rattle around in the trunk of my car. My solution was an old shoe box. The box I found wasn’t exactly pretty. I decided it needed a little beautifying, so I grabbed some chevron patterned shelf liner to cover the box lid. As I was measuring the paper out, I was struck by a lightning. Okay, not a real lightning. Just a great idea kind of light bulb, but you get my point. Anyways, that’s when I thought it would be fun to change my chevron pattern into herringbone. Here’s how I did it.

Fist, I cut the shelf liner into strips using scissors. I did not do this haphazardly. The method to my madness was cutting straight lines directly through the points of each zigzag.

Next, I removed the backing of each contact paper strip to reveal the sticky side. With sticky side down, I placed each strip making sure to alternate colors with each piece. This is what created the herringbone pattern. Seriously, this project was so ridiculously simple. I feel a bit embarrassed and like I am cheating using this as a blog post.
Because of the size of the shoe box I was using, hubby’s giant feet not mine, I had to add some small pieces of the contact paper to the ends of the box lid to complete it. It took a little finagling (technical term) to get them to look right. But once I had finished, I loved how this turned out! What do you think? So simple, right?

________________________________________________________________ You may also like:

Garbage Picking Kit 
Removing Oil Based Paint & Primer 
Hardware Change-A-Roo 
Faux Roman Shade -
Wood Box Caddy
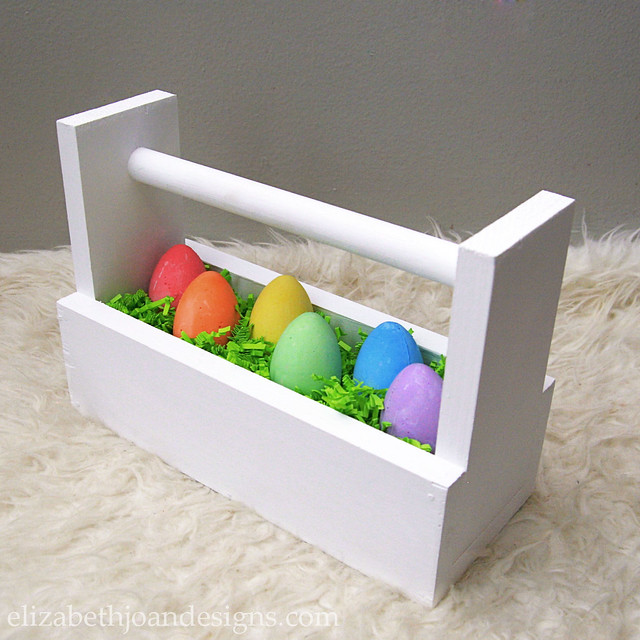
It’s March 15th, which means that it is time to share our Monthly Home Depot Gift Challenge post. Last month, Emily showed you how she used copper fittings, combined with other supplies, to make an Industrial Book Rack. This month’s challenge item was a wooden dowel and the project was supposed to be a gift for a child. After a little brainstorming and chatting with my sis and hubby, I decided to make a Wood Box Caddy that could be used as an Easter basket for my kids.

This challenge is in no way associated with The Home Depot. We just love their stuff!
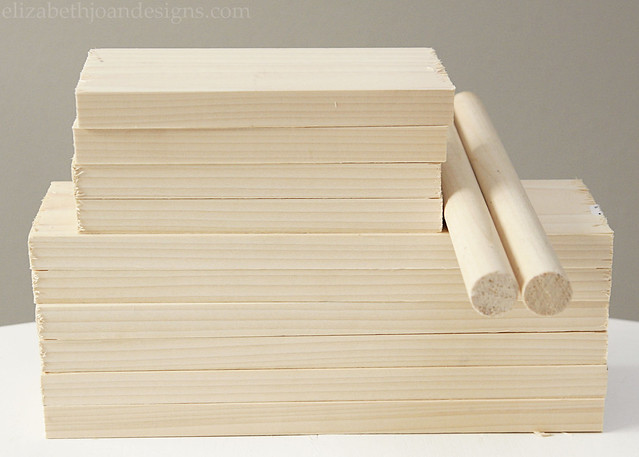
Since we have two kids, I obviously had to make two caddies. I bought our boards and wooden dowels from The Home Depot and they cut everything for me while I was there. Behold the wood!
These caddies are pretty easy to whip up, so if you have minimal wood working skills, do not fret. You can do this!
To make one wood box caddy you will need:
- 1 – 1″ X 4″ furring strip (cut into 3 – 12″ pieces and 2 – 7.5″ pieces)
- 1 – 1″ Wooden Dowel (cut to 12″)
- Pencil
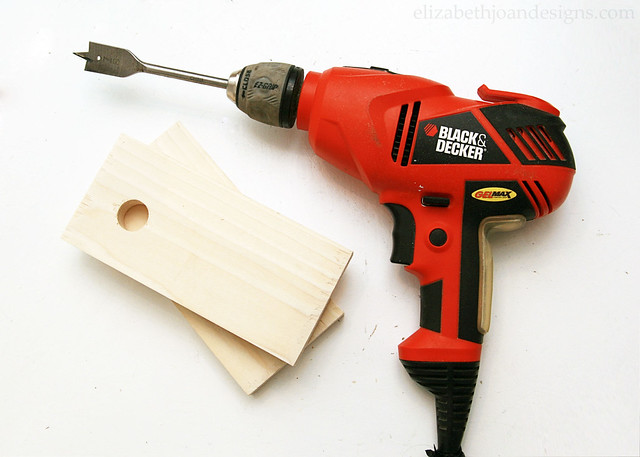
- Drill with 7/8″ Spade Bit
- Electric Sander or Sandpaper
- Wood Glue
- C-clamp
- Hammer
- Finishing nails
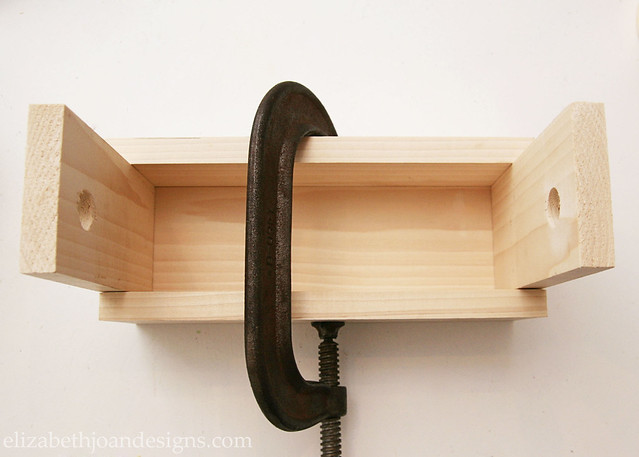
To start, figure out where the hole for the the dowel will go in the two 7.5″ end pieces and mark it with a pencil. Use the drill with a 7/8″ spade bit to make a hole in each end by lining up the tip of it with the mark on each board and drilling through. Lightly sand any rough areas.
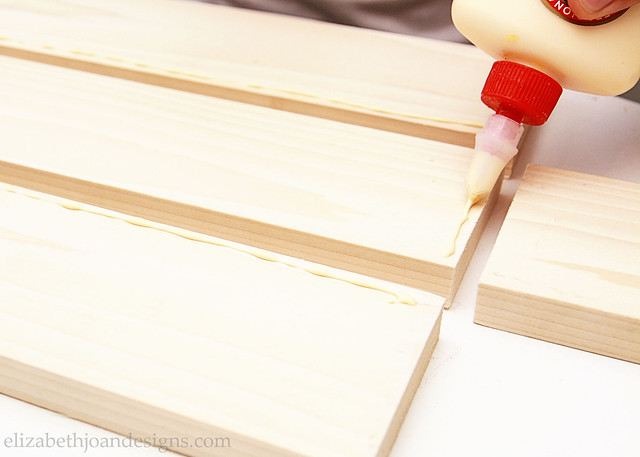
Lay out the 5 boards of the box. Apply wood glue to the edges that will be meeting up by following the guide below.

This caddy is basically one 12″ bottom piece that is sandwiched between the other two 12″ boards on the sides. The 7.5″ end pieces are placed on top of the bottom piece and also in-between the side boards with all of the ends lined up.
Assemble the pieces together and use a c-clamp to hold them in place while the glue dries.
Is this thing reading like stereo instructions? Stick with me. We are almost there.
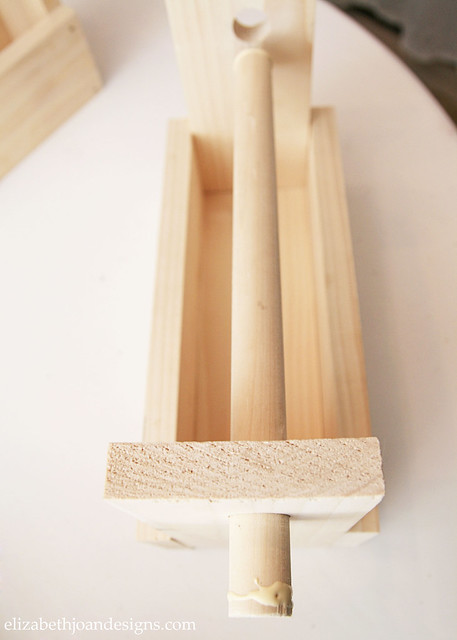
Insert the dowel through one side of the caddy and add some glue to both ends. Then push the dowel into the second hole and make sure the ends are flush. Wipe away any excess glue.
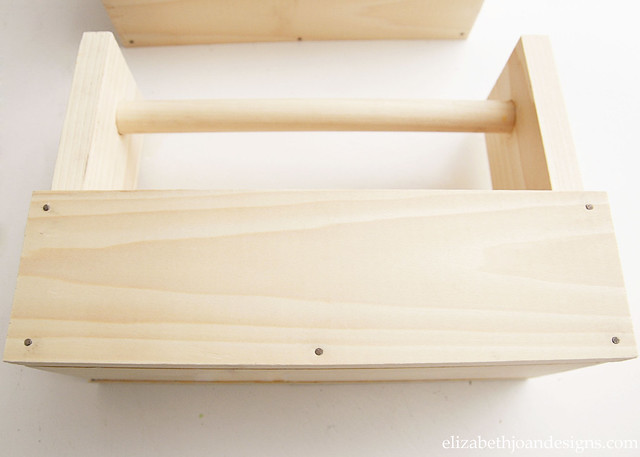
Finally, secure the sides of the caddy with some finishing nails.
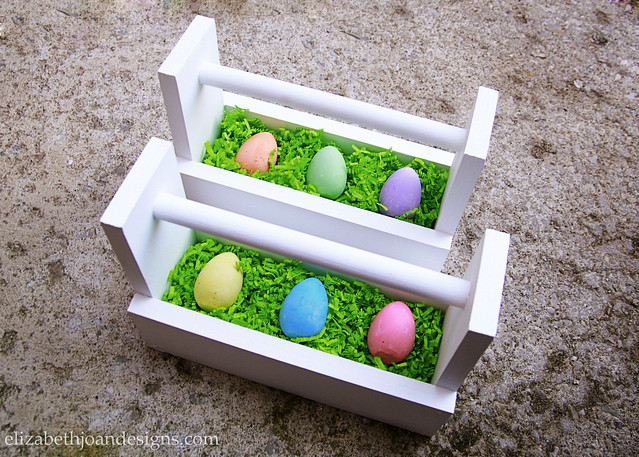
I decided to get crazy and paint both of these caddies white with some chalk paint. Just kidding. I tend to paint everything white. *wink*

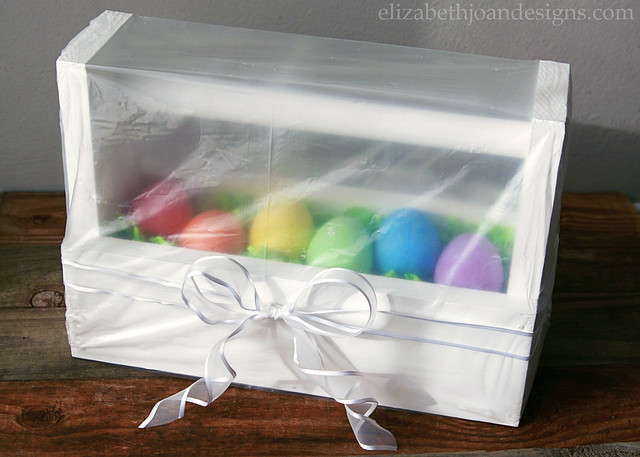
Aren’t they purdy? I’m so excited for the Easter Bunny to deliver some goodies for the kids in these. The best part is that once the holiday is over, the kiddos can use these for a multitude of purposes. Matchbox car holder? Check. Nail polish storage? Check. These will be perfect for toting things around the house.
Oh, and I can’t forget the wrapping! As part of the challenge, this gift was to be wrapped in an item also from The Home Depot. Since these will be used as baskets and set out on Easter morning, I didn’t want to hide everything inside, so I decided to go with a clear plastic drop cloth and a lovely white bow. Cute, right?
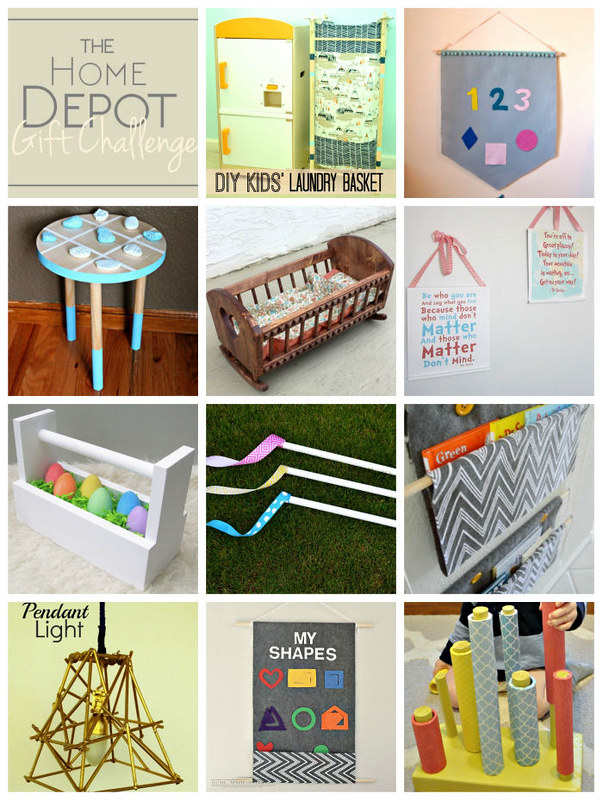
Like how we tackled this challenge? Head on over to check out all of the other awesome projects involved by clicking on the images below!
-
DIY Split Pea Wreath
Who is ready for spring? Probably everyone who is reading this, including me. I am so tired of all of snow and freezing temperatures. To invite and welcome spring to this part of Earth, I am sharing a Spring DIY Split Pea Wreath. Last year, I had made a spring moss wreath. So this year, I decided I would make one with food. Sometimes we need just a little green in our lives to help break up all that white snow.

To make this wonderful wreath, I used a straw wreath form, a paint brush, Mod Podge, a large plastic container, and a whole lot of bagged split peas.
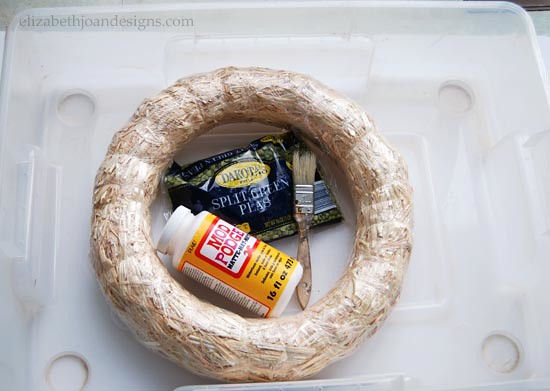
First, I placed the wreath form in the plastic container and painted the front and sides of it with a thick layer of Mod Podge.

Here is my lovely assistant. Do you like his duct tape arm band? He thought it was cool.
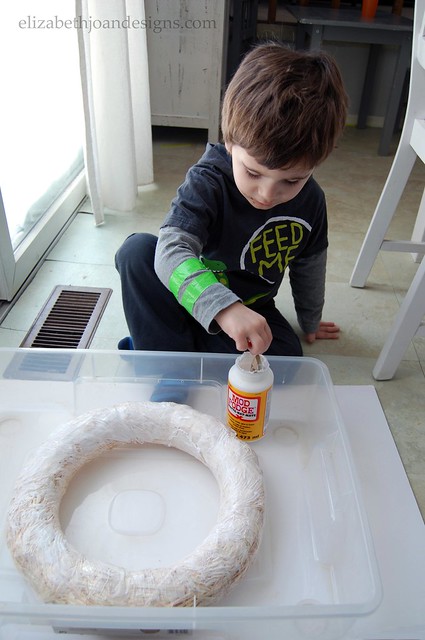
Next, we coated the glue covered circle with the small vibrant colored greens and let it dry.

The little helping hands and I continued this process until every space was filled with peas.

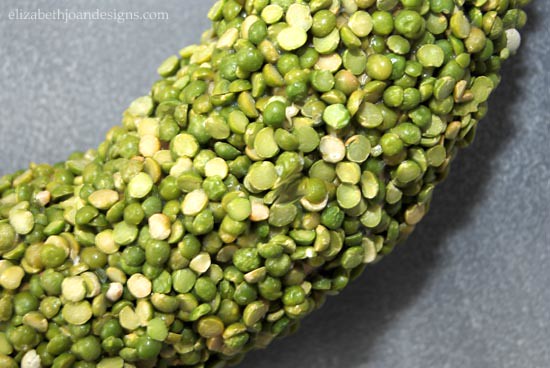
Finally, we were finished and it looked great!

My original plan was to work on this project alone, but I am so glad this was something my three year old and I could do together. It was such a great sensory activity for him. I love how beautiful and simple this wreath turned out too. Okay spring, now it is time to arrive!
________________________________________________________________ You may also like:

Eye Shadow Easter Eggs 
Faux Topiaries 
Gardening Gift Basket 
Spring Moss Wreath