-
Two Year Blogiversary Celebration – Day 3
It’s day 3 of our two year blogiversary celebration and so far we have shared two of our most popular post, Boxes into Baskets and Bed Risers. Today’s featured project is one of my favorites, Personalized Utensil Crock.

This project was super easy and I have treasured having our mom’s chocolate chip cookie recipe right on my counter top. At moments glance, I am filled with amazing memories of my childhood. Is there anything better than that?
If you haven’t yet, don’t forget to enter The Home Depot Challenge Giveaway for your chance to win a $100 gift card to The Home Depot. Check back each day this week to celebrate with us and see more awesome Elizabeth Joan Designs’ projects!
-
Two Year Blogiversary Celebration – Day 2

It is day 2 of our two year blogiversary week and we are so happy you are here! It seems like Elizabeth Joan Designs started just a short time ago, but it is also hard to believe that we’ve met so many amazing friends and accomplished over 300 DIY projects and tutorials! Today, I’m going to share one our favorites with you: finial bedrisers!
We needed more storage space and decided to use deck post finials to give our bed a lift and attempt to toddler proof it a bit.

The bedrisers have been the perfect storage solution for us and have held up great over the past year. They lift everything up just enough for us to be able to store a couple of our paint dipped box baskets underneath.
I’m sad to say though that they didn’t make our bed toddler proof in the way we had hoped. Our son has grown some and now has no issue climbing up. However, he has given them rigorous testing with his many trampoline attempts on the top of the bed. To see how we attached these pretty, yet sturdy feet, check out Raise Your Bed If You’re Sure.
Also, there is still time to enter The Home Depot Challenge Giveaway for your chance to win a $100 gift card to The Home Depot. Check back each day this week to celebrate with us and see more awesome Elizabeth Joan Designs’ projects!
-
Two Year Blogiversary Celebration – Day 1
We are celebrating our two year blogiversary! Can you believe it? Two years! This week we are looking back as some of our favorite and most popular projects. Today, I am sharing one of our most popular with you. Boxes into Baskets.
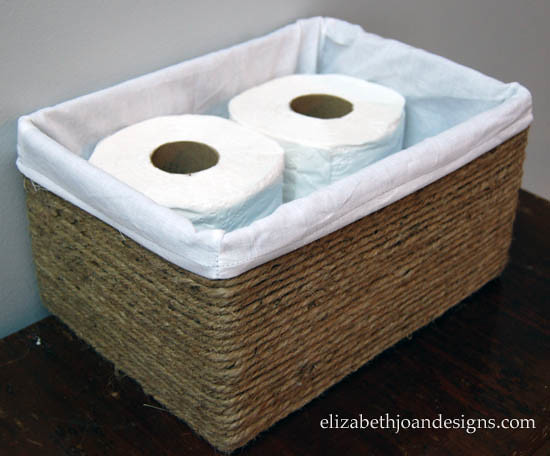
I am using these budget friendly storage solutions in our entryway and in our half bathroom. They have held up amazingly.


You can visit the boxes into baskets original post to see how we made them.
Don’t forget to enter The Home Depot Challenge Giveaway for your chance to win a $100 gift card to The Home Depot. Check back each day this week to celebrate with us and see more awesome Elizabeth Joan Designs’ projects!
-
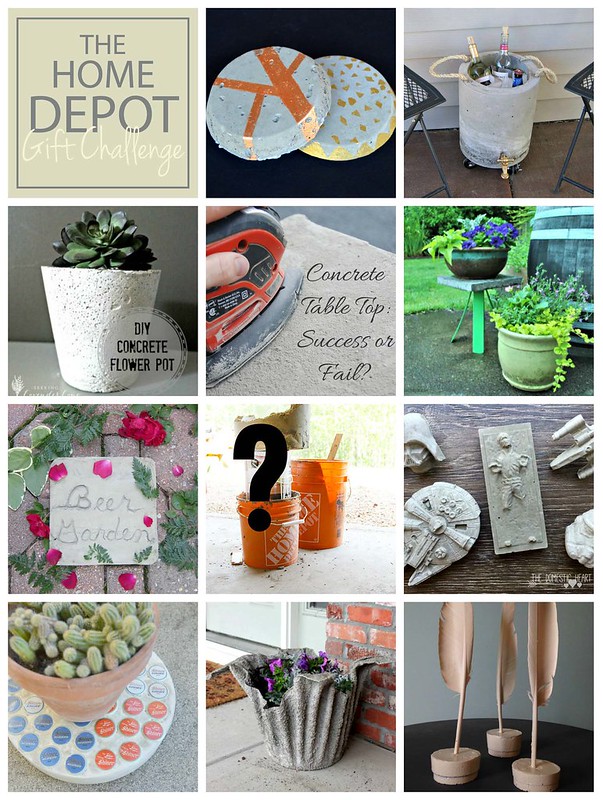
Concrete Table Top – The Home Depot Gift Challenge & Giveaway
It’s monthly challenge time again and boy was this month a challenge! (A few of our past projects were 2 x 4 Wall Art, an Industrial Book Rack, a Wood Box Caddy, and a Pegboard Luminary.) When I first heard that we would be doing projects using concrete for June, I thought “This is going to be easy.” Silly me, I have never even worked with this substance before. I could not have been more wrong about it! My attempt at concreting a table top turned out to be more of a failure rather than a success story.

This challenge is in no way associated with The Home Depot. We just love their stuff!
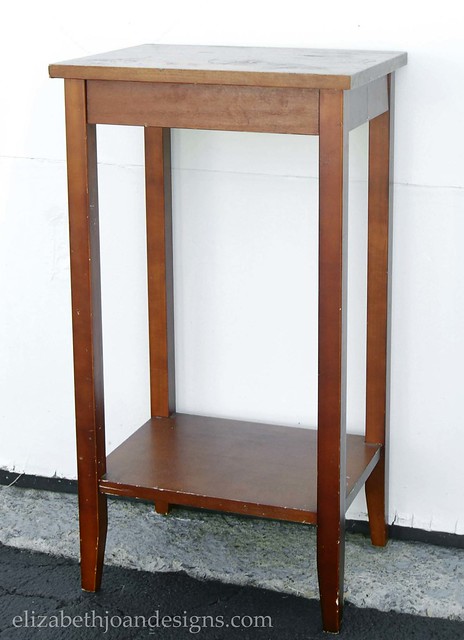
Before any DIY happenings, this is the original table in all of its pre-concrete glory.
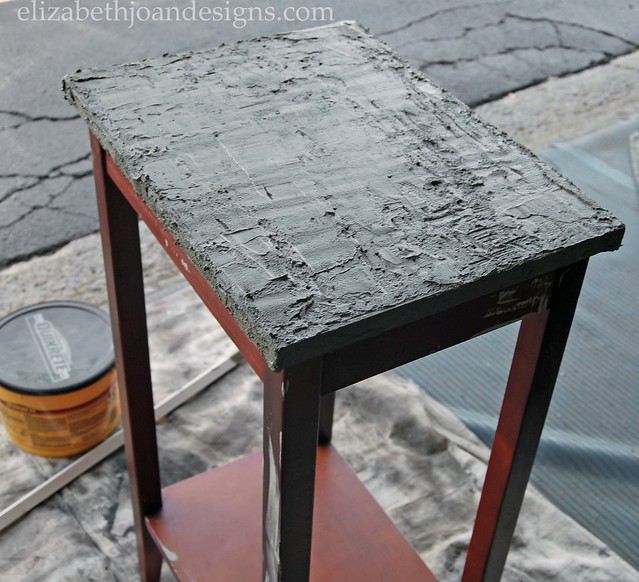
Starting off with full confidence, I mixed up a batch of Quikrete and applied it to the surface.

It went on pretty even. I let it dry a full 24 hours.
Next, I sanded it down to smooth out any bumps.
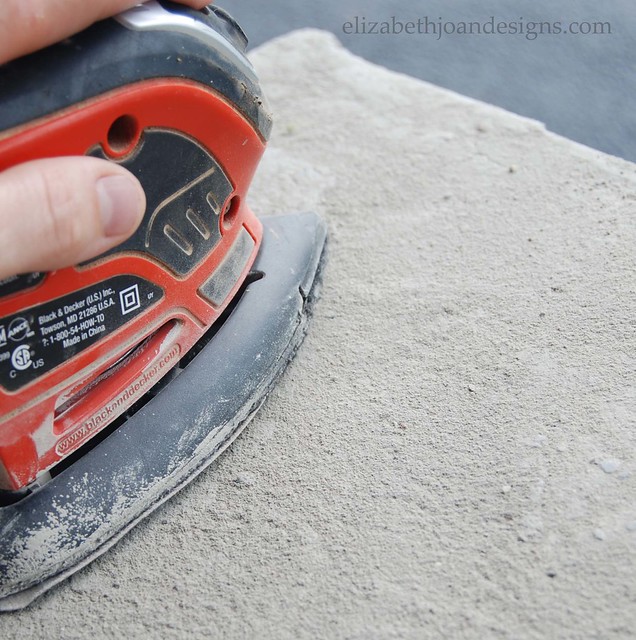
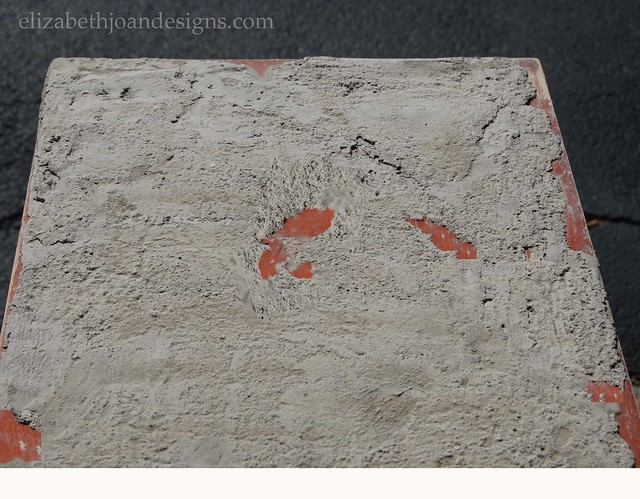
It was looking pretty good until I used the shop vac to suck up the dust. This revealed a few holes in my concrete surface and I noticed the edges were starting to crack too.

I thought, “No big deal. I’ll just patch it with more concrete.” If only is was that easy, the outcome of this project would have been much different.
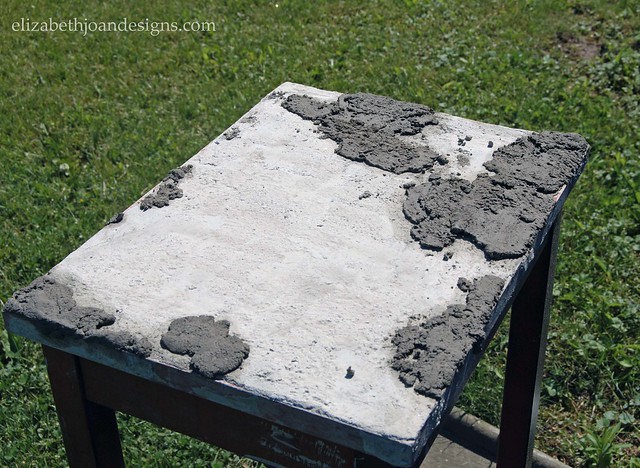
After the patching, I sanded it down again and I had even more holes and cracking.
Well, clearly this wasn’t working! I had to come up with a new plan. So I took some of the concrete mix and stirred it together with some white latex paint. I wasn’t entirely sure what I would be accomplishing with this new concoction. But at this point, what did I have to lose? Also, at some point during this whole process, I had decided to paint the rest of the table white in an attempt to make it more appealing to the eye.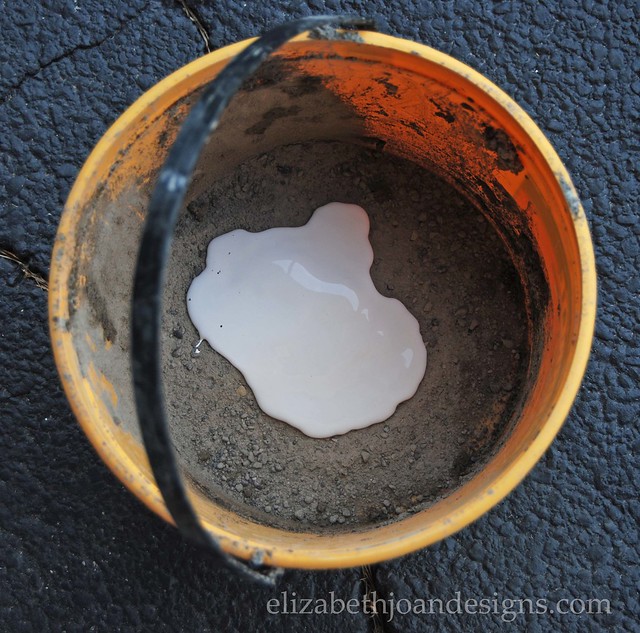
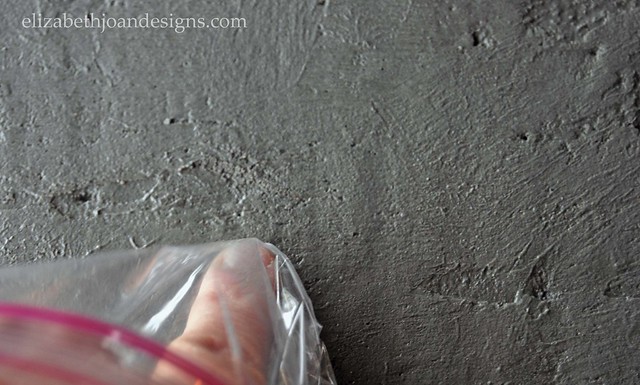
This new substance was pretty pliable. I covered my hand with a plastic bag to help me level it out on the surface.
Finally, when there was just no more time to dedicate to this project, this is what I was left with after it dried. A lumpy, uneven, partially painted table that was extremely top heavy. A Project Fail if I’ve ever seen one!
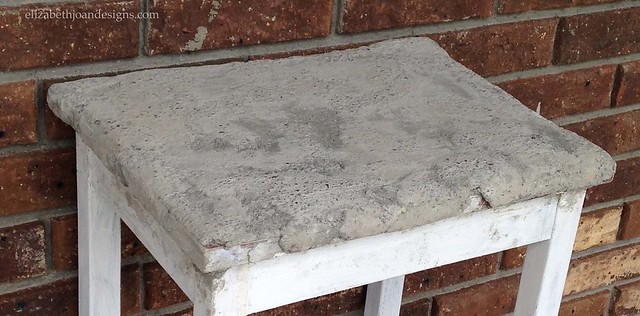
During this entire process, I have really learned so much about working with concrete. And this may sound a touch on the crazy side, but I really do think I could have made this project work. I am hopeful that someday I may find more time to give to this poor little table.
_______________________________ Giveaway Time!_____________________________ Along with this month’s challenge, we are giving away a $100 gift card to The Home Depot! To enter for a chance to win, follow the instructions on the Rafflecopter ballot below. Good Luck!
Now it is time to head on over and check out all of these fun concrete projects! I am betting they had better success this month than I did.