-
Happy New Year & Changes
Hello, Friends and Happy New Year! We hope that you had a magical time during the holidays! For me, the break has been so wonderful and it has been great to spend more quality time with the kids and hubby. We’ve played tons of games, done Christmas crafts, went to see the Nutcracker, visited the zoo to see the Christmas lights, and of course spent lots of time with family and friends!

But now it is back to reality. The kids started back to school yesterday and I’ve been tweaking some blog stuff here and there. You may have noticed the mini “blog makeover” going on. Since it is a new year, we’ve decided it was time for a new look. It is such a process, but hopefully everything will be back to normal working order soon!

In other blog news, we’ve decided to shift gears slightly. Don’t worry. We will still continue to bring you plenty of fun DIY, decor, and craft projects. But we have felt that there was maybe a little something missing. What’s that you ask? Well, it’s personal. Literally. We thought it was time to welcome you into our lives and share a little more of the personal details. Don’t be scared. It’s not anything too crazy.

We are so glad you stopped by! Check back later this week for an update from Emily too!
___________________________________________________________________________ Have you downloaded your free 2016 Calendar and Planners?

-
We Are Grateful
Where has the year gone? I can’t believe that it is already November, the month of gratitude, but I’m excited for all of the family time we will be getting in the upcoming month. Emily and I are both thankful for all of our amazing readers who’ve welcomed us on this blogging journey. Your support keeps us going and we thank you for that!
I’ve seen friends on Facebook posting things that they are thankful for each day and know that there are gazillion crafts out there in the blog-o-sphere relating to gratitude, so I figured that I would share how our family is expressing our thankfulness this year for all of the wonderful things in our lives.

Let’s call it the Grateful Frame. It’s basically just a cheap, white Ikea frame with the glass removed. I put in a piece of Kraft paper and then added the letters, which I printed on cardstock and then cut out. Also, some decorative washi tape makes the edges of the frame pop a little.

The concept is really pretty simple. When one of us thinks of something we are grateful for, we can write it on the paper, creating a fun, interactive family art piece. There is no time limit on when we need to write something. It can be every ten minutes or every other day, whenever we feel like it. I like that there aren’t any restrictions (besides maybe not writing on the frame itself) and even our two year old can add his grateful little doodles.
(Our daughter writing “family” below.)
Right now it is pretty bare, but I plan on sharing it all filled up once the month is over on Instagram. (Follow me @erinejd.)

How are you showing your gratitude this month??
-
Two Sisters. Bad Photos.
As Emily mentioned in her post last week, we got to see each other for the first time since we’ve started working on this blog back in June. (I believe it was actually on our family vacation to the Smoky Mountains in May, that we finalized our plans to give this dual blogging gig a go.) You may have noticed the photo of us over there on the side bar, and I must admit, it is a bit dated. Like several years ago. We live almost 400 miles apart, so grabbing a quick pic is not something we can do any ol’ afternoon. So, we made plans to take a better and updated version when we met up.
What we did not do, was plan on the days going so fast, my speed light breaking, or our children being needy. Because what child actually needs their parents? Certainly not mine. I usually like to just give them some matches and knives and let them have at it. Just kidding.
Anyway, by the time we were both free enough to pose for a pic, we were both slap happy, the lighting was horrible, the camera battery was dead and neither one of my children were sleeping. (Extra points to Em, whose children had passed out earlier.) So we had to resort to blurry selfies on the iPhone, which are totally not blog profile worthy. However, they are totally great for this post of “what not to do when you want a good photo for your blog.”
This pixel-y shot may possibly be the best and was taken by my daughter. We hate it. (That’s Emily on the left and me on the right, in case you didn’t know who was who already.)


We know that these photos are by no means professional or serious, but we figured they would help give a little bit of a view into our personalities and lives. And how we act when we’re way over tired. Plus, as an added bonus, they were totally DIYed. We wouldn’t want to stray from the norm too much. *Wink* Now back to our regularly scheduled programming.

-
Here’s Your Sign
Four years ago, my parents moved into the house that had belonged to my grandparents. A woods in the back and several interesting old farm buildings, along with the house, make up this beautiful property they are on.
After moving in, there was one building that was particularly aged and needed a little updating; the machine shed. This old building was there when my grandparents bought the house and my grandfather used this barn for storing his tractors. Last summer, the ancient wood siding was torn off and replaced.
I think my parents may check out our blog quite frequently and know what kinda of DIY projects Erin and I are up to. Lucky for us, they decided to save some of the siding and doors back for us.
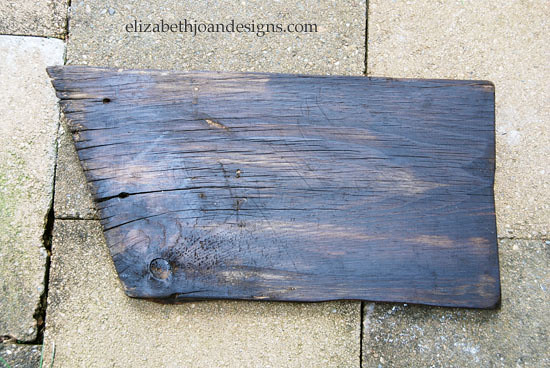
Of the boards I have, I found the shape of this piece extremely interesting and decided to create a sign out of it for our kitchen. By the way, Erin said she didn’t think this wasn’t interesting at all. Although, she did find the final product to be up to her standards.

Once I had chosen the location for my sign, I realized it needed to be a little smaller. Using the miter saw, I cut a smidgen off the bottom and side.

To keep the weathered looked consistent, I sanded and hammered the blunt edges I had just cut.

The sign was stained with Minwax Special Walnut. The porous wood soaked up more of the stain than I anticipated. Oops! Should have known!
To remove a bit of the dark coloring, I sanded the entire piece down.
Next, I painted the letters on using the same technique Erin used {here}. I don’t always have a real steady hand when painting, but I was okay with the hand written look.
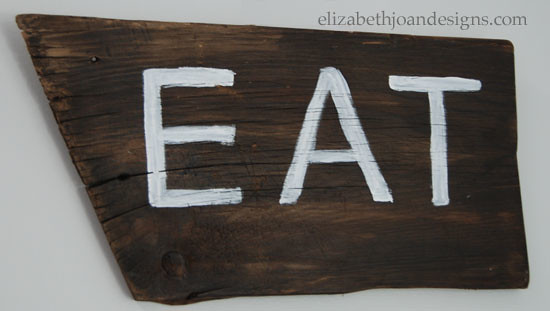
Then, the letters were sanded down to let some of the wood show through. Finally, using a hot glue gun, I tacked down a piece of jute to the back and hung the sign from the wall.

It’s so nice to have something in our home with special meaning. Every time I look at it I will think of my parents and grandparents. Oh, and to eat.
