-
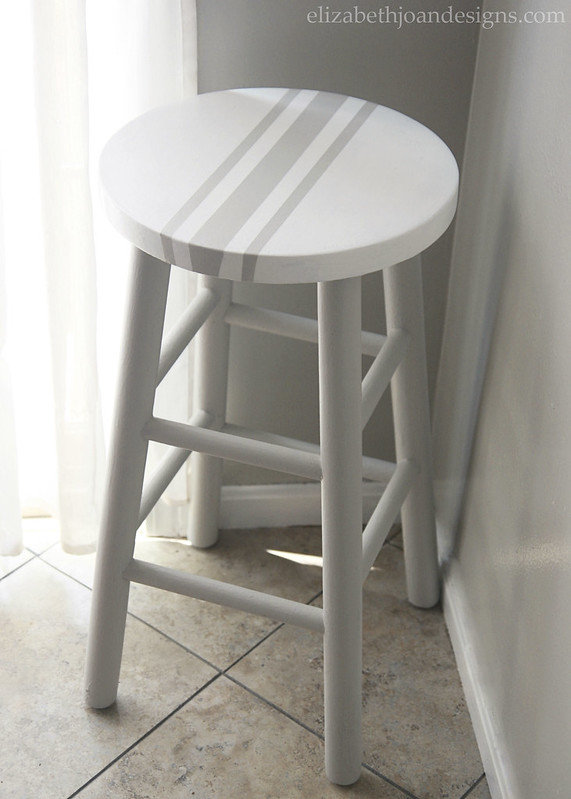
Painted Grain Sack Stripe Bar Stool
We’ve had quite a few projects that we’ve done in the past which started out as side of the road finds. So, when Emily brought me an ugly old stool, I could have just told her to take it back to where it came from, but we could both see that it had potential. And after a little brainstorming, I decided to gussy it up as a painted grain sack stripe bar stool.
As you can see below, this little seat was pretty freaky looking. I’m not quite sure what the previous owner had planned for it, but it had obviously gone terribly wrong, hence it’s curbside location.

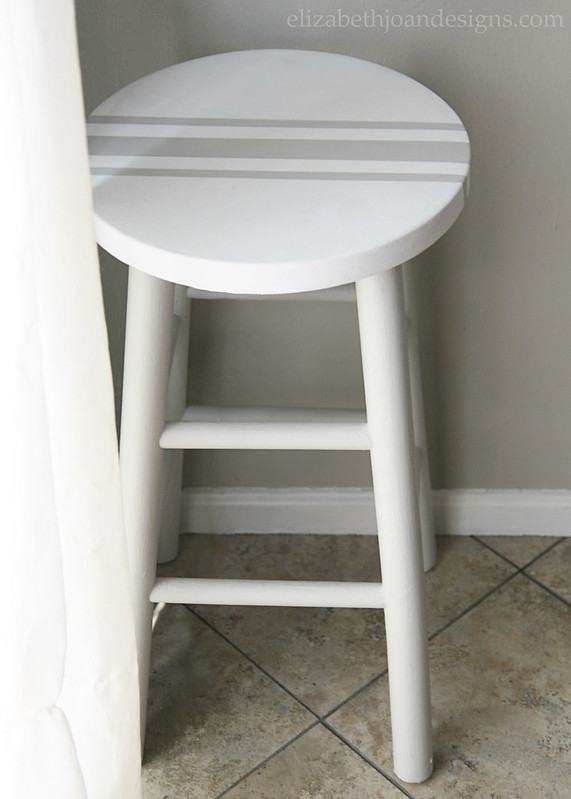
So, I grabbed some paint and got to work. For the legs, rungs and stripes, I used the color Stonington Gray by Benjamin Moore and the top got a couple of coats of Super White.

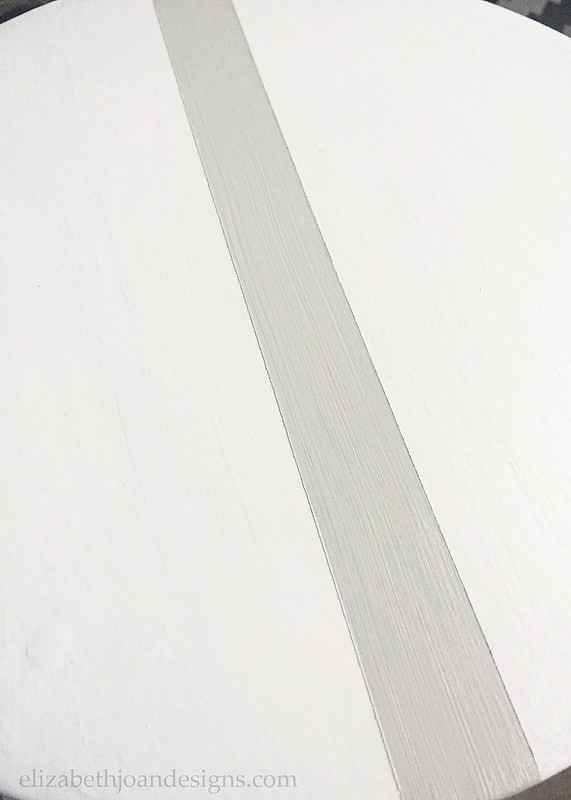
To make the stripes, I used Frog Tape. I started with the middle stripe, sort of eyeballing the width that I wanted, and taped it off. (TIP: To get uber clean lines, run a damp paper towel over the edges of the tape before painting. Remove the tape after painting, but before the paint dries.) Once the middle stripe was dry, I spaced and taped the outer stripes and painted those as well.
Behold: The power of paint! Doesn’t it look a million times better??
Since we do not have any sort of bar type counters in our kitchen, I needed to figure out another use for this cute stool. I contemplated using it as a plant stand or cutting the legs some to create a small end table, but then another need came to mind. If you’ve been following along on Instagram (Erin’s Instagram/Emily’s Instagram), you’ve probably met our sweet kitty Rowan. He has been a wonderful addition to our family, but he has gained a few habits that I’m not totally crazy about.
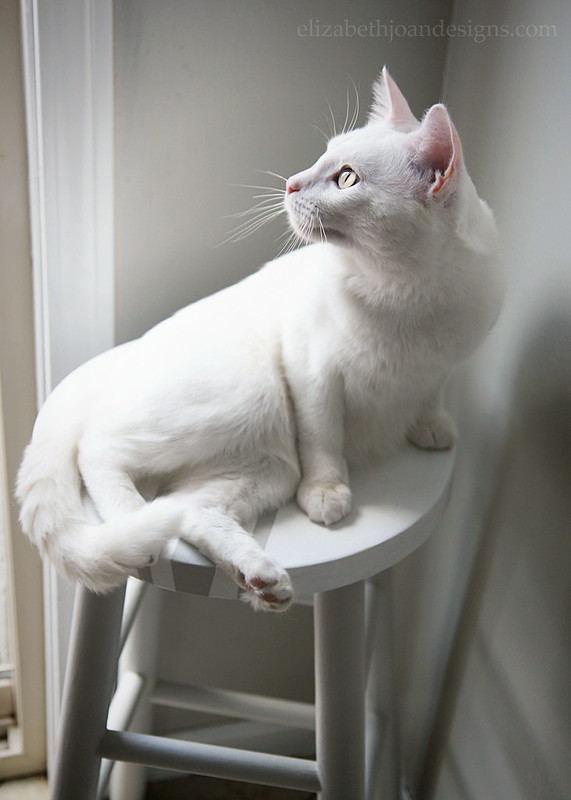
Like most cats, he loves to be up high so that he can see out of the windows and watch the birds and squirrels and one of his favorite places to do this is on our breakfast nook table. Eww. To say that I’m not a fan of his table preferences is an understatement. So I decided to add this stool to the corner of our breakfast nook and try to train him to use it instead of the table for his aviary observances. And it worked! His table time has been dramatically cut down and he loves to sit (and sleep!) on his little perch.

Doesn’t he look cute up there on his little stool? This was such a fun before and after transformation because it was quick, drastic and helpful for our kitty situation. Plus, having some cat furniture in the house that isn’t a complete eyesore is always a win. What do you think? Do you have any furniture transformations that also function as something for your pets? Let us know in the comments below!
-
Childhood Dresser Makeovers
I am here today to tell you the story of my husband’s childhood dresser makeovers.That’s right, two times this dresser has received new looks. This furniture piece has moved to many apartments, across the country and back again, and into our home together. We decided that this storage item would make a great addition to our son’s bedroom. The only problem was that it didn’t match our decor plans for the room. So, me being the DIYer I am, I gave it a well deserved makeover.
From Wood to White:
The dresser started out with a dark wood stain. It just didn’t fit into the visual of our baby boy’s nursery of blue and white.
*This post contains affiliate links.(Please excuse the bad photography here. This was before I took the Shoot Fly Shoot Photography class. FYI: This class really is amazing!)
So, I primed it and gave it several coats of white paint. I also updated the chunky hardware to these basic silver pulls.

I absolutely loved this dresser white. So clean looking.
But as any DIYer can tell you, sometimes you just need to change things up.
From White to Gray:
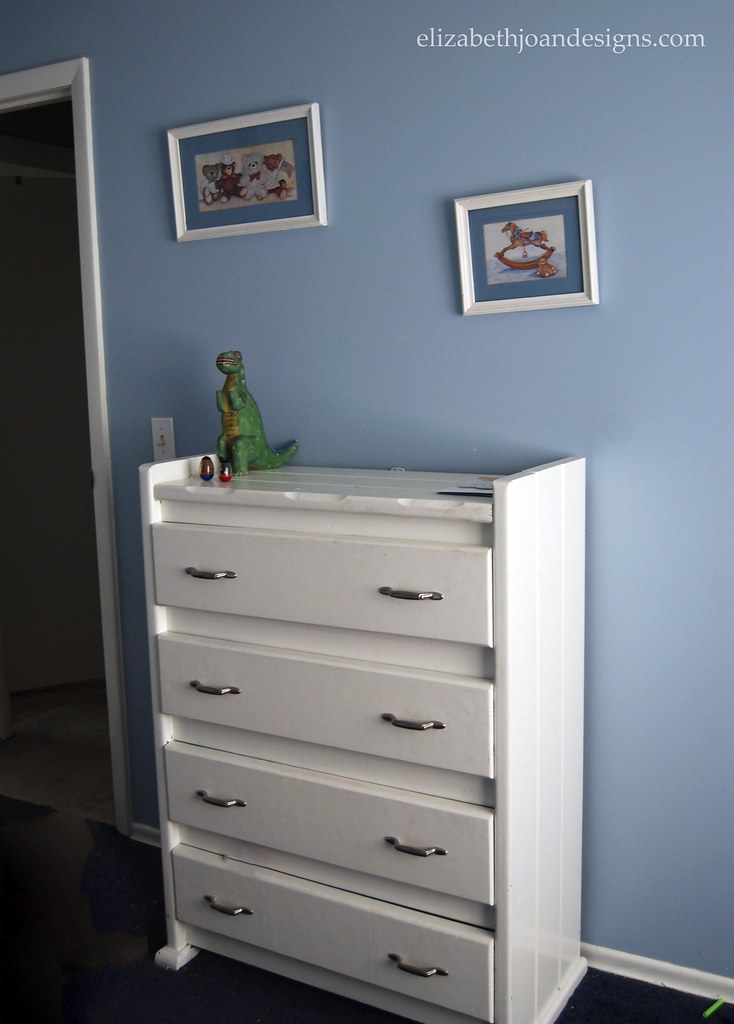
As our son is getting older, he has been wanting a “big boy” room. (This is the vintage airplane themed room I have been working on.) Our color scheme has changed again and it was time to repaint the dresser.
I mixed up some of my own gray-blue chalkboard paint and got to work.

After two coats, it had a new look. We doodled on it with some chalk then wiped our drawings away.The chalkboard paint gives it an old kinda beat up look.

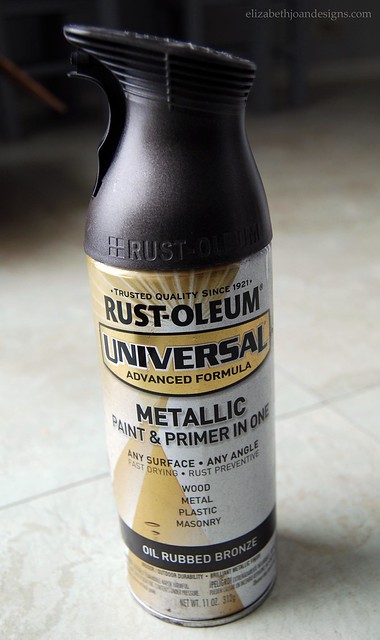
For this makeover, I spray painted the hardware with Rust-Oleum Oil Rubbed Bronze Paint and Primer.

It amazes me that one piece can have so many different looks.

We would love to hear your thoughts! Are you a fan of the clean white? The vintage gray? Or maybe you prefer the original stain. Leave us a comment and let us know!
_____________________________________________ You may also like:

Pinky’s Painted Desk 
Desk Makeover 
Vintage School Desk Makeover 
Mouse Trap Photo Holder -
14 Amazing Outdoor Pallet Projects
DIY Outdoor Pallet Bar from Restless Arrow

How to Make a Pallet Garden for Small Spaces from Dwelling in Happiness

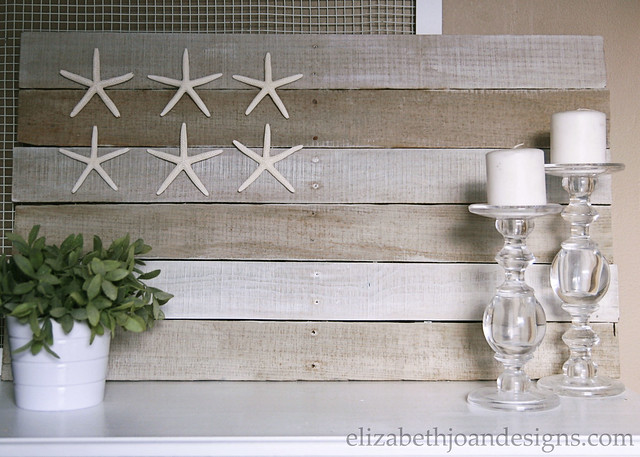
Neutral Coastal Pallet Flag from Elizabeth Joan Designs
Backyard Pallet Sand Table from Prodigal Pieces

Bike Storage Rack from Our Taylor Life

How to Make a Work Bench Out of Pallets from Little House of Four

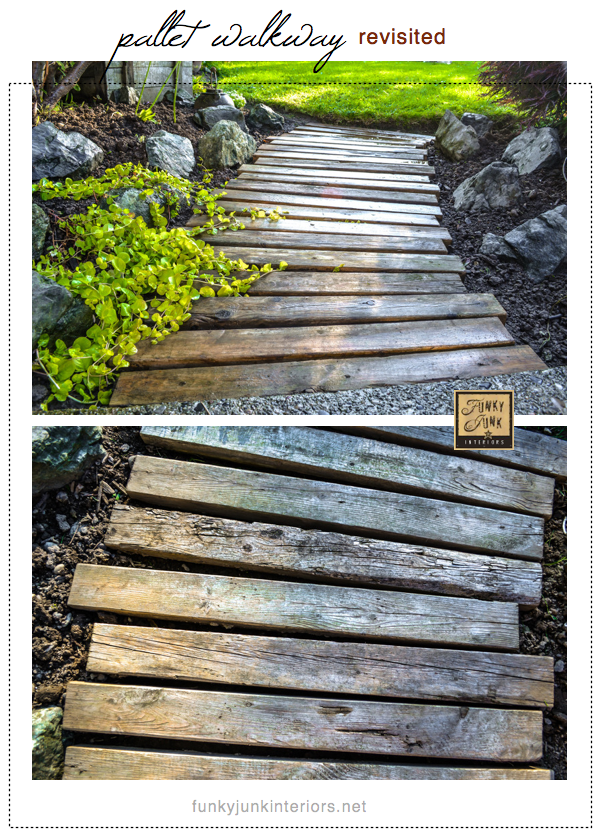
Wooden Pallet Walkway from Funky Junk Interiors
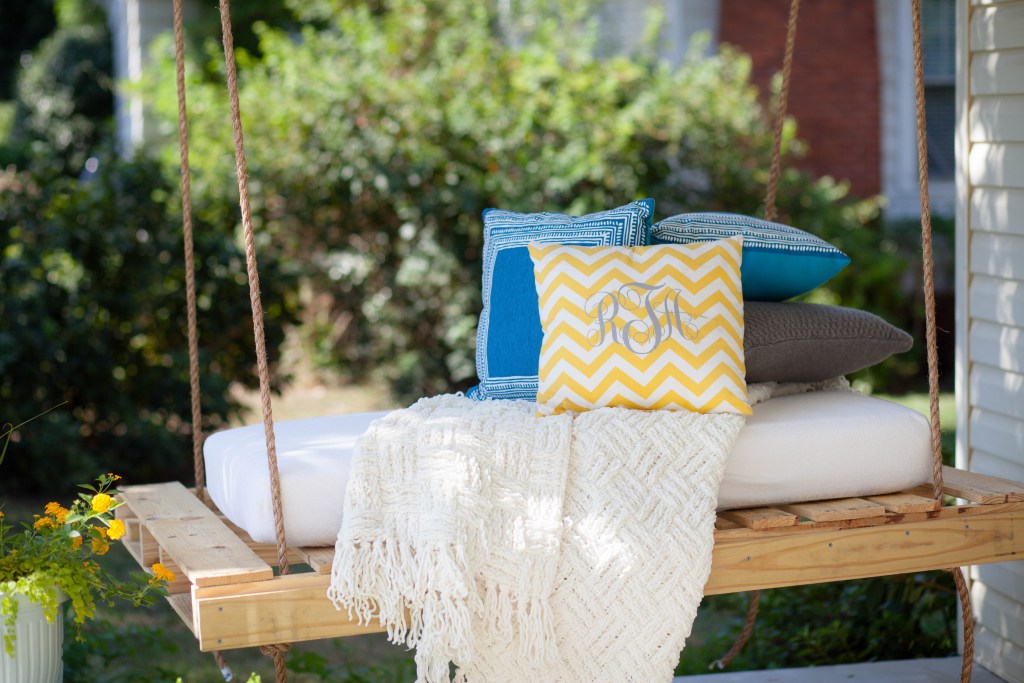
DIY Bed Swing from Restless Arrow
DIY Pallet Gardening Table from Jenna Burger

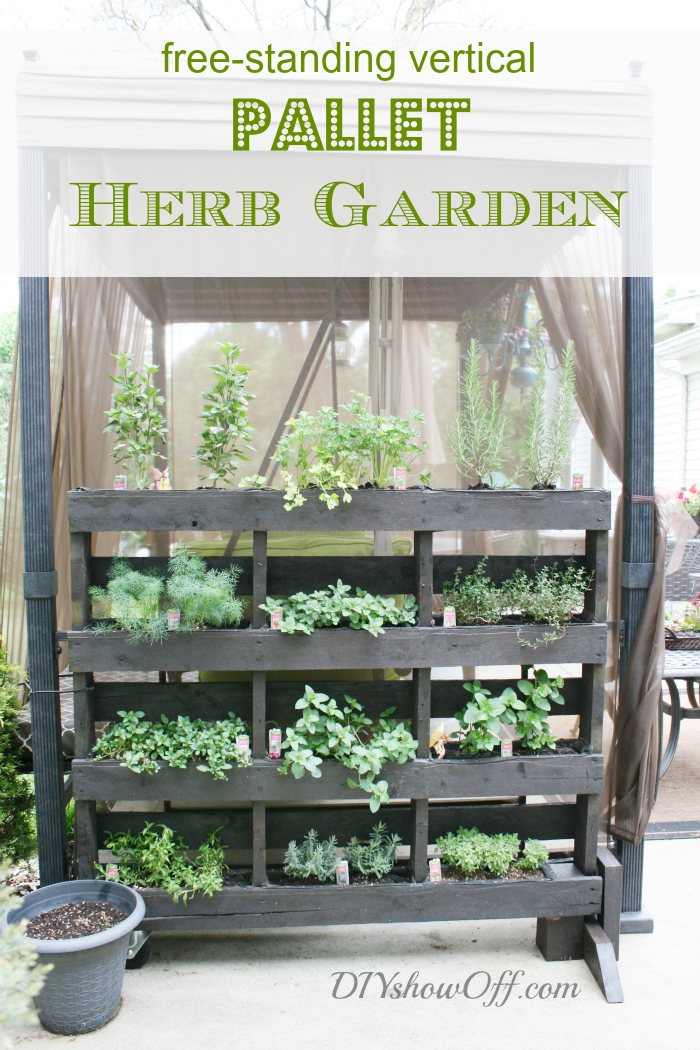
Free Standing Pallet Herb Garden from DIY Showoff
Pallet Picket Fence from Designed on Sunshine

Pallet Coffee Table from Elizabeth Joan Designs

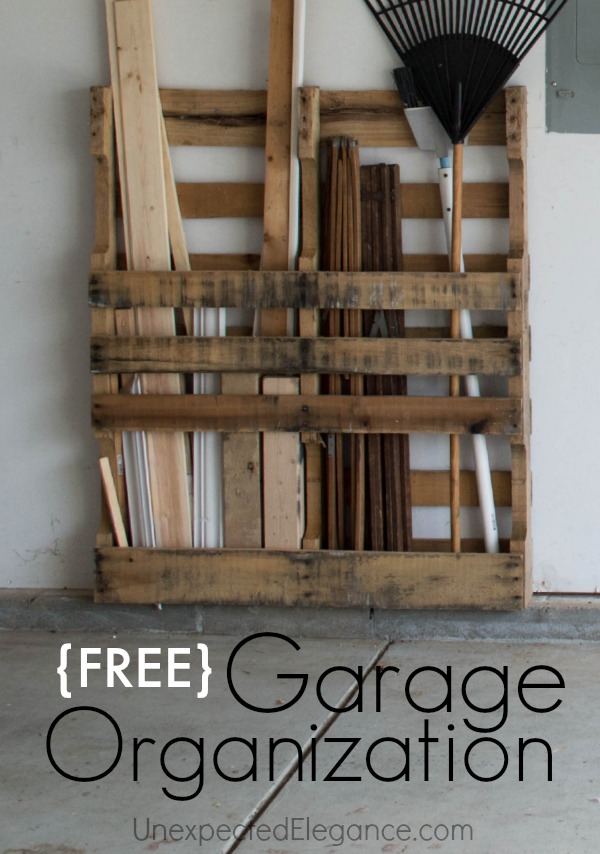
Free Garage Storage from Unexpected Elegance
Colorful Wood Pallet Garden Bench from Our House, Now a Home

_____________________________________________ You may also like:

15 Furniture Transformations 
Reclaimed Wood Fence Headboard 
Mouse Trap Photo Holder -
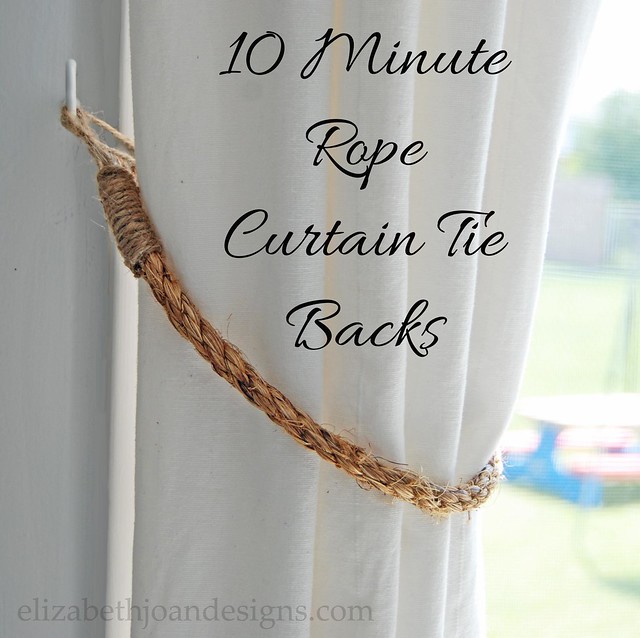
10 Minute Rope Curtain Ties
Rope is the item for The Home Depot Gift Challenge this month. (In previously months, our projects have been 2 x 4 Wall Art, an Industrial Book Rack, a Wood Box Caddy, and a Pegboard Luminary.) These 10 minute rope curtain ties are a prime example of being struck by an amazing idea and then you come to find out everyone and their brother was hit with the same one. Oh well. I decided to share it anyways, because it is that awesome. I guess it’s true great minds think alike, just ask Pinterest.

This challenge is in no way associated with The Home Depot. We just love their stuff!
Here’s how I made mine.
Supplies
Rope
Twine
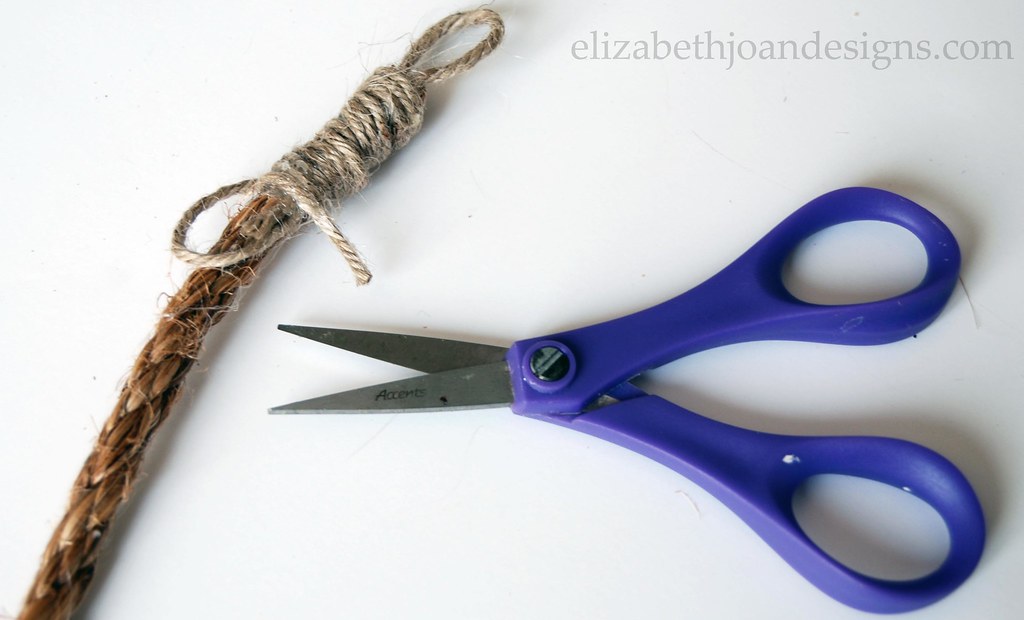
Scissors
Hot glue gun and glue sticks
Hooks- I used 1 1/4″ mug hooks
My hands (If only I had a couple more, this project would have been a lot easier.)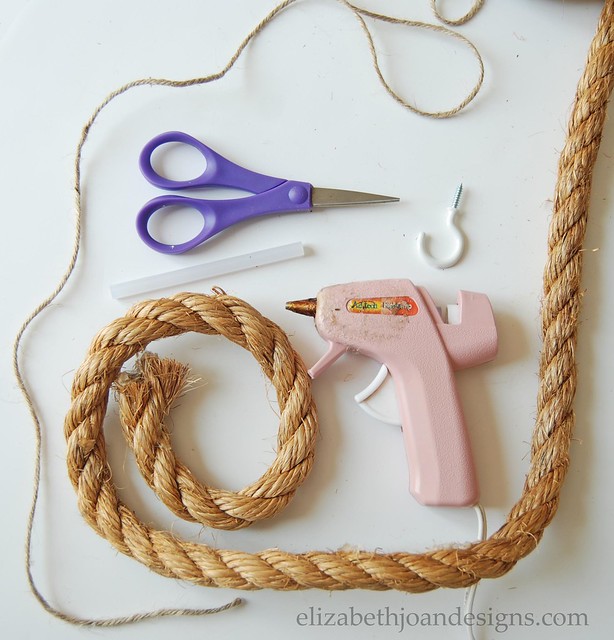
First, I unwound the rope into smaller sections. I thought the rope as a whole might be too thick for a tie.
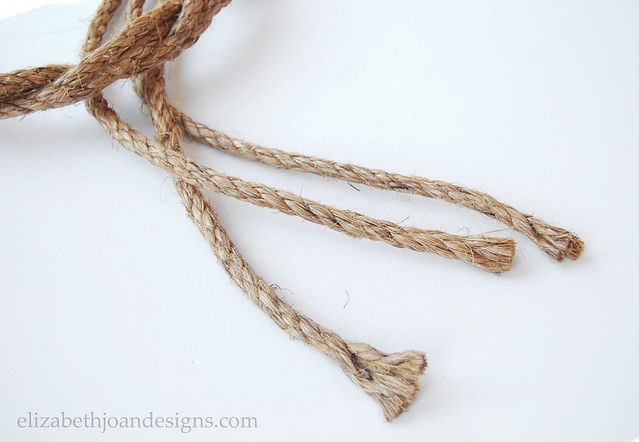
Next , I cut a section of the rope into an 18″ long strip.
Then, with the twine I created a loop and hot glued it to the sides of the rope.
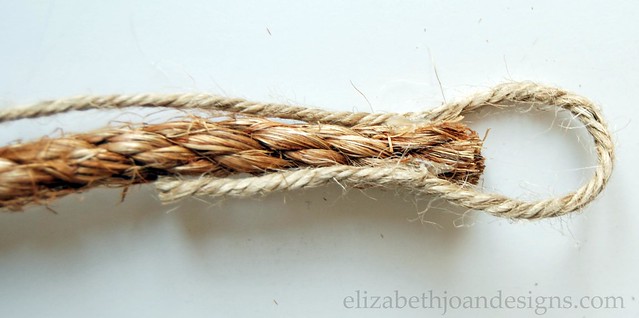
After that, I looped the twine again so the end of it was at the top of the rope. I wound the twin down the rope about 1 1/2″ gluing some along the way.

I cut off any excess string and smoothed the ends down with hot glue.
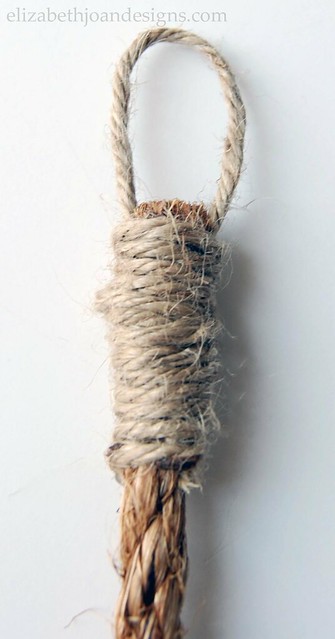
Then, I repeated each step until I had completed both ends of the curtain tie.
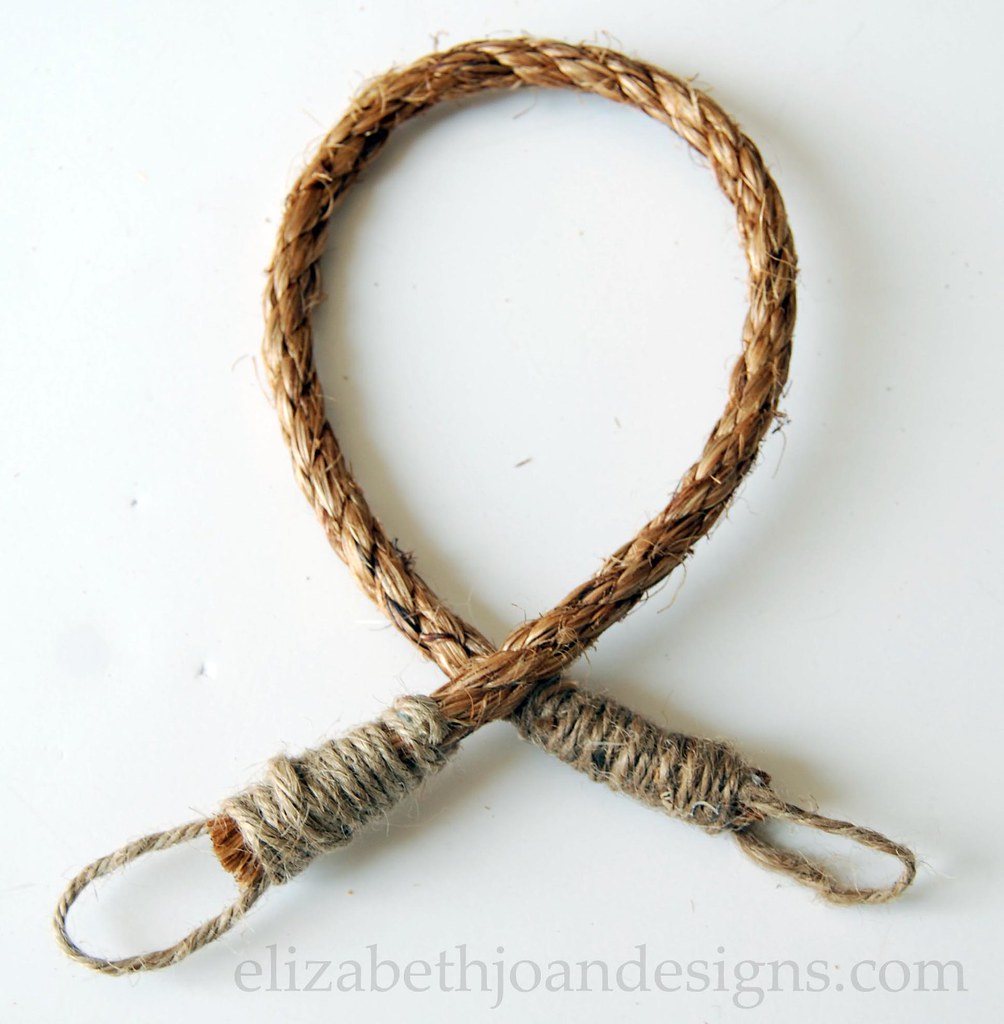
Finally, I attached the hook to the wall and tied up my curtain.
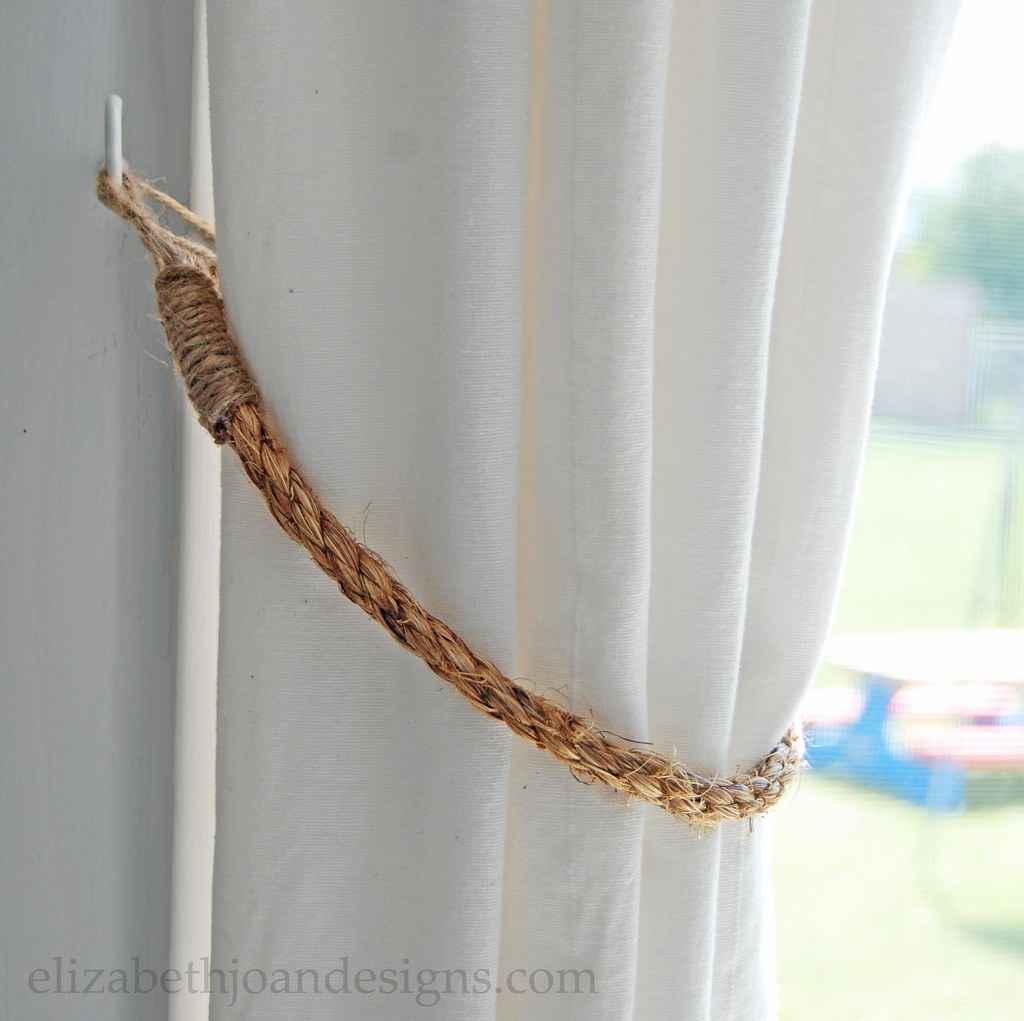
I really love how simple and budget friendly this project is. I spent less than $5 total for 2 curtain ties. Yay! I may just have to make more of these for other rooms in our home too.
Now it is time to check out these other amazing rope projects!