-
Concrete-Esque Planter
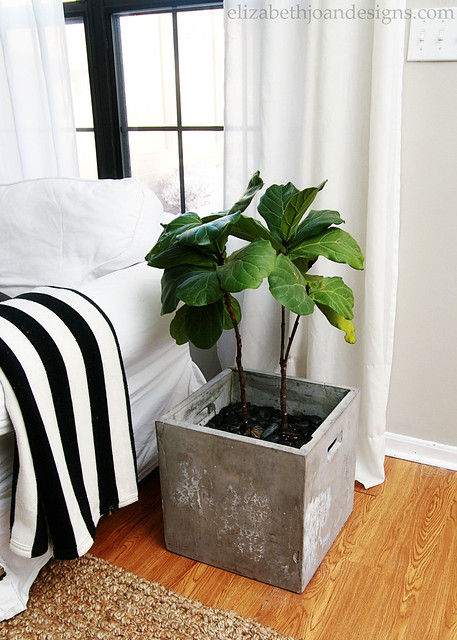
OK. I admit it. Sometimes I drive behind furniture and decor stores and look to see if they have any goodies hanging out next their trash bins. Weird? Maybe. But every once in awhile, I see something cool. Like this awesome concrete-esque planter. Of course, I had to grab it.
When I brought the planter home, I immediately went online and attempted to look it up on the store’s website. Unfortunately, I couldn’t find anything listed regarding this particular piece, probably because it had been discontinued. However, after doing a Google image search I found out that it wasn’t even a planter at all, but some sort of storage stool. Interesting, but whatever.
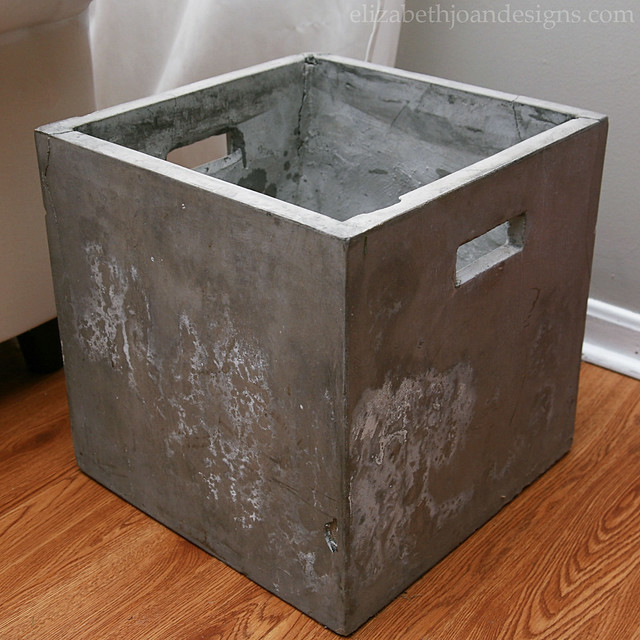
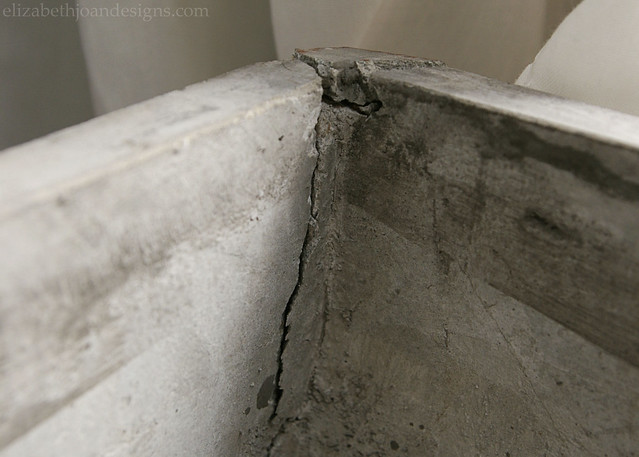
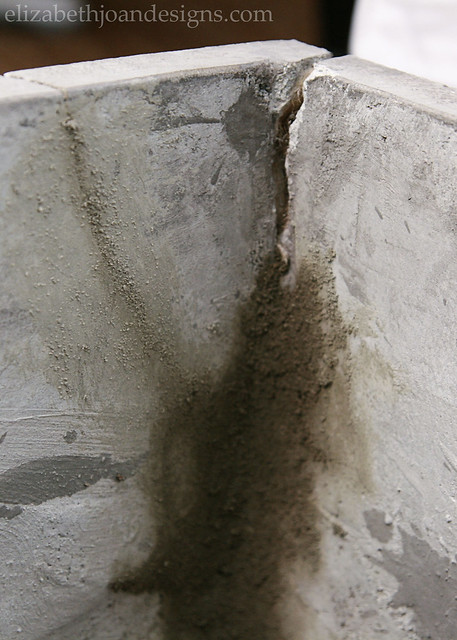
It had a lot of cracks in it, as you can see. And a cat too! Oh wait, that is just Rowan helping with me. He does that sometimes.

Since I still planned on using it as a planter, I wanted to make sure to fill the cracks in a bit to deter dirt and water from leaking out.
My hubby brought home concrete mix for me and I got to work stirring it up with some water.
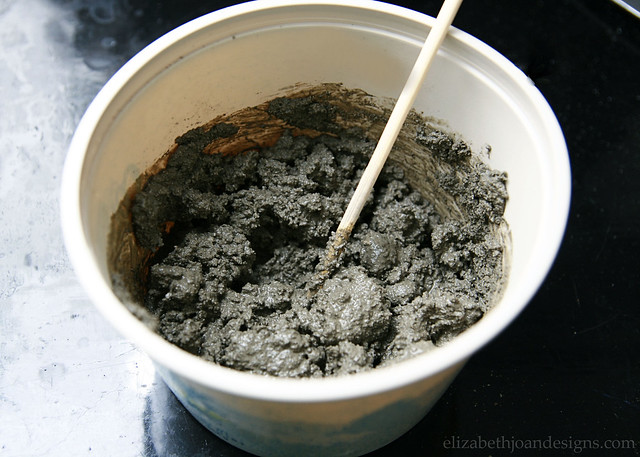
Using disposable gloves, I applied a layer of wet concrete to the cracks on the inside of the planter. I left the outside of the cracks alone, since I wasn’t sure how well it would match the existing color and texture.
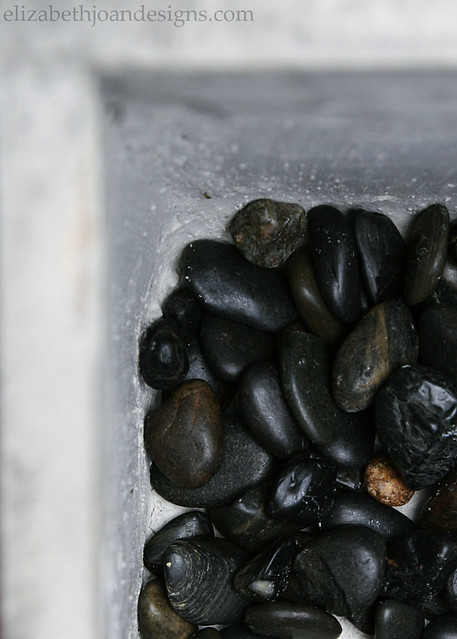
Once the concrete patches were dry, I added a few packages of river rocks (from the dollar store) to the bottom of the planter for drainage.
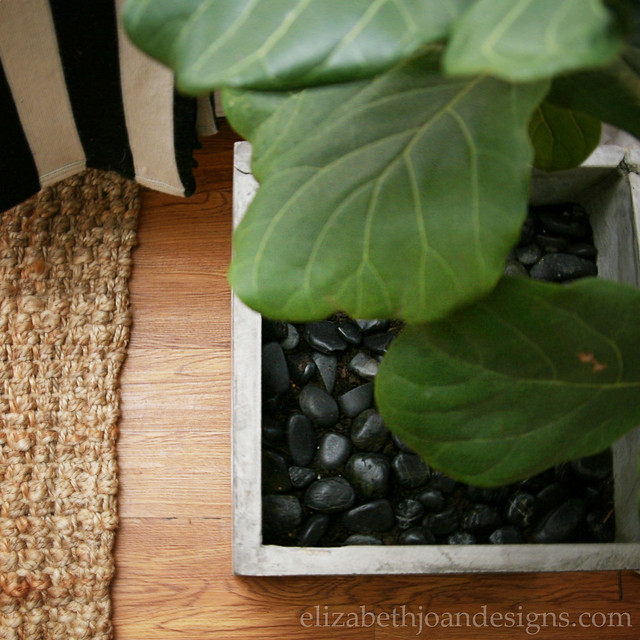
Finally, I added some dirt and my trusty Fiddle Leaf Fig Tree. To keep this Rowan proof, I added an extra layer of river rocks to the top of the planter too. This keeps mischievous kitties from digging in the dirt and using it as an extra litter box.
Doesn’t this planter look great?
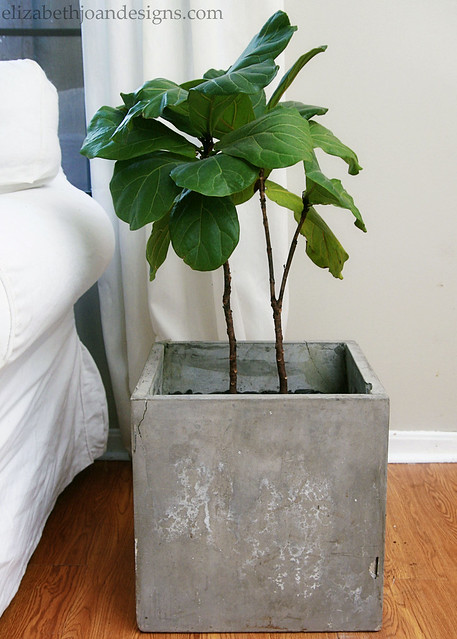
I love the character that the cracks add and we hope that this holds up and allows our pretty plant to grow bigger and stronger!
-
Favorite Painting Tools & Supplies
Between Emily and I, there is a lot of DIY going on in each of our homes. One of our favorite ways to fix something up and make it our own is to slap a little paint onto it. So, it is only natural that after completing a bunch of projects, we have both found a few go-to items. Here is a list of our favorite painting tools & supplies that we love to use.

No. 1 – Benjamin Moore Paint
– One of our most favorite paint brands is Benjamin Moore. We love how these paint colors look in different lighting and have not come across one that we’ve used our homes and didn’t like. Great for walls, trim and furniture.
No. 2 – Dollar Tree Paint Brushes – We like to use these brushes for stain and oil based paint projects because they are so inexpensive and if you don’t want to spend time trying to clean them up, you can just throw them out.
No. 3 – Zinsser Oil Based Primer
– This primer is the bomb. It sticks to pretty much any kind of surface and creates a wonderful base for paint to stick to.
No. 4 – Black & Decker Mouse Detail Sander
– Power, precision and smoothness all packed into a tiny little sander. Who could ask for more?
No. 5 – Purdy Cub Angled Paint Brush
– This may just be the best brush ever! It is so perfect for cutting in and works great when trying to paint smalls spaces or decorative molding.
No. 6 – Minwax Wood Finish (Special Walnut)
– If you are looking for a great stain that is not too warm or cool in color and covers pretty evenly, this is the stuff.
No. 7 – Rustoleum Universal Metallic (Oil Rubbed Bronze)
– This spray paint gets a huge amount of use from both of us. We’ve used it on door handles, curtain rods, table legs and even a light fixture. (Tutorial to come soon!)
No. 8 – Restoration Hardware Paint – We are also obsessed with Restoration Hardware paint because their velvety colors look good in pretty much any room of the house.
This post contains affiliate links.
_____________________________________________________________________________ You may also like:

Mason Jar Paint Storage 
Removing Oil Based Paint & Primer 
Tips For Mixing Paint -
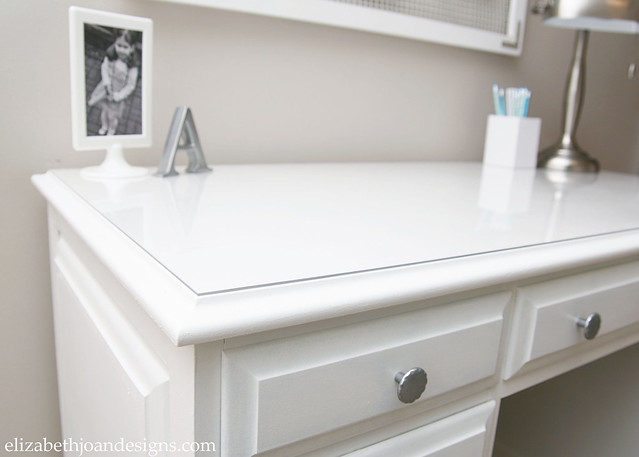
Pinky’s Painted Desk
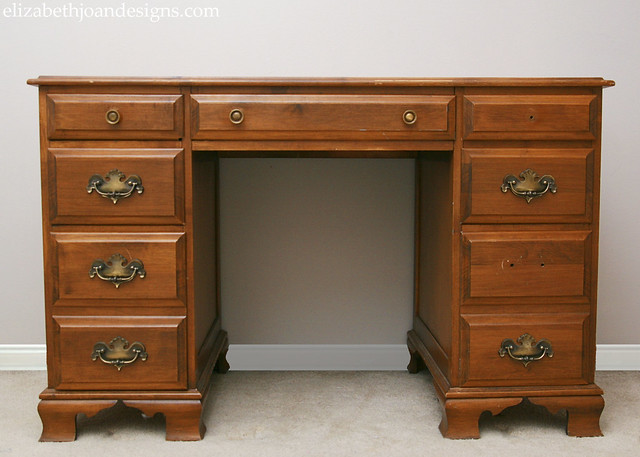
One of the items on our to-do list for 2015 is to work on our kids’ rooms. Our daughter, Pinky, is going from a little girl to a tween, so her room needs a little updating in the form of functional furniture and decor. Luckily, her space is in pretty reasonable shape and she has inherited my Mom’s childhood dresser and a painted desk (pictured below.)
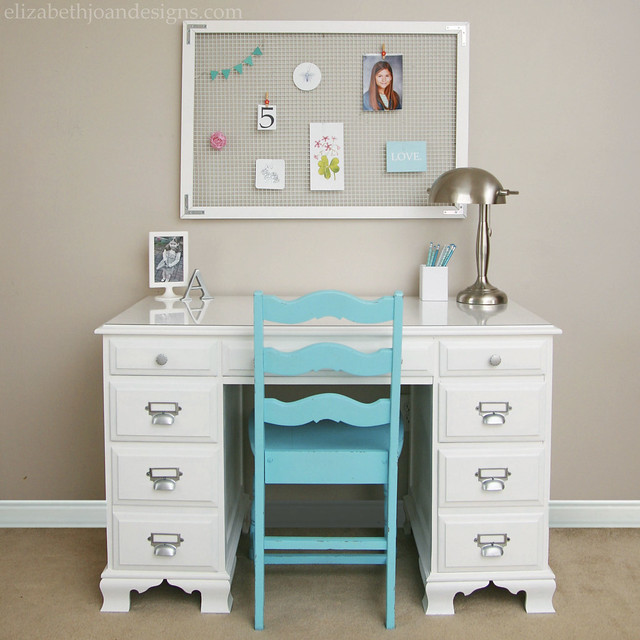
This post contains affiliate links. Click here to view my full disclosure. We got the desk for the amazing price of $FREE.
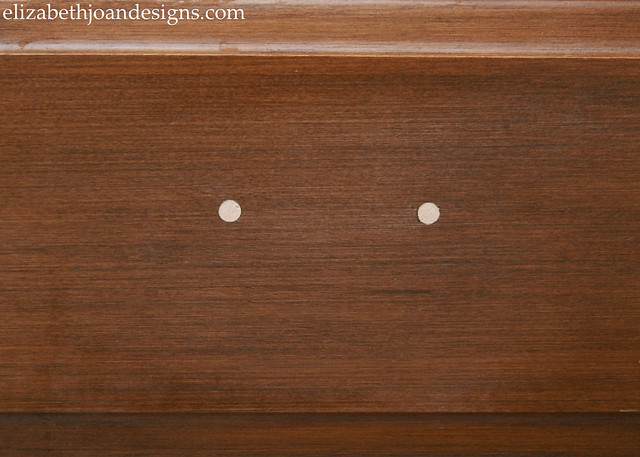
Hey, I can’t pass up a good deal and the previous owner was just going to throw it away! It was in pretty good condition, minus a few drawer pulls, but we knew we wanted to give it a little pizazz to make it work with the other furniture pieces in Pinky’s room. Plus, it has plenty of drawers, which is great for storing diaries, loom bands, and random love letters, I’m guessing.
The entire desk received several coats of primer and paint (Behr Premium Plus Ultra Interior Semigloss Enamel in Polar Bear) applied with a sponge roller. I also used a paint brush to get in a few nooks and crannies, but I like the smooth look the roller delivers, plus it makes everything more time efficient. Bonus! 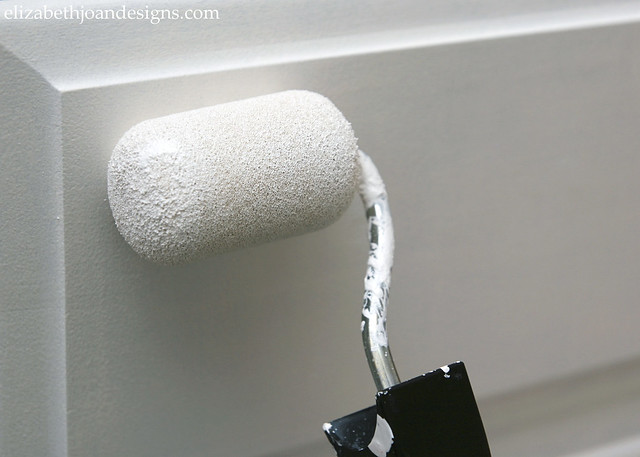


-
Thank You Cards and Resolutions
The holidays are over and if you have not already taken down your decorations, I’m sure it is on your to-do list, along with thank you cards and resolutions. Our family was sick with some sort of stomach bug during/after Christmas, so even though we had the best intentions of getting a lot accomplished at the beginning of the new year, things were pushed to the back burner.
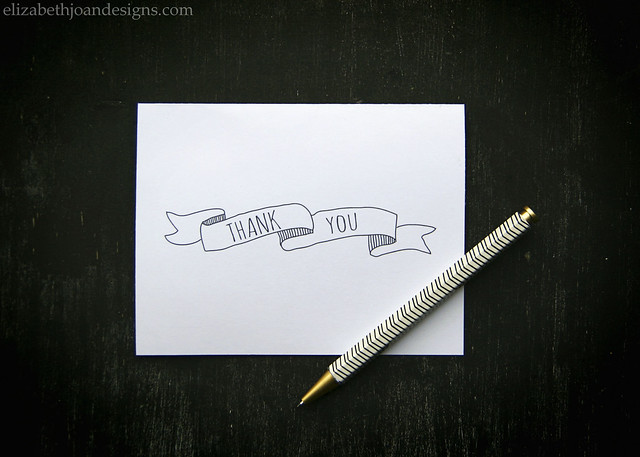
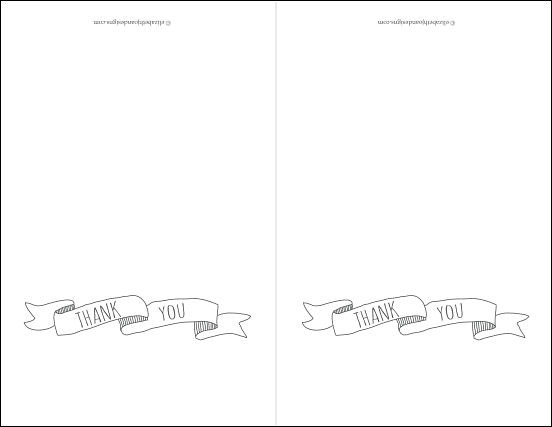
For example, I had intended to get thank you cards written up and sent out for all of the amazing gifts our family received, but that hasn’t happened yet. So, in the name of procrastination, I whipped up some thank you cards. Aren’t they cute?
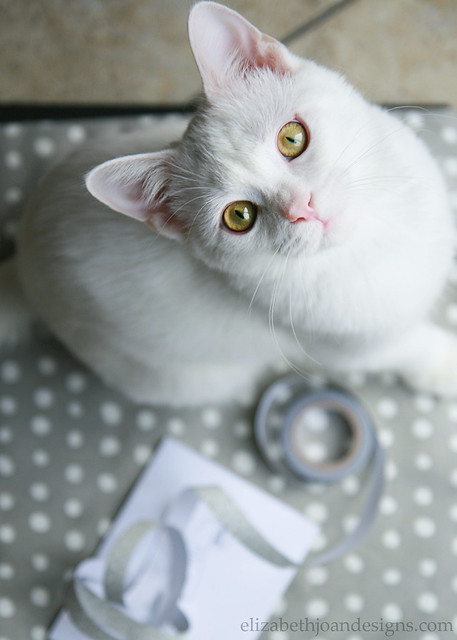
I had some “help” getting my cards ready. This is Rowan, our snugly kitty, who sometimes makes appearances on Instagram. (Erin’s Instagram/ Emily’s Instagram) He really isn’t that great at preparing stationary (Shhh, don’t tell him I said that), but I like to indulge his passion for paper products and embellishments from time to time.
These cards are bi-fold, so you can write on the inside and they should fit well in standard invitation envelopes. If you haven’t already sent out thank you cards for the holidays or you know you will be needing some in the future, we would love to share this fun design with you. Hopefully the people who will be receiving them from us will be understanding of the delay. Maybe my New Year’s resolution should be to stop procrastinating? Nah, maybe next year.
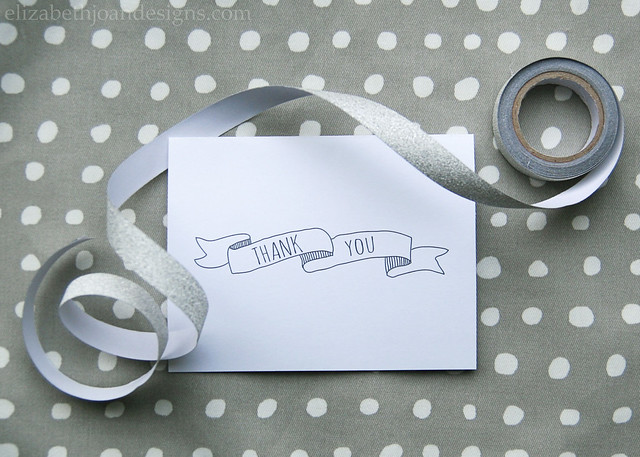
All of our printables are currently FREE for download for personal use only. However, this is subject to change in the future, so snag them at no cost while you still can! (View Terms of Use.)
Click the image below for the free PDF link. Please download the file and open with Adobe Reader to ensure proper print sizing. When printing, make sure that Page Scaling is set to “None.”
________________________________________________________________ You may also like:

Weekly Calendars 
2015 Printable Calendar 
Spring Cleaning Checklist 
Thank You Cards