-
Baby Boy Farmhouse Nursery
Happy 2018, Friends! You may have missed the arrival of our little bundle earlier last month. (January 12th to be exact!) Our little guy came a few months early at only 29 weeks and is currently hanging out in the NICU while he grows and his lungs get a bit stronger. Since we weren’t quite expecting him to make his debut so soon, we hadn’t made any progress on what would be our baby boy farmhouse nursery!

This post contains affiliate links. Click here to read my full disclosure.
As you may know, the Country House isn’t a mansion. With only 3 bedrooms (all occupied) we were stumped as to where we would put the newest addition. Of course, he could share a room with one of his siblings, but since they are both a bit older and need to get a good nights sleep for school, we were hoping for a more private spot for the little guy. At least for the baby/toddler phase.
After some brainstorming, we decided to transform the walk-in closet in our bedroom into a tiny nursery. Fancy, huh?
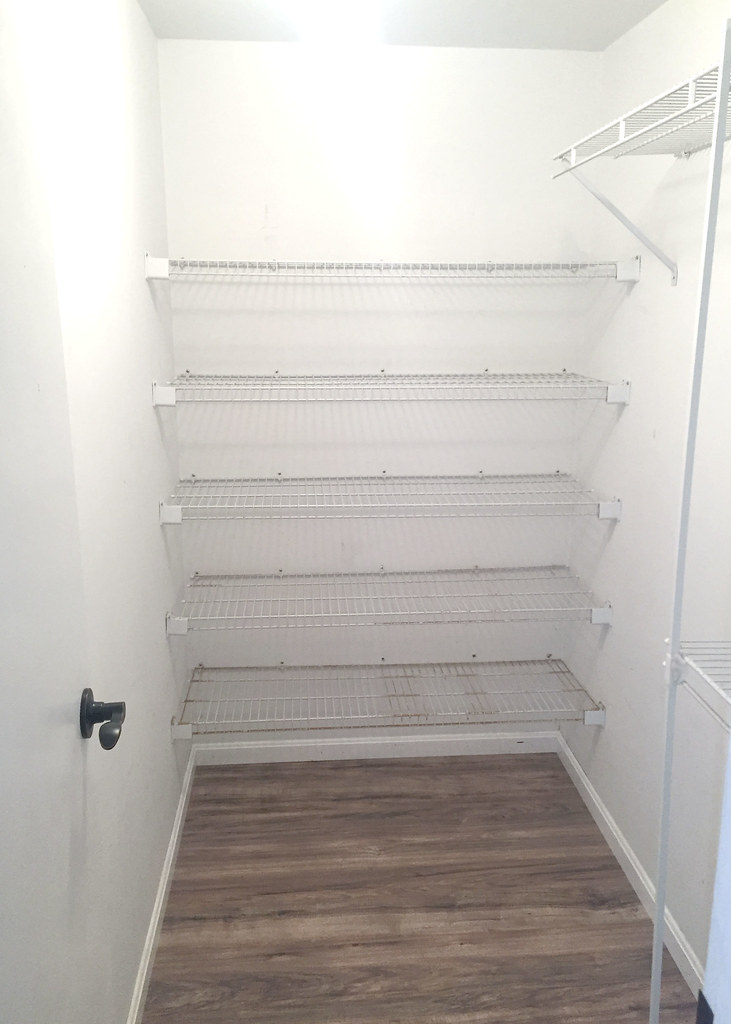
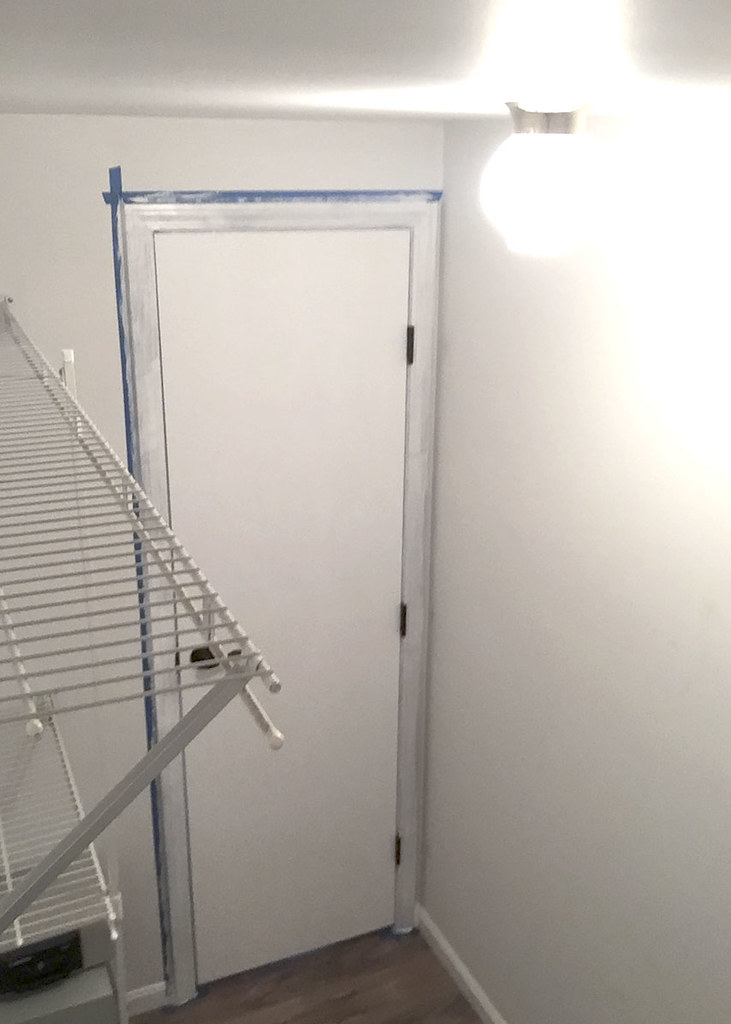
The
closetroom is pretty tiny, so there won’t be a ton of space, but we are working with what we’ve got. So far, we’ve been able to move things around and relocate our clothing/shoes/etc. to another closet just outside of our bedroom. It is now time to really get working on converting this into a livable bedroom for our little guy, hopefully before he comes home from the hospital!Here’s the mood board I whipped up for inspiration…

Light | Flooring | Animal Prints | Olive Topiary |Ruler – DIY | Mini Crib | Little Man Pillow | Rug
I’m excited to get working on this little room and if we are lucky, we will be able to get this pulled together sooner rather than later. Wish us luck!
Follow along with me on Instagram/Facebook to keep up with the latest!
-
$100 Room Challenge – Master Bedroom Final Reveal
A couple of months ago, I decided to take part in the $100 Room Challenge by redoing our master bedroom on a tight budget. To say that I dropped the ball on that is partially true. Yes, I took a super long blog/social media break (more on that in the next week), but we did actually finish the makeover back in August. Anyway, I’m here to share our Master Bedroom Final Reveal!

Some affiliate links are included below for convenience. Click here to read my full disclosure.
Doing a room makeover on a tight budget of just $100 can get pretty tricky.

We only made a couple of purchases for this space before all of our money was totally eaten up! So we had to come up with some creative ways to update this room using items we already owned!
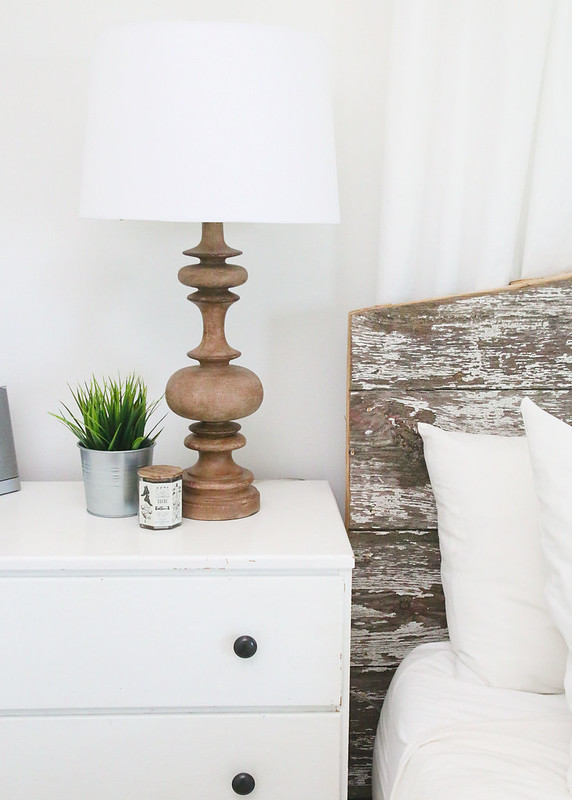
All of the money in our budget went towards these pretty turned wood lamp bases and shades, which we picked up from Target. Even though they were on sale (36.09 each for the bases and 18.99 each for the shades), we still went slightly over $100 when it all totaled up. However, I really like the look of the lamps and how they bring in some warmth to the stark white of the room, so it was definitely worth it!

In my last post about this room, I shared how my hubby and I fashioned this DIY barn wood headboard. It is so cool to have such a sentimental piece (the wood is actually an old barn door from my grandparents’ house)!
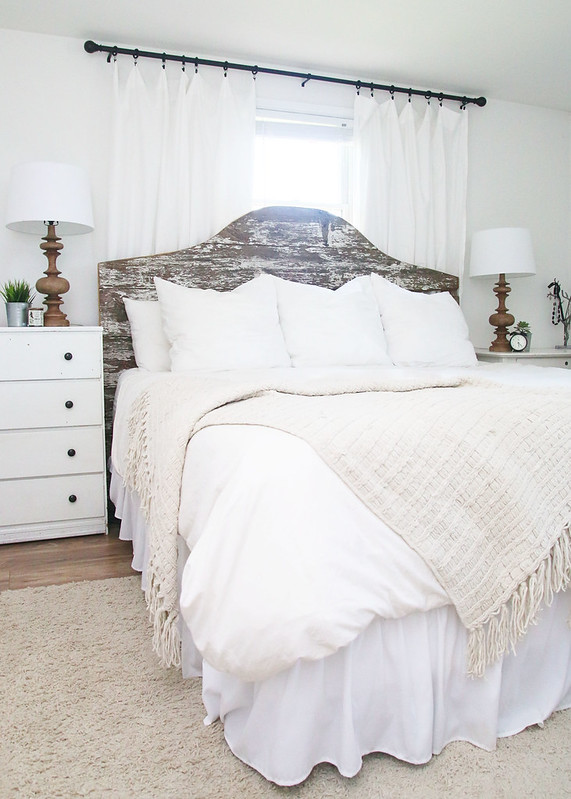
Also, on this side of the room, we updated the knobs on the left dresser/nightstand with a little Oil Rubbed Bronze spray paint. A few accessories from other parts of the house were also pulled in to help the space look more finished. Oh, and I can’t forget the addition of a dust ruffle to hide all of the items stored under our bed.
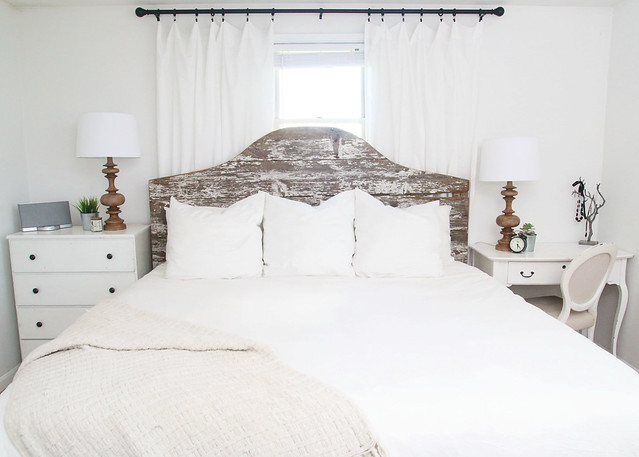
On the other side of the room, we really made an impact with paint! Lucky for us, there was plenty of leftover white paint from previous projects, so that did not affect our budget at all.
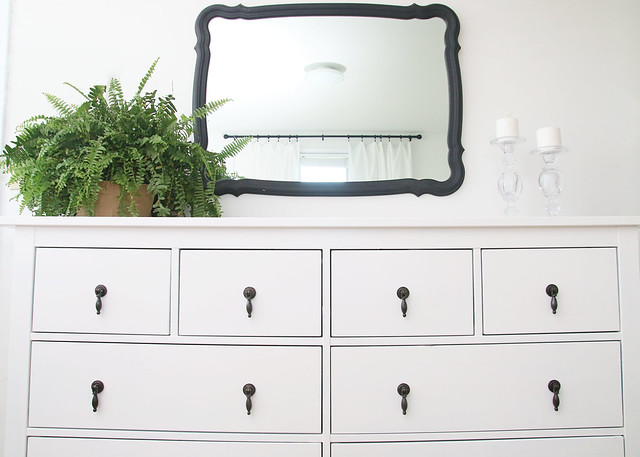
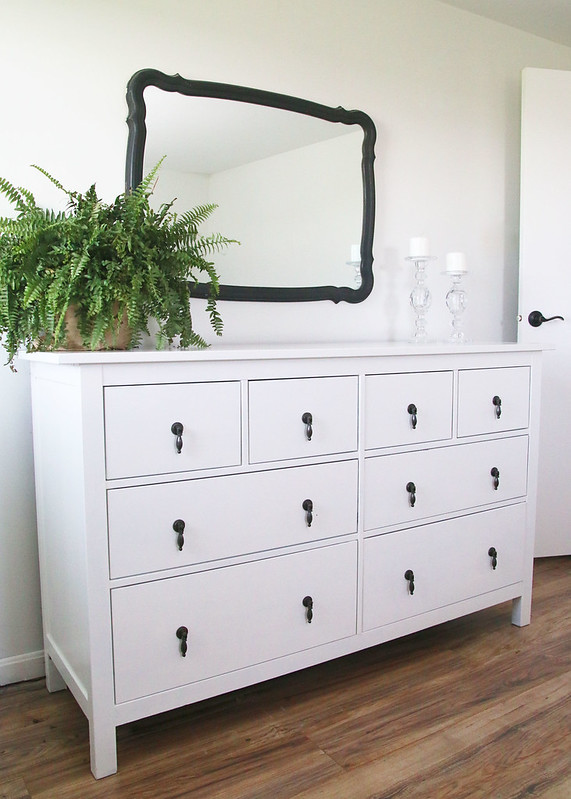
The white dresser fits this room so much better and those drop pull knobs now pop against the white backdrop.
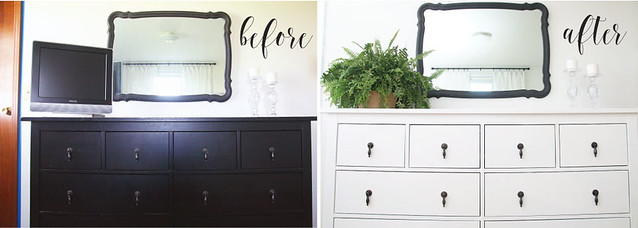
After removing the old tv and sending it to live in storage, it was time to bring in a few accessories to this space. To keep things simple and add a bit of color, I grabbed one of my ferns from the front porch. Yes, the scale is a bit off, but I didn’t want to clutter the dresser with knick-knacks. Plus, we already owned the fern, so it was a freebie addition to the bedroom.
I also chose to keep the spindle glass candlesticks because I liked how they emulated the lamps at the opposite end of the room. This is a lesson in working with what you’ve got!

Let’s check back on the to-do list to see how we did!
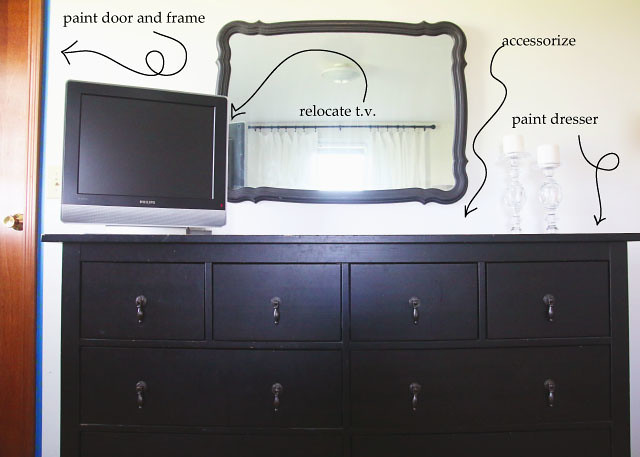
Buy/Replace the lampsDIY a headboard for the bedAdd a few accessories to each side tablePut on the bed skirt that we’ve been too lazy/busy to addIron the duvet cover (also laziness)Paint the doors/frames (window frames are already painted)Relocate the TVAccessorize the dresserPaint the dresser
Yay! It looks like we were able to complete everything on the list and stayed pretty close to our $100 budget. (It came it at roughly $110 and change.)

How do you think we did? Would you have taken a chance and spent all of your budget on just a couple of lamps? Or would you put your money to use on something different to makeover this space? I would love to hear your thoughts!
-
$100 Room Challenge Week 2 -Modern Farmhouse Master Bedroom
So, I have decided to again join my friend, Erin, from Lemons, Lavender, and Laundry for her $100 Room Challenge. I’ve tackled this challenge once before when we gave our bathroom an overhaul on a budget. This time, we are attempting to revamp our bedroom using the same small budget, but hopefully making a big impact. We’re also working against time since I’m joining up at the end of week 2. EEK!
Here is my long term plan for our Modern Farmhouse Master Bedroom.
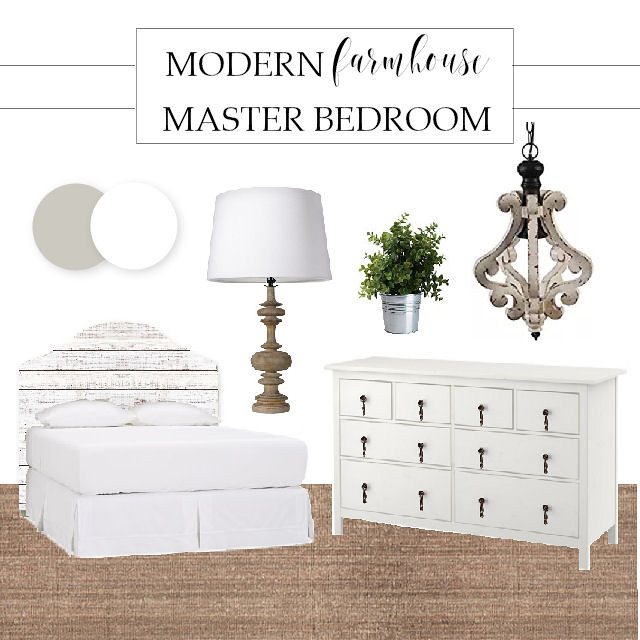
Now, of course, a full room makeover could end up costing us quite a bit of money. (Way over the $100 limit!) Especially if we purchased all of the items in the mood board above. So we are going to have to pick and choose which items to purchase, which projects can be DIYed, and what will have to wait until a later date.
Doesn’t our bedroom look kind of meh?
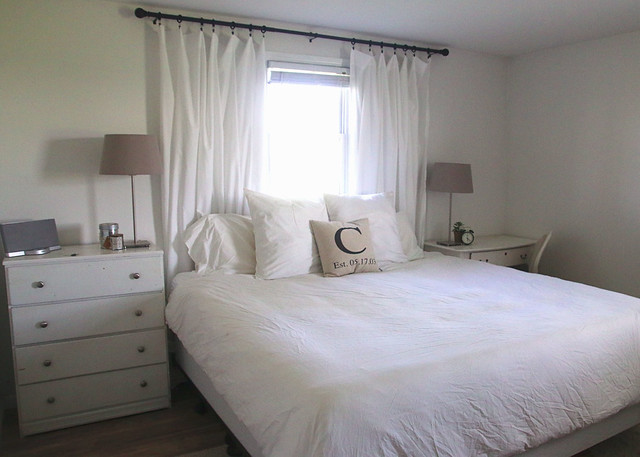
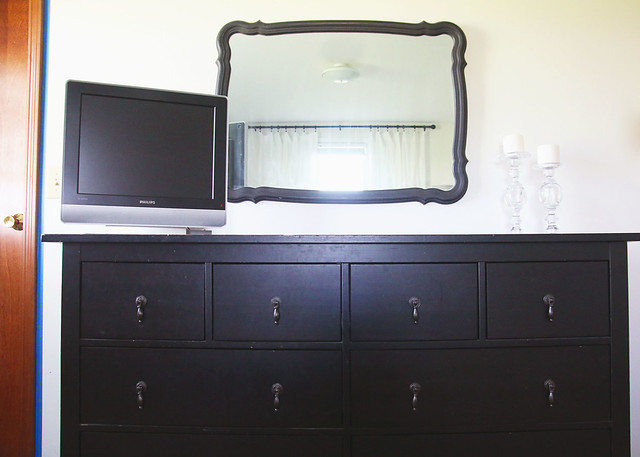
Yes, of course, everything consists of neutral colors, but each side of the room is the polar opposite of the other with bright whites/creams at one end and a black hole on the other.
I don’t know about you, but it seems like our bedroom is always put to the bottom of the list when we are working on projects, storage, and cleaning. Seriously, it is the place where stuff comes to die, especially when we are trying to speed clean before company! So we thought this would be the perfect opportunity to spruce things up just for the Mr. and Mrs.!
So what exactly are we going to focus on to dress up this space and make it a bit more cohesive? Well, here is the checklist:
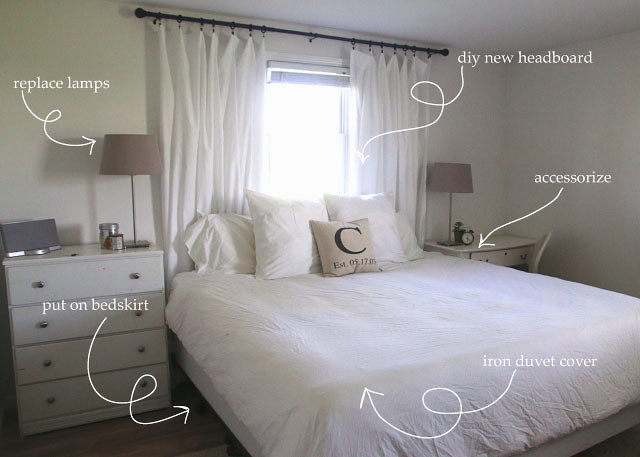
- Buy/Replace the lamps
- DIY a headboard for the bed
- Add a few accessories to each side table
- Put on the bed skirt that we’ve been too lazy/busy to add
- Iron the duvet cover (also laziness)
- Paint the doors/frames (window frames are already painted
- Relocate the TV
- Accessorize the dresser
- Paint the dresser
Wowza! That is quite the list and we only have a little over 2 weeks to complete it! I bet you are wondering how we are going to pull this off with only $100. Well, to be honest, our budget will probably be eaten up by the purchase of lamps. Then we will have to shop our home for accessories, DIY a headboard, and use paint we already own to makeover the doors/dresser. Wish us luck!!!
Stop by and read more about the $100 Room Challenge by visiting Lemons, Lavender, and Laundry.
You won’t want to miss these other awesome participants’ projects! Click the photos below to check them out!
-
Kitchen Happenings: Room by Room Summer Series Week Two
Today kicks off week two of the Room by Room Summer Series and this week we are dealing with the kitchen. (Last week I shared our entry. Click here to view that post.) It is time to head to the heart of the home, we meals and memories are made. Check out the latest kitchen happenings at The Country House.

Kitchens are always fun to work on because it can make a such a huge impact on the look and feel of a home. However, our kitchen hasn’t changed too much from when we moved in. It is still pretty plain, but we plan to fancy it up in the coming months. That is, once our budget allows.
Here is the kitchen when we first moved in.

We’ve painted some trim and the doors, which has really really brightened up the space. We also added some new pretty door hardware and replaced the faulty oven with a temporary garage sale find.

To add a little farmhouse flair, we painted the peninsula/bar area and framed out an X along the front with 1″x 4″s.

And of course, we installed new flooring.
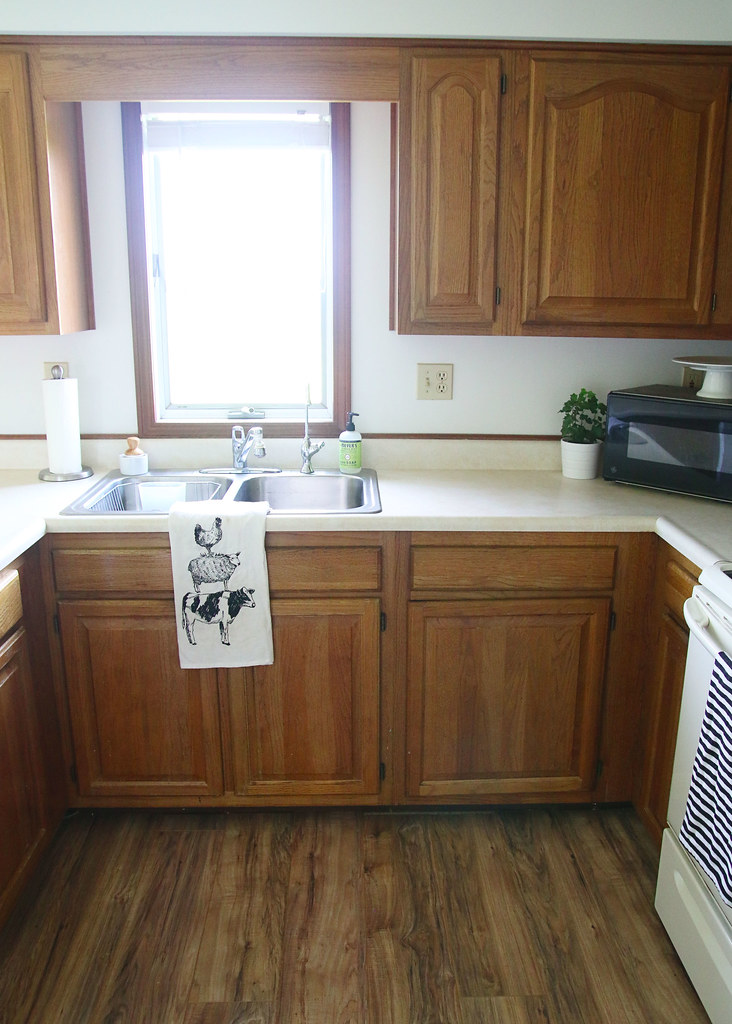
There is still so much we hope to do to this room! Let’s do a rundown of our to-do list:
- Paint the cabinets
- Add cabinet hardware
- Replace the light fixtures
- Paint the walls
- Buy new appliances
- Make a space in the pantry to hide the microwave
- Redo the counter-tops

Did you miss a room in the series? Click below to check out each room.
Entry | Kitchen | Living Room | Bedrooms

Dont’ forget to stop by and visit the links below for more kitchen before/afters, tips, and to-do lists from the other amazing home decor bloggers in this series!