-
We All Scream, For Ice Cream!
“This shop is part of a social shopper marketing insight campaign with Pollinate Media Group™ and Wet-Nap, but all my opinions are my own. #pmedia #showusyourmess http://my-disclosur.es/OBsstV”
Here in upstate New York, everyone is eagerly awaiting the warm weather to arrive and stick around a bit. But, as usual, mother nature is taking her sweet old time. To show her that she can’t bring us down with her frigid windy weather and casual snow storms, I decided to have an ice cream party for
myselfmy boys.
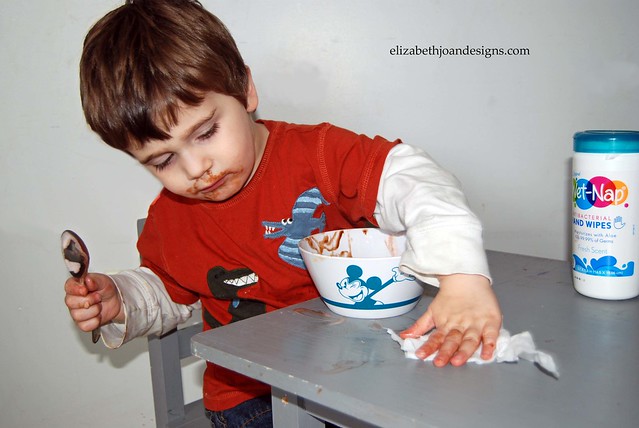
I headed off to Walmart, you know, because of their every day low prices, to pick up some of the essentials for the party. While I was there, I decided to forgo the traditional napkins and picked up a canister of Wet-Nap. After all, this was a party for a 2 year old and 4 year old. Things were bound to get messy. (I used a $0.55 off coupon. You can get it here, while supplies last.)

As party time was approaching, my four year old kept reminding me “Mommy, it’s not just any party. It’s an ice cream party!” To say that he was excited would probably be an understatement.
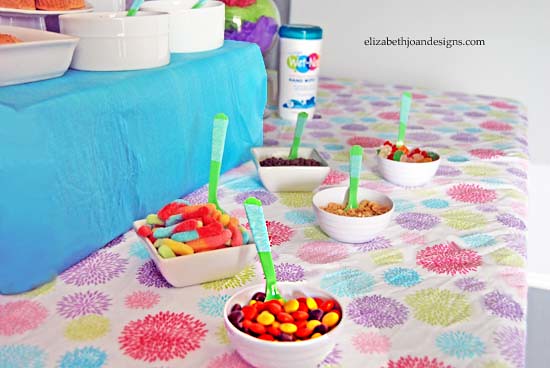
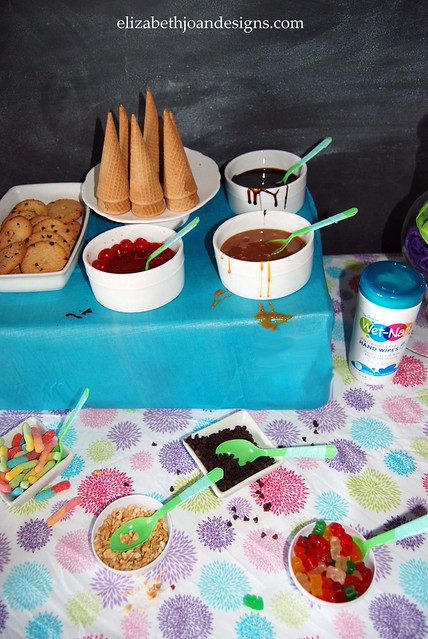
I set up the ice cream bar, using a fun colorful bed sheet I had purchased at the thrift store for only $2 as my table cloth. It was the perfect thing to bring some bright cheeriness to our gathering.
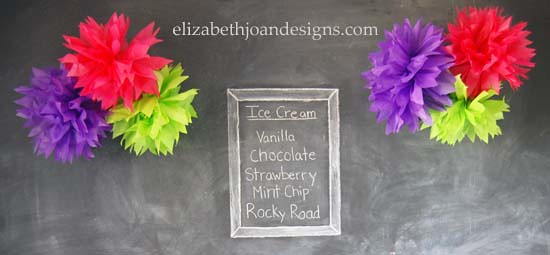
I also made a few tissue paper flowers for more color. The back drop of my display was a chalkboard wall we have in our playroom. This made for inexpensive decorating.
Aqua washi tape was added to my neon green plastic spoons to jazz them up a bit. Super simple!

My little men had a blast with this party.

As predicted, things got pretty messy.
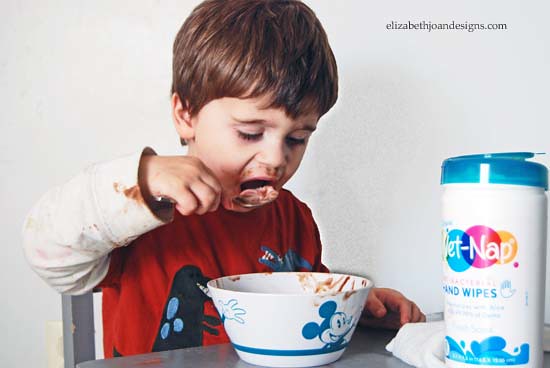
But nothing my two year old couldn’t clean up. The Wet-Nap made it a breeze!
So, take that mother nature! Finally, a win for us!
-
13 Fun Spring Ideas
Each week during our link up (Your Designs This Time, Mondays 8:00am EST) we are inspired by so many great ideas. These a just a few of our spring favorites we wanted to share with you. Click on the link or photo to see the tutorial of each project.
Grown Up Easter Basket from Addicted 2 DIY 
Indoor Tabletop Garden from One Krieger Chick 
Dollar Store Bunny Makeover from Average But Inspired 
Thread Spool Carrots from Crafts By Courtney 
Hanging Test Tube Wall Planter from Hearts and Sharts

DIY Leather Plant Hanger from Bigger Than The Three Of Us

DIY Painted Billy Ball Flowers & Gift Wrap from The Semi Frugal Life

DIY Burlap Bunny Bag from The Casual Craftlete

Carrot Treat Bags from Sum Of Their Stories

Pottery Barn Knock Off Burlap Bunny Ears from Little House Of Four

Decorative Bunny Platter {Chalk Paint Makeover} from Dolen Diaries

Flower Garland from Woods Of Bell Trees

Hay Wheel Barrow from Penny’s Vintage Home

-
DIY Note Cards From A Gift Box
My son recently received a gift and it arrived in a cute polka dot patterned gift box. The bottom portion of the box got smashed during the gift opening process. I really wanted to figure out something to use the top for so I wasn’t just throwing it away. That’s when I decided to make a few fun note cards from the leftover cardboard.

Here is what the top looked like before I started.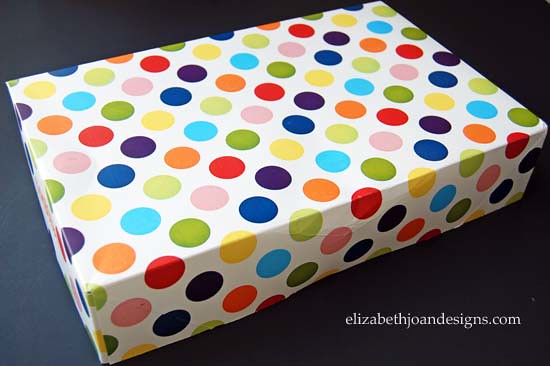
First, I deconstructed the lid by pulling the corners apart. Next, my paper cutter was used to sever the edges along the creases. That left me with just the center section of the cardboard.
Then, I cut the paper again into 3 equal sections. If you are trying this at home, you can make the cards any size you would like. This is just what worked for my needs.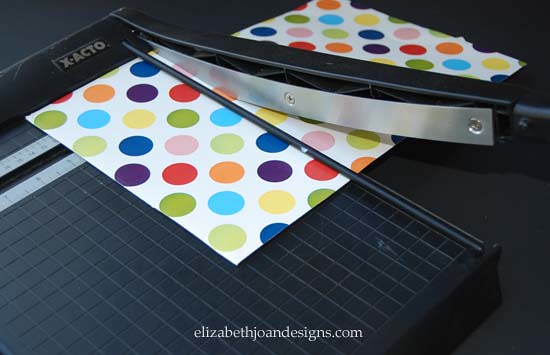
Finally, I folded each piece in half and pressed down with the flat edge of a ruler to get a firm crease.
I also made a few itty bitty ones from the edges I cut off in the first step. I love these! Plus they were free! Yay!
Is there anything special you have saved from going into the garbage? -
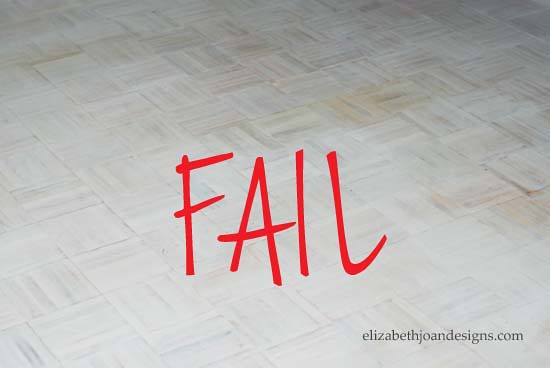
Project Fail: Whitewash Parquet Floor
Whitewashed parquet floors; sounds like it could work, right? Wrong!
In a perfect world every DIY project I did would turn out just the way I wanted it to. In case, you may not have heard, this isn’t a perfect world. Sometimes what sounds like a good idea turns out to be just plain awful. I would say I most definitely learned that lesson with this project. I realized that I really do love the look of whitewashing, just not on parquet flooring.
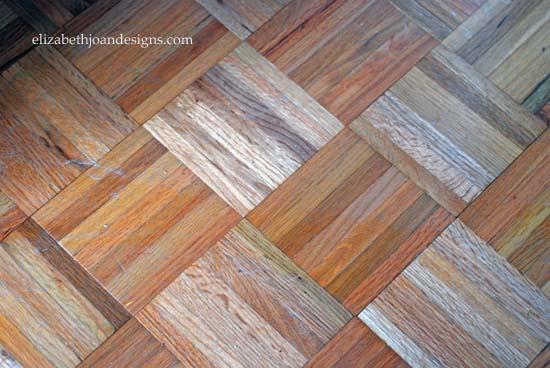
When this horrible idea occurred to me, our playroom floors looked a little something like this. Yuck!
I was so excited to start working. I couldn’t wait to transform them into something beautiful. In all fairness, I should tell you, my husband was a bit skeptical from the very beginning and tried to talk me out of doing this. But once I get something in my mind, I am determined to make it happen.
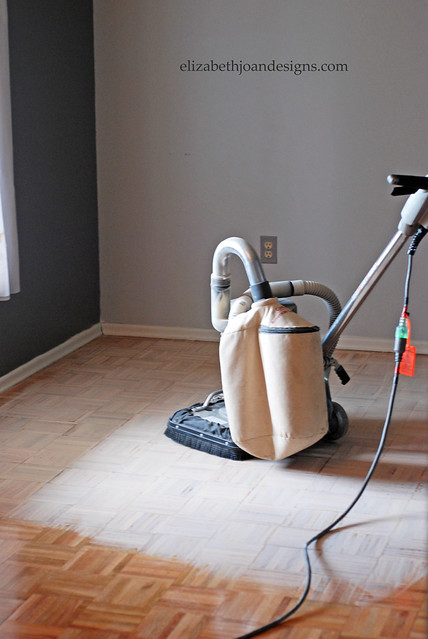
First, I rented a floor sander from Lowes to remove the current finish.
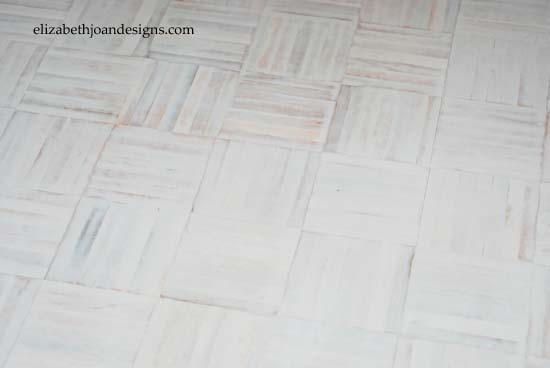
Once the floor was sanded, I wiped off all the dust and started the white washing process. I thought it was looking pretty good at that point. Next, I applied several coats of water based poly to it.
Finally, after days of working, it was complete. It wasn’t the worst looking floor in the world. (Although, I haven’t seen anything worse than this, I do believe that out there, somewhere, is a floor that looks worse than mine.) I just didn’t like it. The coloring was inconsistent across the entire area and looked bad. Plus the poly added a yellowing touch to it, that I was not a fan of. This idea might work for someone, it just didn’t work for me.
So, for now it’s back to work. Stay tuned for a future post and see what happens with this floor.
What are your most memorable project fail?