-
Home for the Holidays Tour
Hi and welcome to Emily’s home! Come on in!
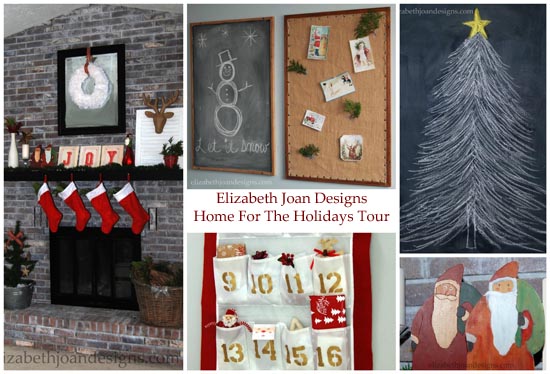
This is the decor of our entryway. I’m a pretty simple gal, so my decorating tends to reflect that.
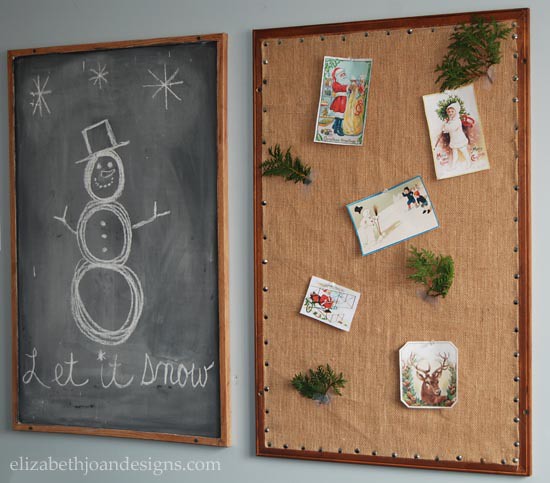
One night, I was having the hardest time going to sleep. I decided to do a little chalkboard doodling in our playroom and was extremely pleased with this tree I drew.

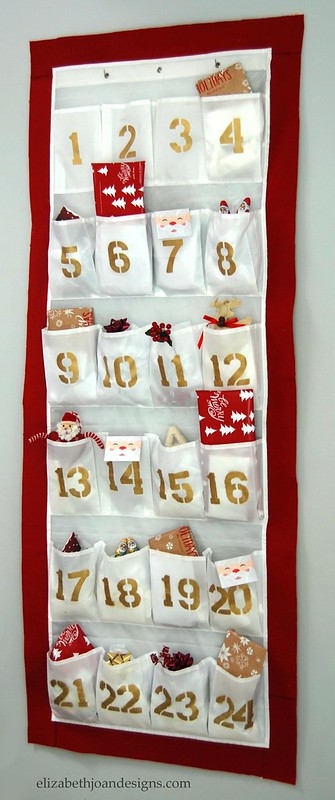
In our Kitchen/Dining Room area I have hung my DIY Advent calendar. This has been a huge hit in our house. Saying my boys love it, is probably an understatement.
I am still keeping things simple here with my wood shim Christmas Tree.

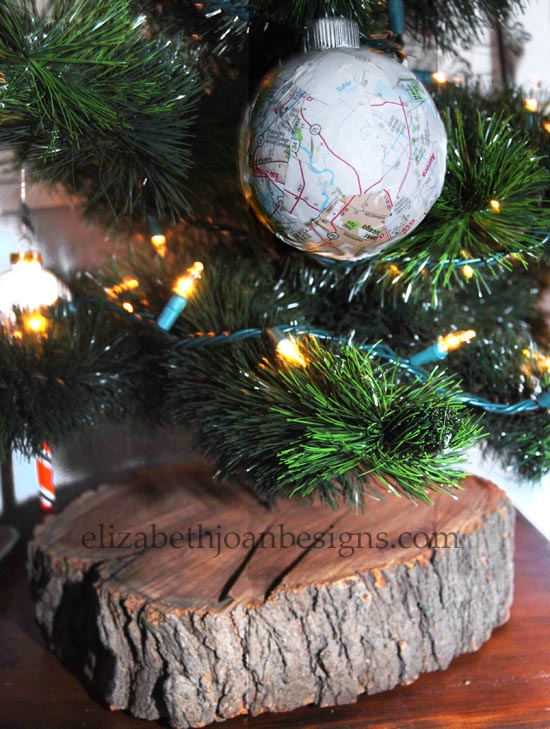
Some of my favorite ways to decorate is with touches of nature found right in my very own backyard.

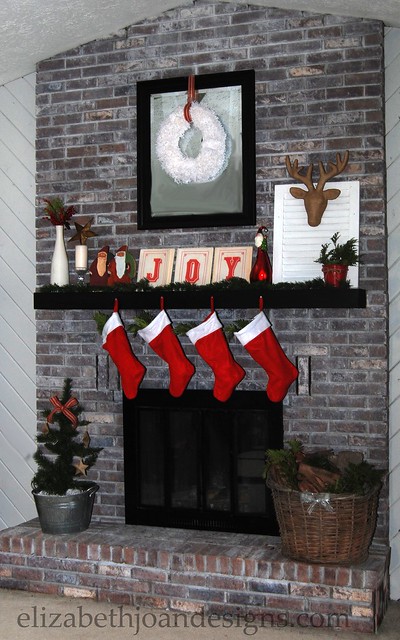
Styling this fireplace and mantle brought me so much joy, that I felt the need to spell it out for everyone to see. Do you like our dollar store stockings hung by the chimney with care? I think they add a nice pop of color to our very neutral Great-room.
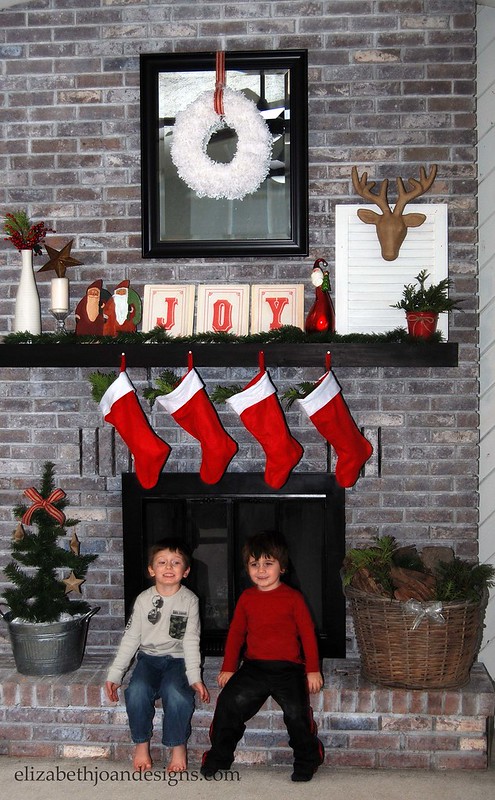
Take a real good look at this pic. My two boys in the same photo! This almost never happens!
These two Santas are very special to me. Our grandpa had mad wood working skills and had cut these
badgood boys out. Our mom painted the one on the left and the 10-year-old version of me painted the one on the right. (I know what your thinking, that I was a real prodigy, huh?) Our mother passed away when I 12 and these little guys became mine. When I was in my 20’s and moving all around the country, so did these Santas. I make sure they make my holiday decor cut every year.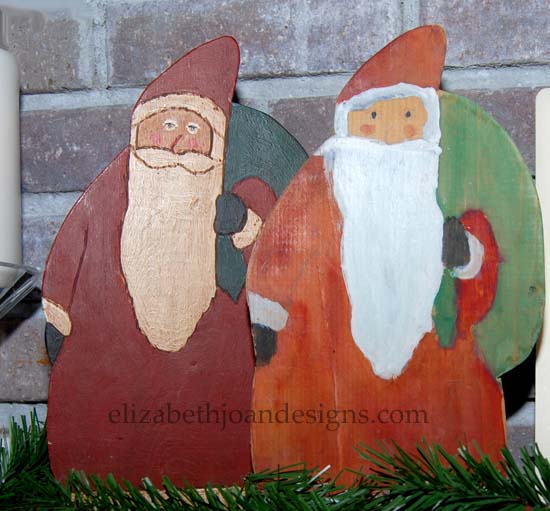
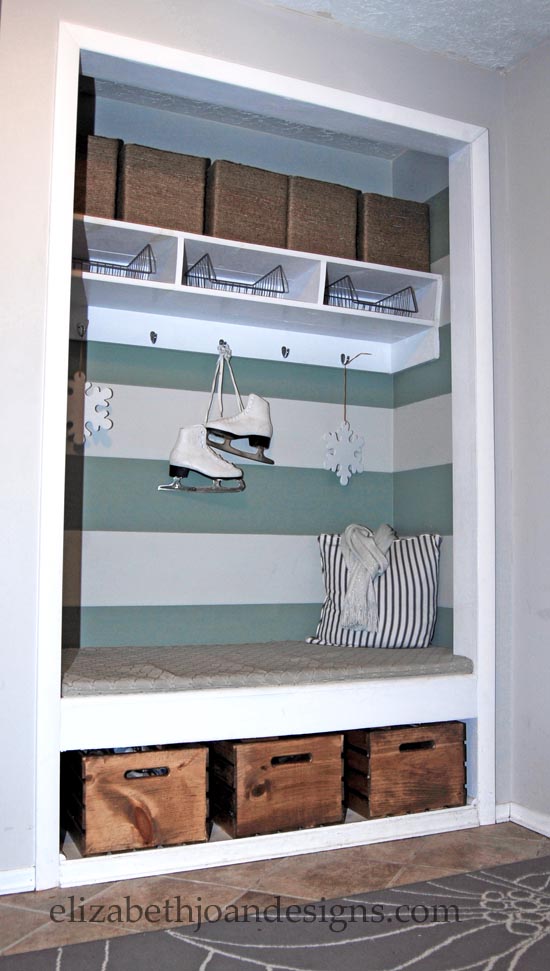
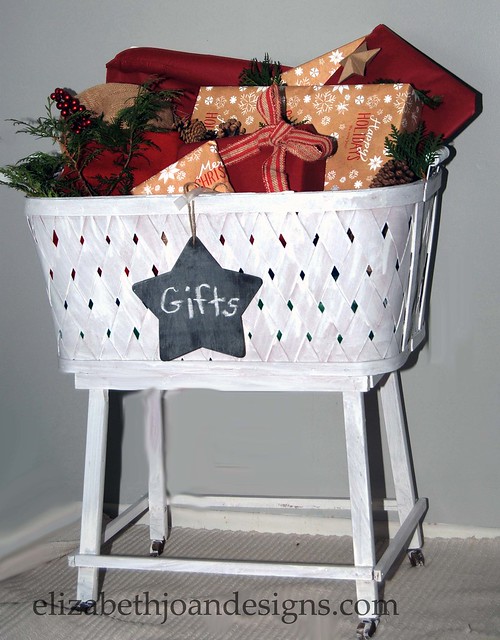
I found that this antique bassinet is a great way to keep our wrapped gifts safe from curious little fingers.

My oldest son keeps telling me we NEED more Christmas decoration. To keep his holiday spirit up, together we added little festive touches to his room. His favorite part is that he got his very own tree.
> 
Well, that’s it for the tour. Thanks for stopping by and Happy Holidays to you!
-
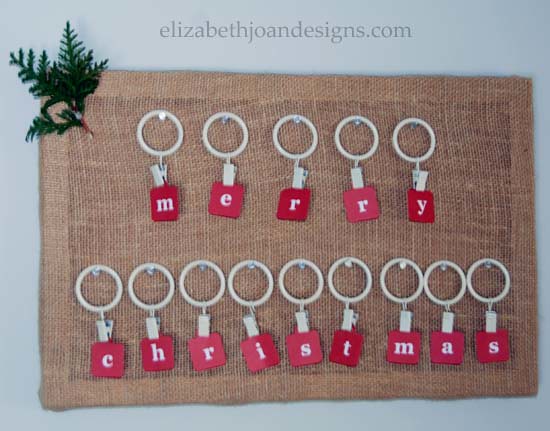
December 2014 Printable Gift Tags
With the holidays quickly approaching, I know that I am still scrambling to get all of our family’s gifts purchased, let alone wrapped. (I’m almost done with the first part though. Woohoo!) However, I did whip up some fun printable holiday gift tags over the weekend that will be dressing up our presents.

I love a pretty package with creative embellishments. (Find out how I made this wrapping paper bow.) Just cut out the gift tags along the outermost line, use a hole punch over the little circle guide, and attach them to your presents.

The round printable tags can also be used as an adornment for the top of a large mouth mason jar lid.

We’d love to share this colorful collection, as well as a neutral gray version, with you as an early holiday gift!

All of our printables are currently FREE for download (for personal use only.) However, this is subject to change in the future, so snag them at no cost while you still can! (View Terms of Use.)
Click the image below for the free PDF link. Please download the file and open with Adobe Reader to ensure proper print sizing. When printing, make sure that Page Scaling is set to “None.”

_____________________________________________________________________________________
Click here to get the 2013 Printable Gift Tags.

_____________________________________________________________________________________
You may also like:

Festive Paper Stars 
Stocking Hanger 
Gift Wrapping Ideas 
Advent Calendar from Shoe Organizer -
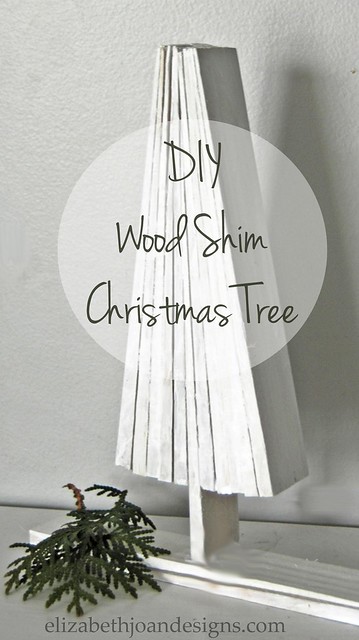
Wood Shim Christmas Tree
Hello! Welcome to Day 11 of The 12 Post of Christmas, where 12 blogs have come together to bring you a variety of amazing Christmas projects for $24 or less. So if you like to spend hundreds of dollars on each of your holiday decor items, then this post isn’t for you. But if you like cute, cheap, and easy projects then stick around and I will show you how I created an adorable wood shim Christmas Tree for less than $2.00.
Supplies
– Wood Shims – (I used Nelson Wood Shims, 1.25-in x 7.75-in.)
– White Paint
– Paint Brush
– Hot Glue Gun and Glue Sticks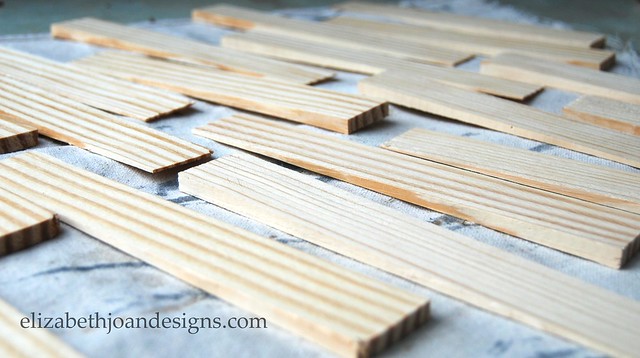
First, lay out all of the shims and brush them with one nice coat of white wash.
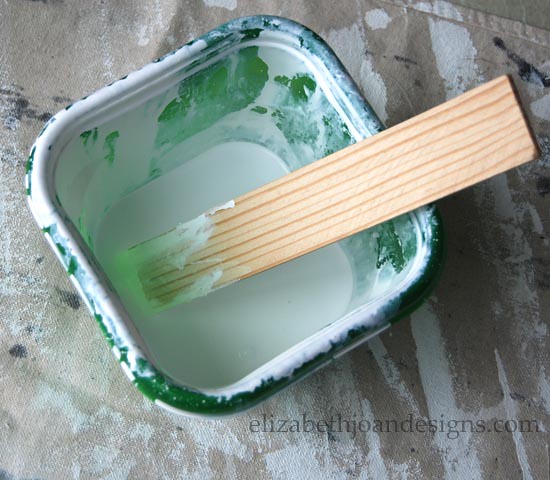
I mixed up a solution of equal parts water and white paint. This seemed to give the wood a whitish look, but I loved how you could still see the wood grains through it.
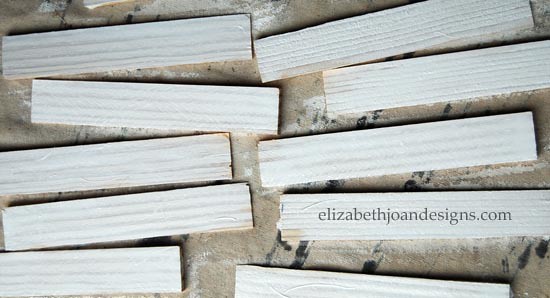
Once the paint dries, it’s time to assemble the tree. This process may sound a bit confusing, but trust me. It’s a breeze.
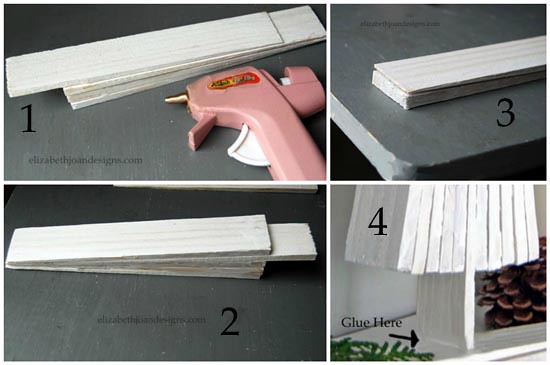
1. Start by hot gluing a few of the wood shims flat on top of one another. Make sure to line up the narrow ends, which this will be at the top. For the trunk piece. you will want to glue it about 1 1/2 inches down from the top of the other glued pieces. It should stick out a little bit from the rest.
2. After the trunk is in place, glue the next shim on top of the trunk. Line up the narrow end with the top of your tree, not the trunk piece you just placed. Continue to glue shims directly on top of each other. For balance, you will want an equal number of wood pieces on both sides of trunk. (I went with 5 on each side.)
3.For the base, take two shims and glue them together. You will want the narrow end to line up with the thick end. This will create an even foundation for your tree to stand on. (A leaning tree might not be quite as cute in the end.)
4. Finally, attach the tree trunk to the base with a dab of hot glue and you’re done! Yay!

This project is a fun modern spin on a traditional Christmas tree decoration. What do you think? I think I am in LOVE!
__________________________________________________________________ If you have not yet, be sure to check out all of the other amazing projects for the 12 Post of Christmas.

1st Day
2nd Day
3rd Day
4th Day
5th Day
6th Day
7th Day
8th Day
9th Day
10th Day
11th Day
12th Day
____________________________________________________________________ You may also like:
Stocking Hanger
Advent Calendar from Shoe Organizer
Festive Paper Stars 
Ten Minute Infinity Scarf -
Holiday Gift Wrapping
With the holidays approaching, we decided to re-share our holiday gift wrapping ideas to help inspire you. Hopefully some of these ideas will come in handy as you conceal all of your loved ones presents.

Check out this post for more details. ____________________________________________________________________ You may also like:
Wrapping Paper Bow
Advent Calendar from Shoe Organizer 
Salt Dough Starfish Ornament
Stocking Hanger