How To Create A Clickable Image With Multiple Links
We have been asked quite a few of times how to create a clickable image with multiple links. OK. Maybe not in those exact words. But it is something that many people are interested in knowing how to do.
A clickable image with multiple links can have a ton of uses on a blog or website. It’s a great way to group like items together, such as social media icons and images from popular posts, which could also boost traffic. BONUS! It is also wonderful for blog hops (Hello fellow bloggers!), where you want to include images and links to other blogs in a post, and it is perfect for a round up of affiliate products or project/product gallery. Let’s get to the details of how to do it.

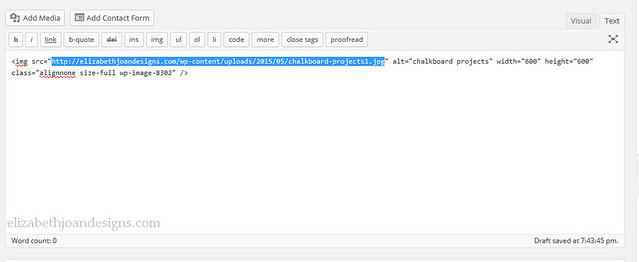
To start, you will need an image with various parts that you would like to link to. I made a collage (check out this post on how to make your own photo collage) of some of our favorite chalkboard projects and then uploaded the image to our blog and inserted it into a post. In addition to your website, you can also use an image hosting website (i.e. Flickr, Photobucket, etc.) You will want to view the HTML code for the image. Copy the URL from the image source (that’s the part just to the right of img src and inside of the quotation marks that starts with http.)
Next, go to the Image-Maps website, paste the URL in the white box, and click “Start Mapping”. When the new page is loaded, press “click to continue.”

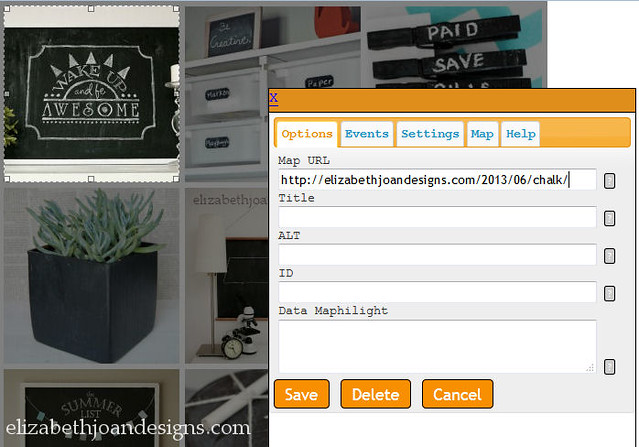
Then, it is time to start mapping. Right click on the image to bring up the menu. (For Mac users “Control + Click.”) Choose “Create a Rectangle/Poly/Circle” depending on what shape the is you are trying to map. I chose rectangle and resized it around my first square in the upper left corner. A little box will pop up and this is where you will enter the URL that you would like to direct the part of the image to. For example, I added the link to our Dry Erase Board Turned Chalkboard, since that is the part that my square is around. This is where you can also add in a title and alt tags if you so desire. Continue this process for each of the areas you would like to link to.
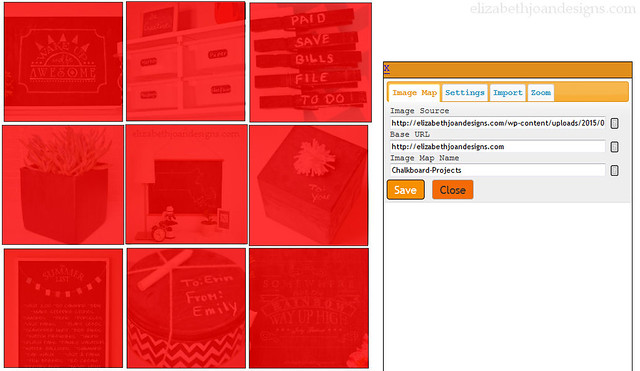
Once everything is mapped, right click again and select Options. Change the Base URL (to your website) and Image Map Name. We also change the options in the settings tab by un-marking all of the boxes. Once you are done changing everything, close the box and right click again. By this point, you may have an aversion to right clicking, but lucky for you, this is almost the end!
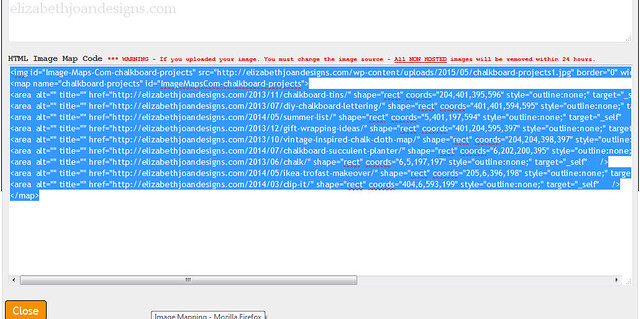
Select “Get Code” and choose the HTML code tab at the top of the pop-up. Scroll down and copy the entire HTML Image Map Code. Then, all that is left is to paste this code into your blog post, sidebar, etc.
Phew! That was a lot, but totally worth it. See, I was able to create this fun collage with links to each project!

And here are our social media icons, in which we used the same process.


There are really so many uses for clickable images with multiple links! In addition to just creating the linked image, you may also want to consider adding code to make the links open in a new window (adding target=”_blank” to the end of the anchor tag) and including rel=”nofollow” for affiliate links. So, what are you going to use your clickable image with multiple links for?
You may also like:


3 Comments
Mandy Campbell
Thanks for the great tips! :)
Erin
You’re welcome, Mandy! Thanks for stopping by!
Nano Banana API
This is such a helpful tutorial! Creating clickable image maps is a fantastic way to make blog posts more interactive and improve the user experience. For bloggers who want to take their imagery a step further, like using AI to enhance or generate unique product shots, I highly recommend checking out the nano banana api. It’s a high-performance and cost-effective solution for anyone looking to scale their image processing tasks. Thanks for sharing these clear instructions!