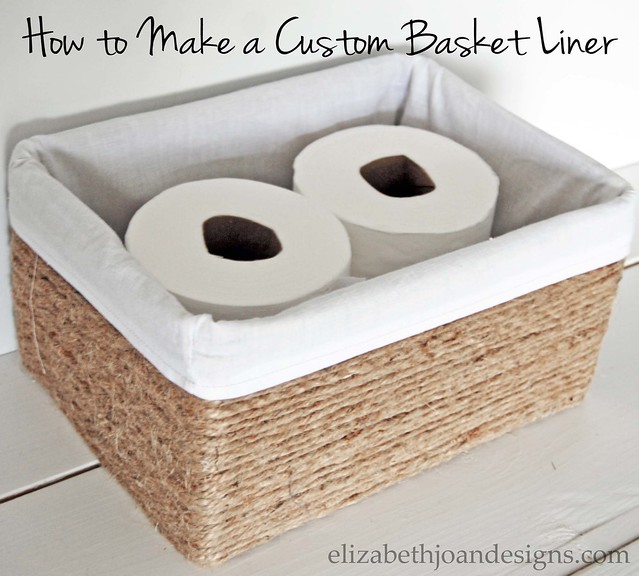
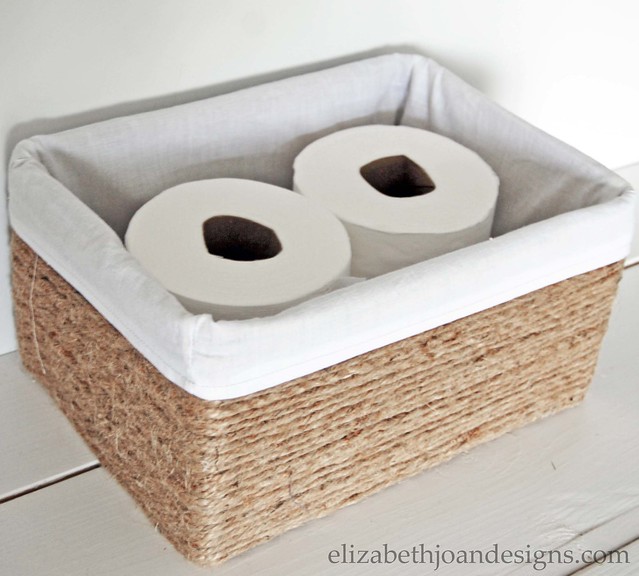
How to Make a Custom Basket Liner
Since re-sharing our Boxes into Baskets post, we have had many requests for a tutorial on how to make a custom basket liner. I have put together a step by step guide for you. (Yes there a lot of steps, but don’t be intimidated. It should only take about 30 minutes to make.) Without further ado, here are instructions and tips so you may create your own.
Disclosure: This post may contain affiliate links, which means we may receive a commission if you click the link and purchase. Please check out our disclosure policy for more details.
Supplies
Basket/Container – Anything you would like to line.
Tape Measure– I personally like a fabric one for projects like this.
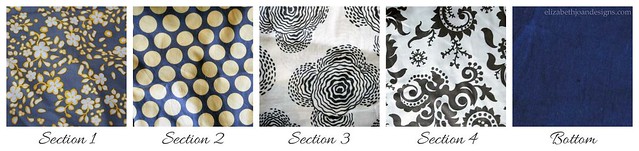
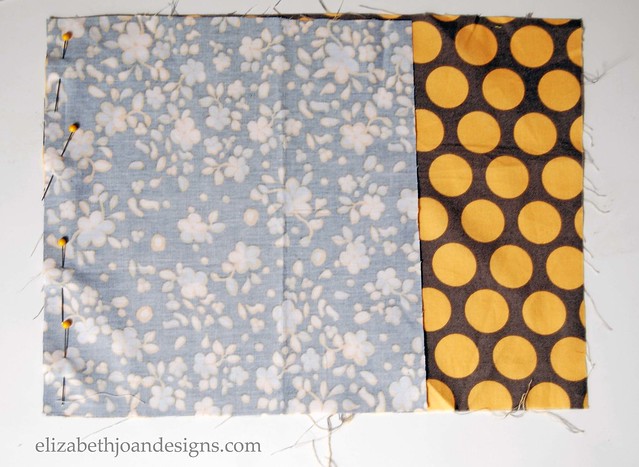
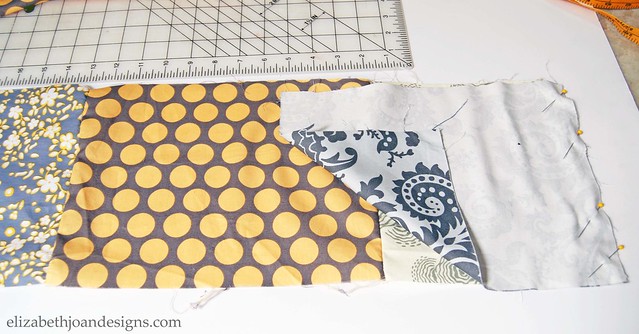
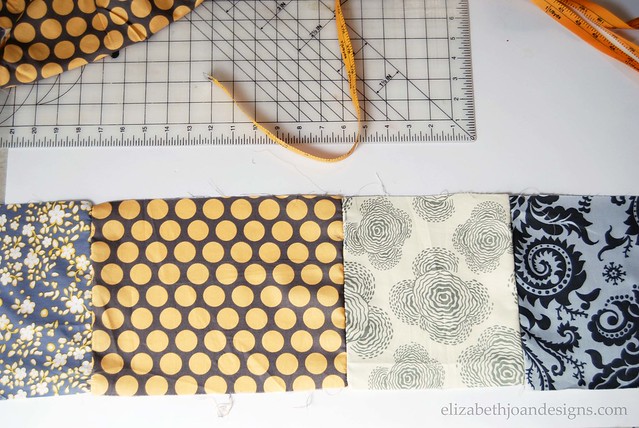
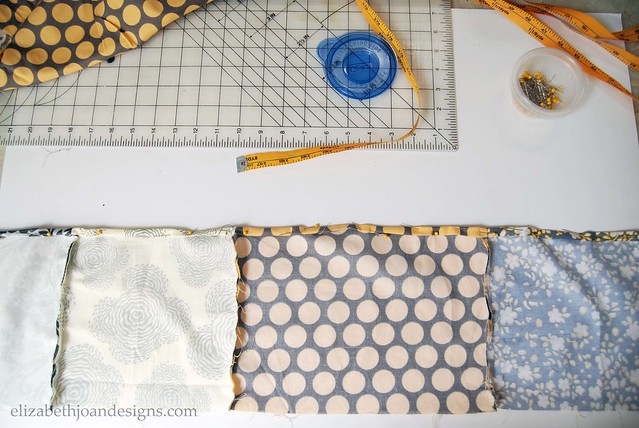
Fabric– This can really be anything you want to make your liner made out of. I usually use inexpensive muslin to keep the cost down, but today I am using different colors of fabric to make it easier to follow along.
Rotary Cutter – Scissors work too!
Cutting Mat – This is optional. You may not need one if you are using scissors.
Straight Pins– In my opinion, an absolute must.
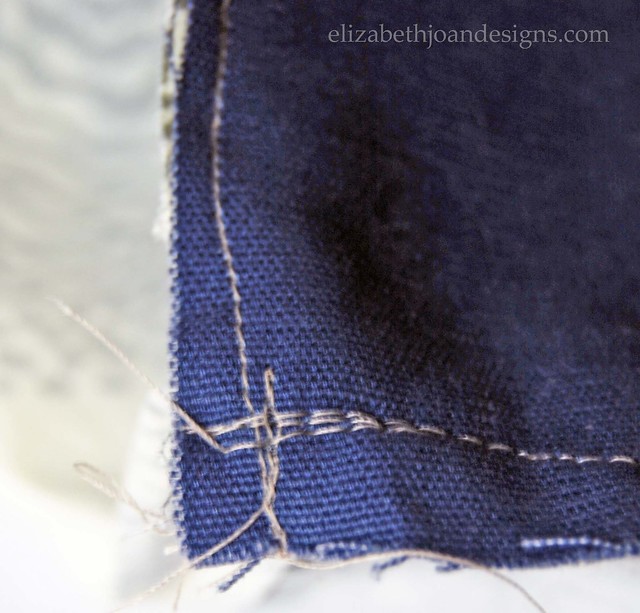
Sewing machine– Hand stitching is also acceptable, but may take a little longer.
* If you don’t sew and still want to make a custom basket liner, exchange the sewing machine for Thermoweb Heat’n Bond Hem Iron-On Adhesive-3/8″X10 Yards, a clothes iron, and ironing board. (Check the Thermoweb Heat’n Bond packaging to make sure your fabric choice is conducive to working with this product. Cotton is usually a safe bet.)
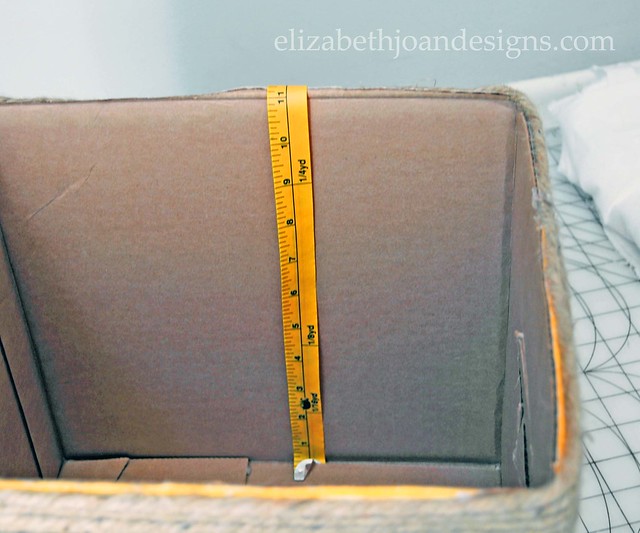
1. Use your tape measure to grab the height and width of all four sides and the bottom of the box.
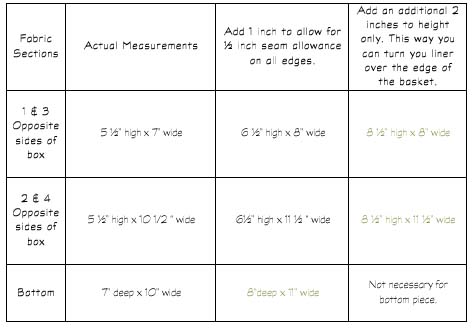
3. Use the rotary cutter or scissors to cut the fabric to the final measurements. (My finals are typed in green on the chart.)
* For the non-sewers out there, every-time you see the word “sew” in this tutorial, place and pin the Thermoweb Heat’n Bond Hem Iron-On Adhesive-3/8″X10 Yards along the edge and press with iron to adhere. Be sure to follow the instructions on the packaging as different brands may vary.

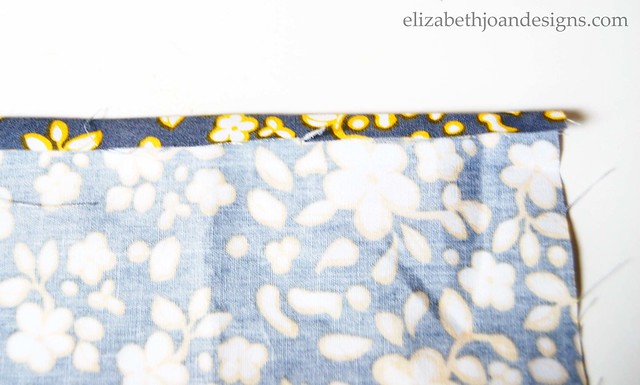
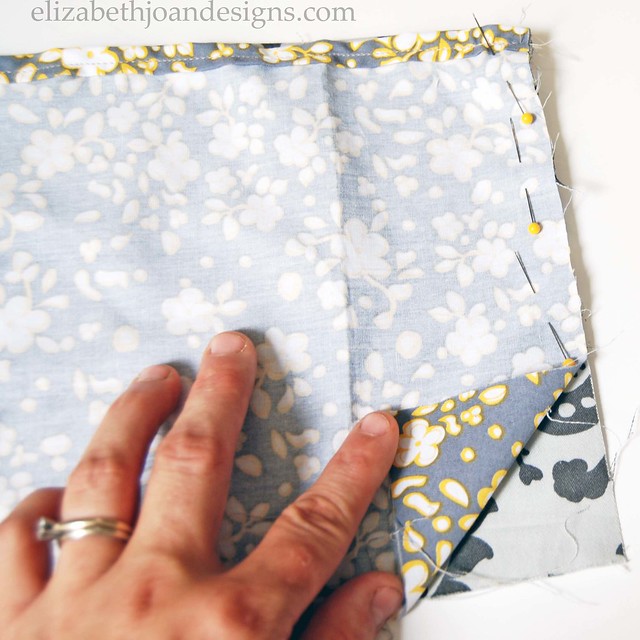
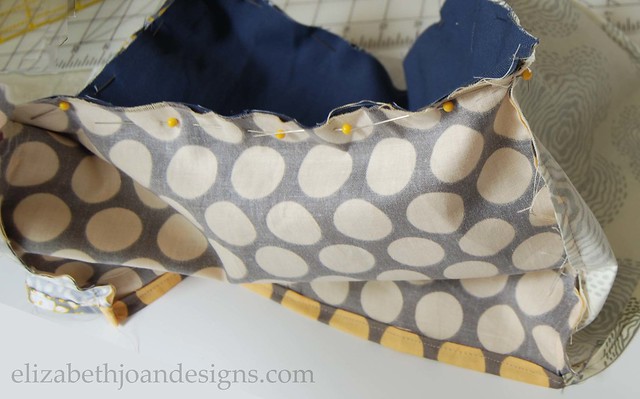
7. Fold top edge of fabric strip.

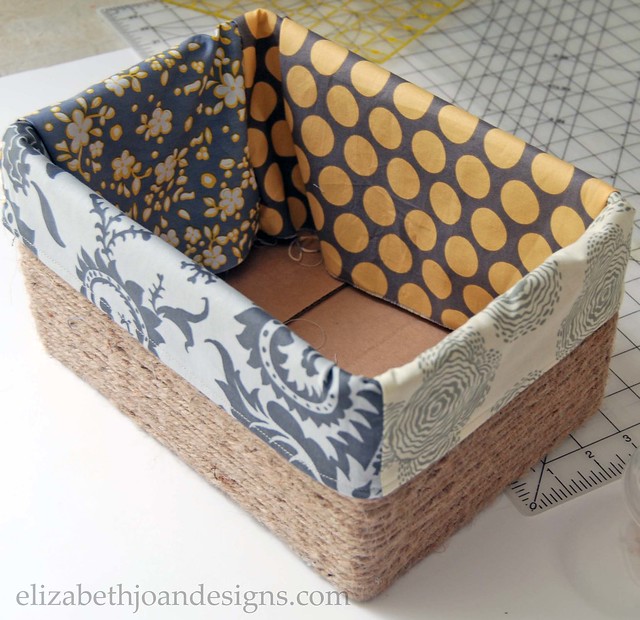
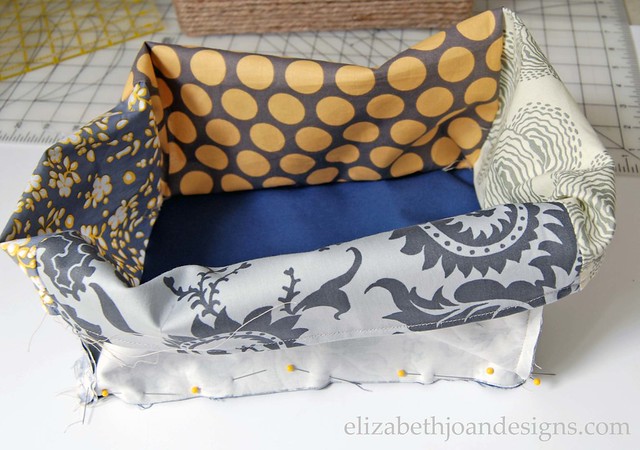
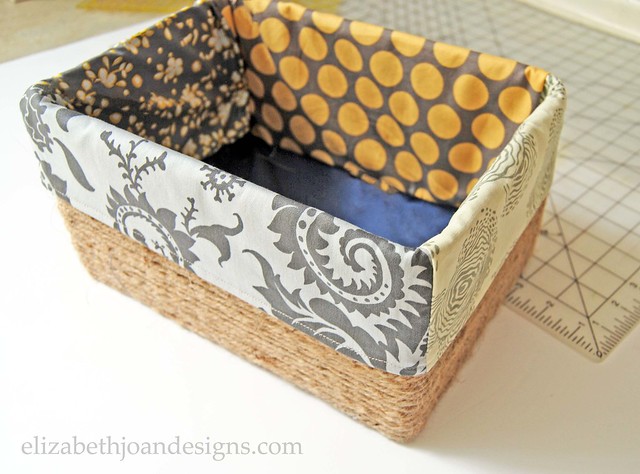
Here is how mine turned out using the muslin fabric.


23 Comments
Linda
Very helpful, thank you :)
jan
wow thanks for letting me know about this wonderful tutorial. It so reminded me of 7th grade and let me tell you that was a long time ago! You’ve inspired me to try this!! thank you again
Rosie
Loved your tutorial. You made it so simple to do. I feel I can make a liner now. I always wondered if it was one long piece for length and then two short for the width but was not confident enough to try one. I will now!
Emily
Thanks Rosie for stopping by! Please let us know if you give it a go!
Mirtill
Great!Thank you!Happy New Year!????
Michelle Burkett
How do you make sure the bottom of the box is sturdy enough? By the way great idea!
Erin
Hi Michelle,
The bottom of the box can be reinforced with packing tape. Hope that helps!
Rachelle Rand
Good idea,
Erin
Thanks!
Laura Rasi
Grazie delle idee ben spiegate e molto semplici ma dal risultato gradevole. Complimenti!!!
Laura
Jane
Love your project! What size jute did you use? Is it the one shown above from Amazon?
Elinór
Pá?i sa mi vaša stránka,je pou?ná.Krabi?ku som už vyrobila pod?a Vášho návodu.
?akujem za dobrý nápad.
Prajem ve?a dobrých nápadov ,ktoré dúfam budem môc? realizova? .
Barb
In my mind’s eye I can see liners mafe for each Season & Holiday!
Erin
Great idea, Barb!
Kristine
Do you ever have trouble with the liner coming off? I wonder if you add elastic if that’ll make any difference. Additionally, how sturdy are these after adding all the rope, etc?
Erin
Hi Kristine,
The liners are custom fit to each box, so there haven’t been issues with them falling off. As for sturdiness, they are a little bit more sturdy with the addition of the rope, but they are still boxes. I wouldn’t put anything in them that is super heavy if you plan on carrying them around. Hope that helps!
Kayla
I found that adding another 1/2 inch to an inch for the top pieces makes it a little easier to fold over.When I made it the exact length around the edges it was really tight to pull over the top.
Stephanie Jevyak
Is this an addition to the 2″the tutorial advises… Or just a 1/2″ more than your measurement??
Esther
thanks a lot for a deal tutorial
Amber
Thank u much! It worked with the no sew tape and came out great! Wish I could post a pic.
Carole
I recently wanted a basket with a liner for my closet. Did not want to spend the money on a nice basket so I made my own. Baskets are very inexpensive in garage sales or rummage sales. I had one that I had gotten at a rummage sale and decided to try and use a pillow case as my liner. It worked out very well. The top is already finished and I just cut the depth and I just folded the bottom under or you could sew it closed or use iron on tape. Very easy and it looks nice and neat and as good as some that I had purchased several years ago. Easy to take out and wash as needed.
Gina G
Can you post some kind of tutorial or step-by-step instructions (with pictures if possible)? I really like the idea of using a pillowcase (especially since I have severe joint issues that makes it really hard to sew or do any fine motor skills). Thanks!
Julie
Thank you for making such a detailed and clear tutorial for how to make liners! I have not been able to grasp the concept until you finally got through the Fog Which Is My Brain! It definitely helped me when you used ask different fabrics. I think I would still be confused if you hadn’t… :)