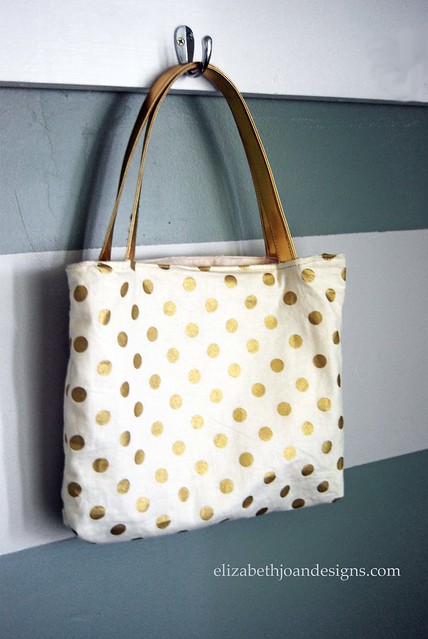
DIY Reversible Tote Bag
I had decided it was time to ditch the diaper bag and prepare for summer with a new tote bag. The traditional size was a bit big for what I was looking for, so I went with making a smaller sized one.
If you would like to make your own, I invite you to follow along with me and I hope to not lose you along the way. I love to sew, but I am not an expert. Just a girl with a sewing machine, trying to make things happen.
Materials:
1 yard of fabric for the outside
1 yard of fabric for the lining and pocket
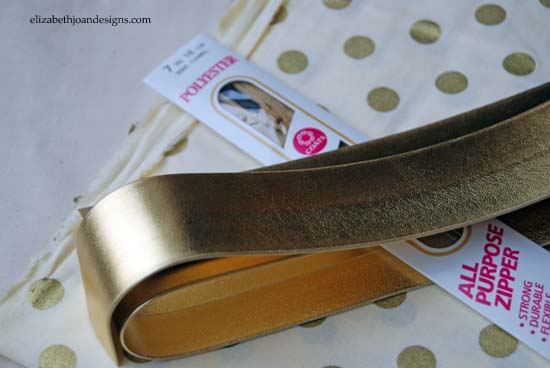
1 yard of pleather belting for the handles
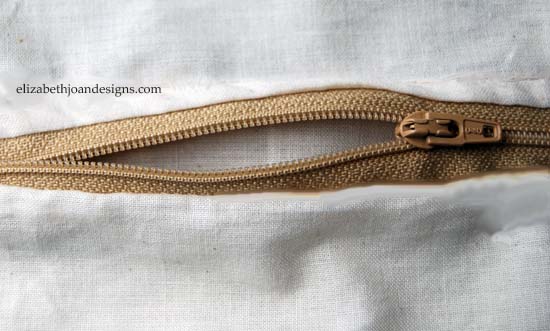
1 7-inch zipper
Sewing machine
Rotary cutter
Cutting mat
Fabric ruler
Straight pins
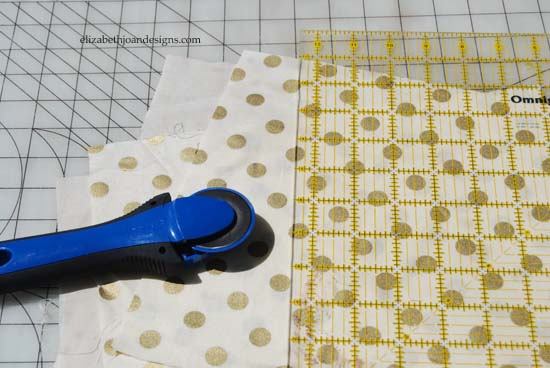
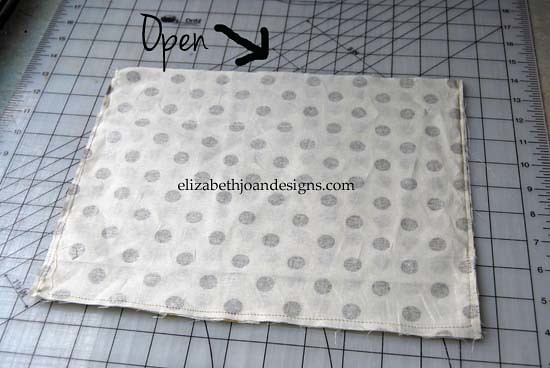
First, I wanted my bag to be more wide that tall, so I used my rotary cutter to make two 12″ x 9″ sections of fabric for the outside, two 12″ x 9″ sections for the liner, and one 9″ x 14″ section of lining fabric for a pocket. (These dimensions can be changed if you are looking for a different size bag.)
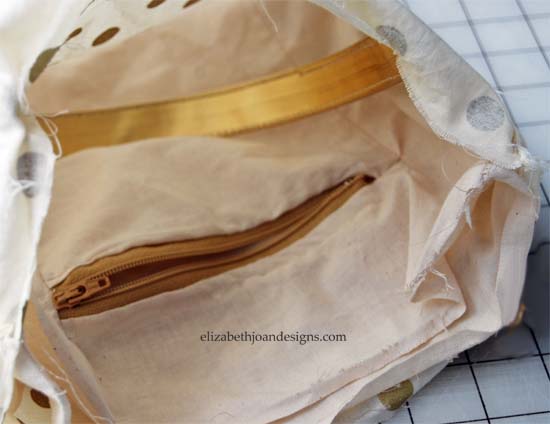
Next, for the inside of the bag, I added a pocket with a zipper. (I referred to this tutorial for installation and used one of the 12″ x 9″ lining pieces along with the 9″ x 14″ pocket piece to do so.)
Then, with right sides facing each other, I sewed three edges of the two outer fabric pieces together. I did the same with the pocket section and second liner piece.
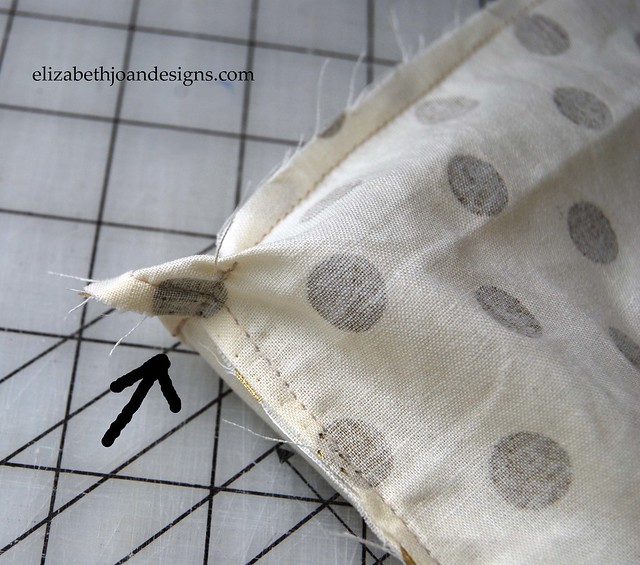
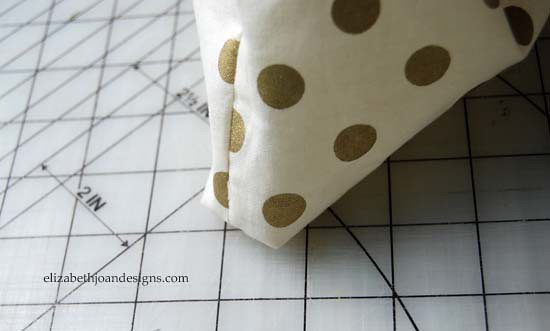
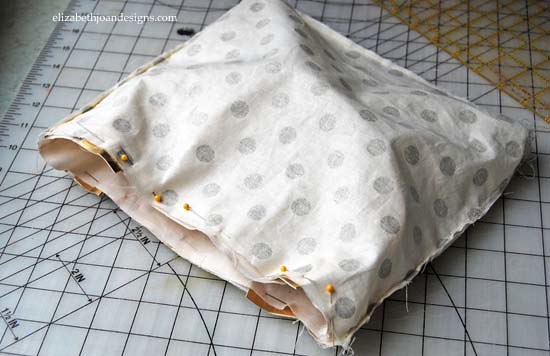
To give the bottom of the bag a squared shape, with the pieces still wrong side out, I made a stitch that went across the seams in the bottom corners of the outside and liner sections. (This is really simple but sounds confusing, so please refer to pictures below.)
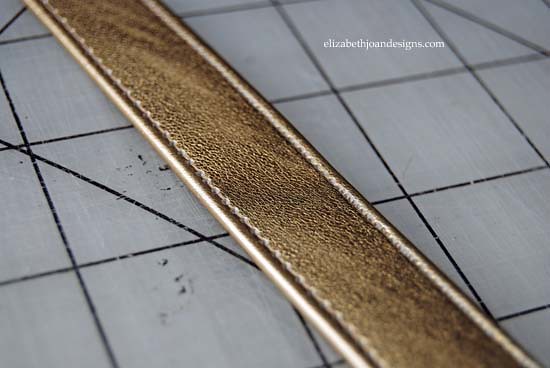
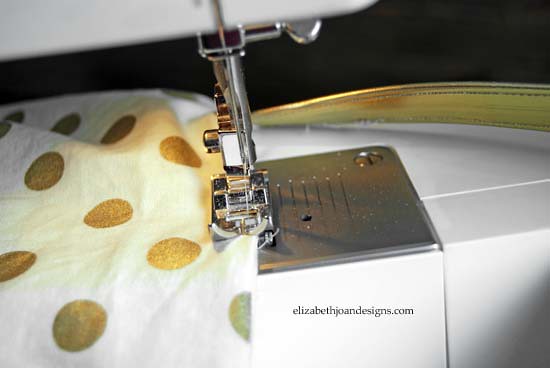
For the handles of the bag, I cut two 16″ long pieces of 1 1/2″ wide gold metallic pleather belting. I folded them in half width wise and sewed using 1/4 seam allowance down both edges. This created two flat thin straps.
After that, I put the liner section in the outside section with right sides facing each other, making sure to line up the seams. I took one handle and tucked it in between fabric pieces where the right sides touch. Making sure it wasn’t twisted, I pinned the ends of the straps 2″ from where the seams lines meet up. I did the same on the opposite side too and pinned around the whole top edge of the bag.
Then, I sewed all the way around the top leaving a small area open. I turned the bag right side out through the opening. I learned that pulling the handles out first, made this process easier.
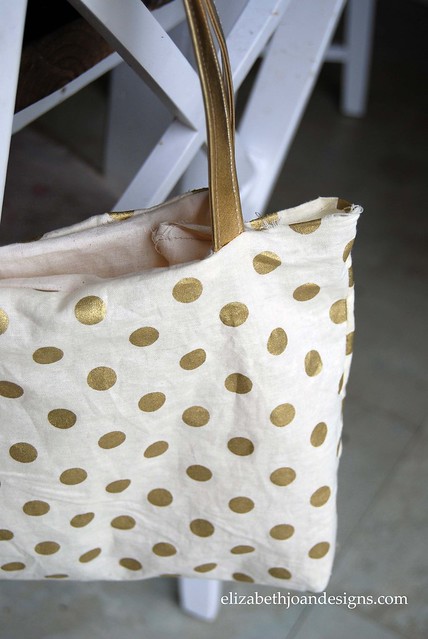
To finish off the bag, I closed up the hole by top stitching around the bag 1/4 inch from the top edge. This made it lay flatter and be less bulky.
This bag is pretty awesome! It can also be reversible, which puts the pocket on the outside.

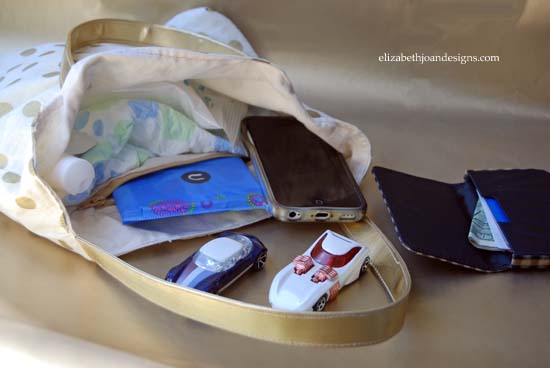
Click on the edge of the next photo to see what’s in the bag and how we are preparing for summer outings with toddlers.
We would love to see what is in your bag! We invite you to take a photo and share it on Instagram with the tag #ejdmybag.
32 Comments
Courtney @ Crafts by Courtney
I give sewing crafters props for doing crafts like this. I can’t sew a straight line to save my life. I really need to learn how to use my sewing machine I got. You did a beautiful job with this bag, I just love the gold polka dots you used. Where can I put in my order?!?! PINNED!
Emily
Thanks Courtney! This was such a fun bag to make and pretty easy! Great starter project, minus the zipper portion.
The Women of Westwood
I would love to make this to use as a grocery bag! I just fear that mine would turn out terrible. Sewing is not my area of expertise. Nonetheless this is adorable!
Emily
Thanks! It is pretty easy to make and would make a pretty good grocery bag, but you may want the bag slightly bigger than I made mine. Glad you stopped by!
Zakkiya Hamza
Now that’s one gorgeous tote bag. I love that it’s reversible as well.
Thanks for sharing . (Hopping over from Say G’day Saturday link party)
Emily
Thanks Zakkiya! It was a fun project to make!
Erlene
Such a cute bag and great tutorial. Pinned. Would love if you shared this tomorrow on Merry Monday Linky Party. It goes live Sun 6pm PST.
Emily
Thanks Erlene! Stopping by to link up now!
Yvonne @ Sunnyside Up-Stairs
Seeing this bag makes me want to re-learn how to use a sewing machine. :)
Emily
It is a good project to start with! Thanks for stopping by, Yvonne!
Suzzie
I have a baby due next week and I already love the idea of ditching the diaper bag. Lol. I’d much rather carry something adorable like this! I love the fabric you picked. It’s just darling!
Emily
Thank you Suzzie! Enjoy your little one!
Treana B
If you had to rate this project in terms of difficulty what would it be? I just got my first ever sewing machine and am anxious to try some easy crafts out. Stopping by from Merry Monday’s link up. -Treana @ Houseofbennetts.com
Emily
Thanks Treana! If you omit the pocket and zipper it is a super easy project and still looks great! The zipper is definitely a little tricky though. Good luck!
Treana B
Thanks for your reply- you are my feature pick from last weeks Merry Monday party! Check it out tomorrow night! – Treana @ House of Bennetts
Kristina & Millie
Totally awesome bag! Love the fabric and the handles! pinning :)
Emily
Thanks Kristina and Mille! It was a fun project to make!
Pingback:
Christina @ The DIY Mommy
This is SO very cute. I absolutely love the gold polka dot fabric you used! (If you want to, I’d love for you to link this project up to Motivational Monday: http://thediymommy.com/motivational-monday-2/)
Emily
Thanks Christina! We are all linked up! Thanks for stopping by!
Ginnie
What a cute bag! I love the fabric you chose:)
Emily
Thank you Ginnie! It was pretty easy to make too. Glad you stopped by!
Pingback:
Amy
Well, I’m in love! I’m crazy for a gold polka dot. Thanks for sharing at our link it or lump it party!
Pingback:
Carissa Rasmussen
love this and love the fabric! I’d love to know your source so I can get some of my own:)
Emily
Thanks Carissa! The gold polka dot piece was purchased at Jo-Ann Fabrics. Glad you stopped by!
Yasmina - Mina and Her Blog
Seeing this reminds me how I made my first bag, I think it’s the easiest thing ever to make. I need to start sewing again!
But YOU just made it even soo much prettier with the gold polka dot (love gold) and the fact its reversible!
Hope you have a great day!
xo – Yasmina
Emily
Thank you Yasmina. I love that this is such a simple and fun project to make. Glad you stopped by!
Natasha in Oz
I’ve just pinned this-what a gorgeous bag. I wish I could sew…
Thanks for joining the Say G’Day Saturday linky party. Hope you can join us again this weekend.
Best wishes,
Natasha in Oz
Emily
Thanks Natasha! We will be definitely linking up again! Glad you came by!
Pingback: